23
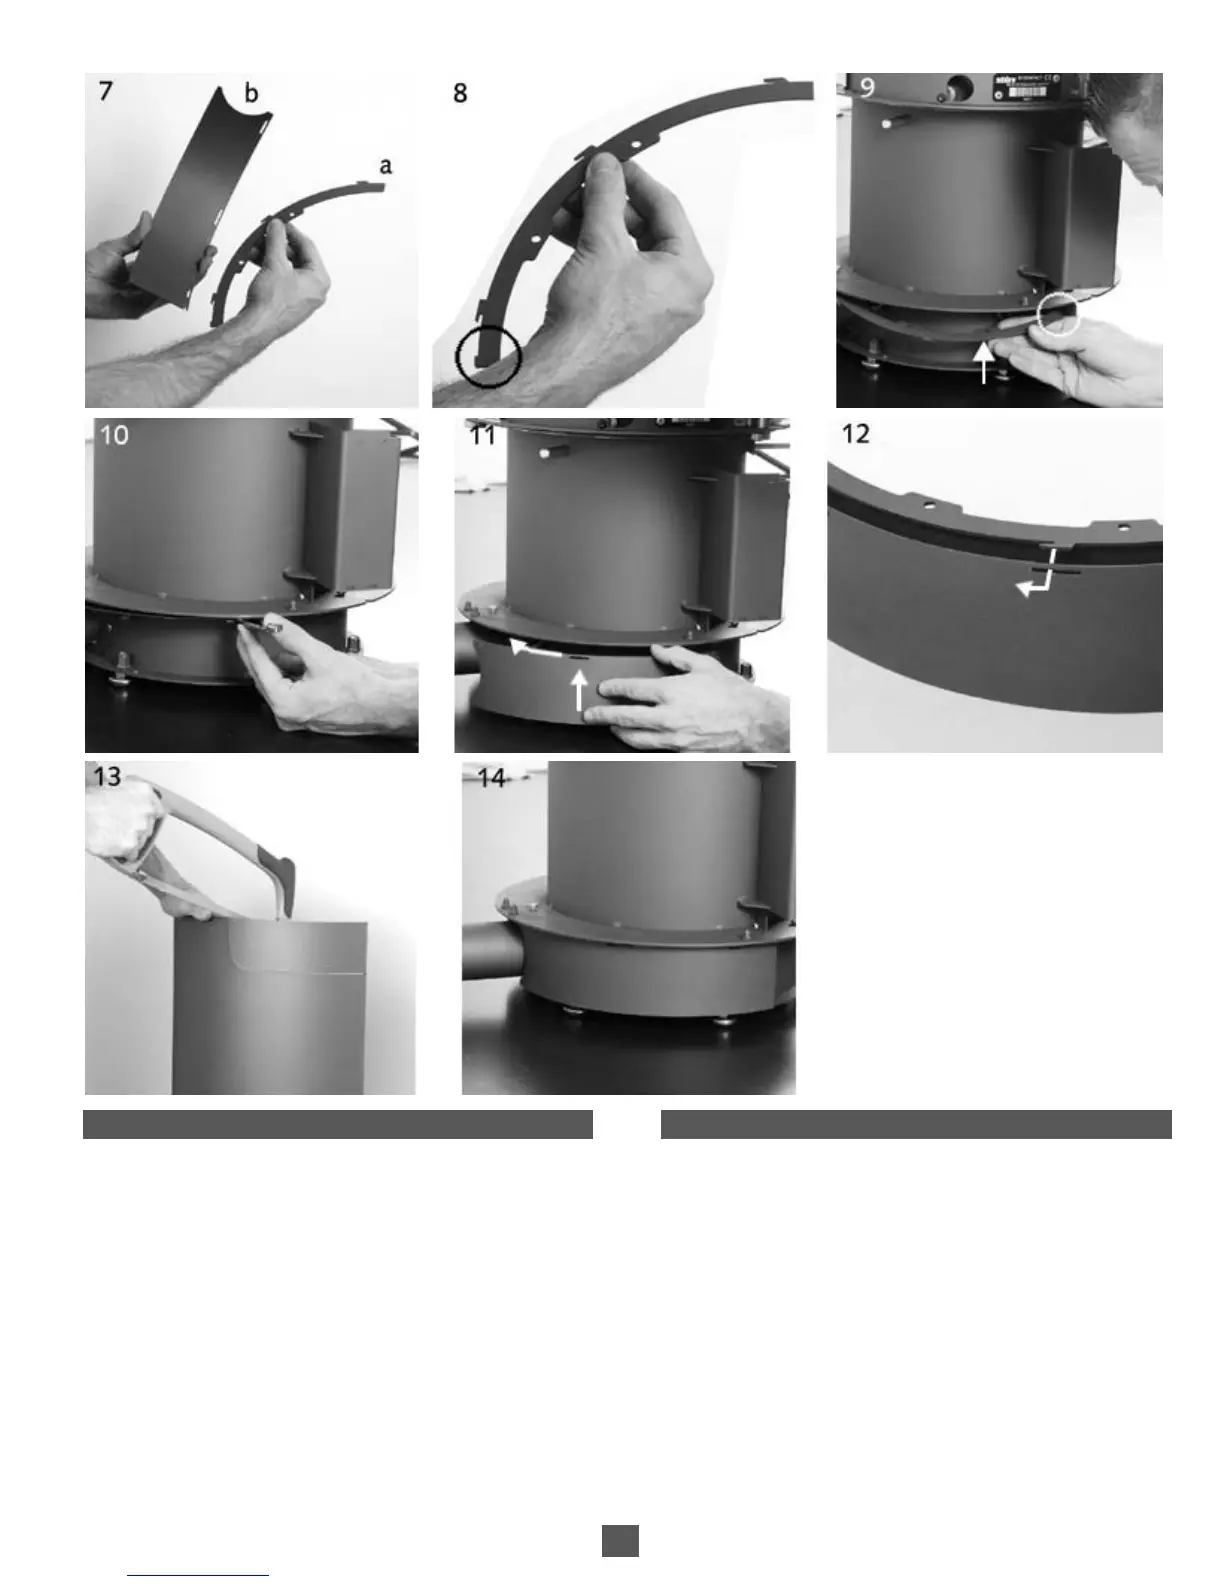
Connection with outside air (continued)
> Fix the 2 masking supports [photo 7a]
– Position the
supports so that the additional piece is at th
e
front
of the stove [photo 9].
– Fix the 2 sup
ports (usin
the 4 M5x6 hexa
onal head screws
and an 8 mm spanner) [photo 10].
> Clip on the 2 masking pieces [photo 7b] to their supports
and check that they are firmly in place [photos 11 to 12].
> Prepare the 2 panels by removing the lower pre-cut part
(using a metal saw) [photo 13]. Smooth the panel edges with
a half-moon file.
> Put the stove in position [photo 14].
Raccordement de l’air extérieur (suite)
> Fixer les 2 supports des demi - caches [photo 7 a]
– Positionne
r les supports de telle sorte que
l'appendice
[sché
ma 8] soit situé à l'avant du foyer [photo 9]
– Fixer les 2 supports (à l'aide
des 4 vis M5x6 tête hexago
nale
et d'une clef d
e 8mm) [photo 10].
> Coupler les 2 demi-caches [photo 7 b]
à leur support et
vérifier qu'ils sont bien bloqués [photos 11 à 12].
> Préparer les 2 parements en éliminant la
partie prédécoupée
inférieure (à l'aide d'une scie à métaux) [photo 13]. Ebavurer le
parement avec une lime demi-ronde.
> Mettre le foyer en place [photo 14
].