Do you have a question about the SunBriteTV Veranda Series and is the answer not in the manual?
Remove the USB drive from packaging and plug it into the TV, ensuring the TV is unplugged from power.
Plug the TV into power to begin the automatic update process, which takes 2-3 minutes.
After update, remove USB, power on TV, and allow 2-3 minutes for initialization with startup icon.
Exit channel scan and skip setup using remote keys to proceed with initial TV configuration.
Use remote buttons Menu, 4, 3, 9, 8 in succession to access the Model Name menu.
Highlight the correct TV model number in the list and press Enter to load default picture settings.
Navigate to and select 'Clean Storage' using the remote's arrow and Enter keys.
Upon completion of 'Clean Storage', the TV powers off, finalizing the firmware update.
Use an empty, FAT32 formatted 1GB USB drive and copy the M95vUpgrade.bin file.
Download the Veranda 2 firmware (Version 2.2.3_r2414) from the provided link.
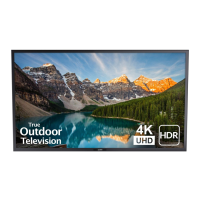
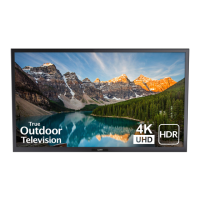
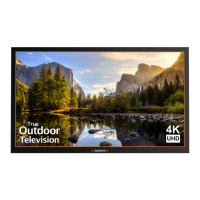
This document outlines the firmware update procedure for SunBriteTV Veranda series televisions, specifically models SB-V-43-4KHDR-BL, SB-V-55-4KHDR-BL, and SB-V-65-4KHDR-BL. The primary function of this update is to optimize HDR compatibility across various devices and to integrate a full Color Management System with 10-point White Balance Adjustment. Performing this update is crucial for ensuring the best possible picture quality and compatibility with modern media sources like Roku, Chromecast, Amazon, and Phillips devices.
The firmware update process is designed to be straightforward, requiring a SunBrite USB Drive and the SunBrite Remote. A USB drive containing the necessary firmware is typically included with the TV. If the drive is missing, detailed instructions are provided for preparing a suitable USB drive. This involves using an empty, Fat32 formatted USB drive with a minimum capacity of 1GB, ensuring no other files or folders are present on it. The firmware file, M95vUpgrade.bin, must be copied directly to the root of the USB drive from a provided Dropbox link, explicitly avoiding the .ZIP file. This preparation ensures the TV can correctly recognize and process the update file.
The update procedure begins by ensuring the TV is unplugged from all power sources. The SunBrite USB Drive, containing the firmware, is then plugged into the TV. Once the TV is reconnected to power, the update process initiates automatically. A progress bar on the TV screen indicates the status of the update, which typically takes 2-3 minutes to complete. It is critical not to turn off the TV during this process to prevent potential damage or incomplete installation.
Upon successful completion of the firmware update, the USB drive should be removed. The TV is then powered on using the remote control. The TV will undergo an initialization phase, during which it sets up its internal menus and settings. This process also takes approximately 2-3 minutes, and a startup icon will appear in the lower right corner of the screen to indicate this activity.
Following the initialization, the TV will typically present an "Auto Channel Scan" menu. To proceed with the setup, the user needs to exit this menu. This is achieved by pressing "Enter" on the remote while "Antenna" is highlighted, then navigating down to "Skip" using the arrow keys, and finally selecting "Exit Setup." This step allows the user to bypass the channel scanning if it's not immediately needed or if the TV is primarily used with external media devices.
The next critical step involves accessing a hidden service menu to configure the TV's model name and clean its storage. This is done by pressing a specific sequence of buttons on the remote: "Menu" followed by "4," "3," "9," and "8" in quick succession. This sequence brings up a standard menu screen that then transitions to the "Model Name" menu.
Within the "Model Name" menu, the user must press "Enter" (the middle button of the arrow keys) to select "Model Name." The screen will then display a list of different Veranda TV models. The user needs to highlight the appropriate model number corresponding to their TV's size (e.g., 0: SB-V-43-4KHDR-B for a 43-inch model) and press "Enter" again. This action loads the default picture settings optimized for that specific model, ensuring the TV operates with its intended visual parameters.
After selecting the model name, the user must navigate down to "Clean Storage" using the "Arrow Down" key and press "Enter" to select it. This step is important for clearing any residual data or temporary files from the update process, ensuring a clean and stable operating environment for the TV. Once the "Clean Storage" process is complete, the TV will automatically power off, signifying the successful conclusion of the entire firmware update and initial setup procedure.
Maintenance features primarily revolve around the firmware update itself. Regularly checking for and applying firmware updates is crucial for maintaining optimal performance, compatibility, and potentially resolving any bugs or issues that may arise. The provided contact information (email and phone number) for SunBriteTV customer service is a key maintenance feature, offering support for any questions or assistance needed during the update process or if the USB drive is missing. This ensures users have a reliable resource for troubleshooting and guidance.
In summary, this guide provides a comprehensive, step-by-step process for updating SunBriteTV Veranda series televisions. It covers everything from preparing the USB drive to navigating the TV's menus for post-update configuration. The emphasis on pre-installation updates, specific button sequences, and the importance of not interrupting the process highlights the precise nature of firmware updates. The inclusion of customer support details further enhances the usability and reliability of this maintenance procedure.
| Wi-Fi | Yes |
|---|---|
| Contrast Ratio | 4000:1 |
| Refresh Rate | 60Hz |
| Response Time | 8ms |
| Wireless Connectivity | Wi-Fi, Bluetooth |
| Resolution | 4K UHD (3840 x 2160) |
| Audio | 20W speakers |
| Inputs | HDMI, USB, RF, Composite |
| Smart TV | Yes |
| Viewing Angle | 178° |
| Screen Size | 55 inches |
| Operating Temperature | -24°F to 122°F (-31°C to 50°C) |