Instruction of SR81 Split Pressurized Solar Hot Water System
Page 7 of 59
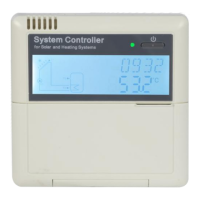
3.1 Mounting the display of controller
►Using Screw and turn it, take the display base plate out, see picture 1
►Fixing the base on the wall with screw (see picture 2), (Note: don’t drill hole on the base
plate)
►Insert the display into the base plate groove ①②, and press it tightly. See picture 3
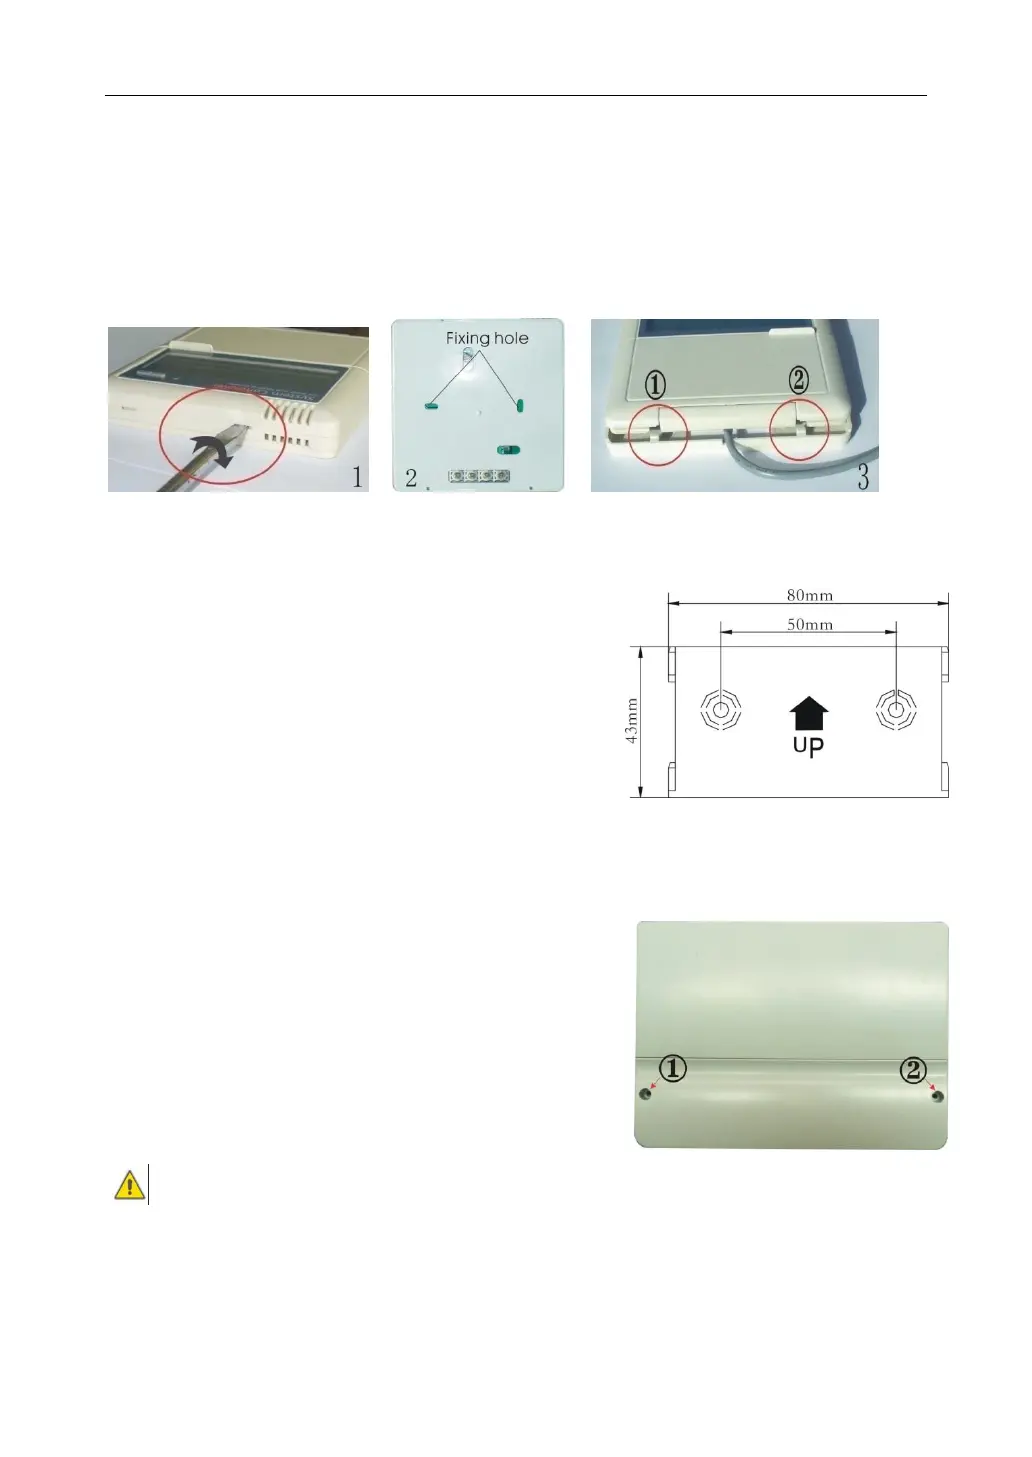
3.2 Mounting the board of controller
Follow the below steps to mount the controller on the wall.
► Select the proper place to install main board of
controller
► Put the hung housing plate on the wall and mark the
upper fastening point.
► Drill the holes and put the plastic expansion bolt into
the holes.
► Hang the housing plate on the screw and fasten it
► Hang the controller on the housing plate.
3.3 Preparation before wiring connection
Open/close the cover of connection terminal.
► Unscrew the screw ①②, and take out the cover
upwards
► Close the cover: close the cover downwards
► Fix the cover with the screw ①②
3.4 Wiring connection
Note: Power can only be switched-on when the controller housing is closed. Installer
should be sure that the IP safety protection grade of controller isn’t damaged during
installation.
According to the way of installation, wire can be connected from hole ④ on the bottom plate