8
We value your experience using Sunny Health and Fitness products. For assistance with parts or
troubleshooting, please contact us at support@sunnyhealthfitness.com or 1-877-90SUNNY
(877-907-8669).
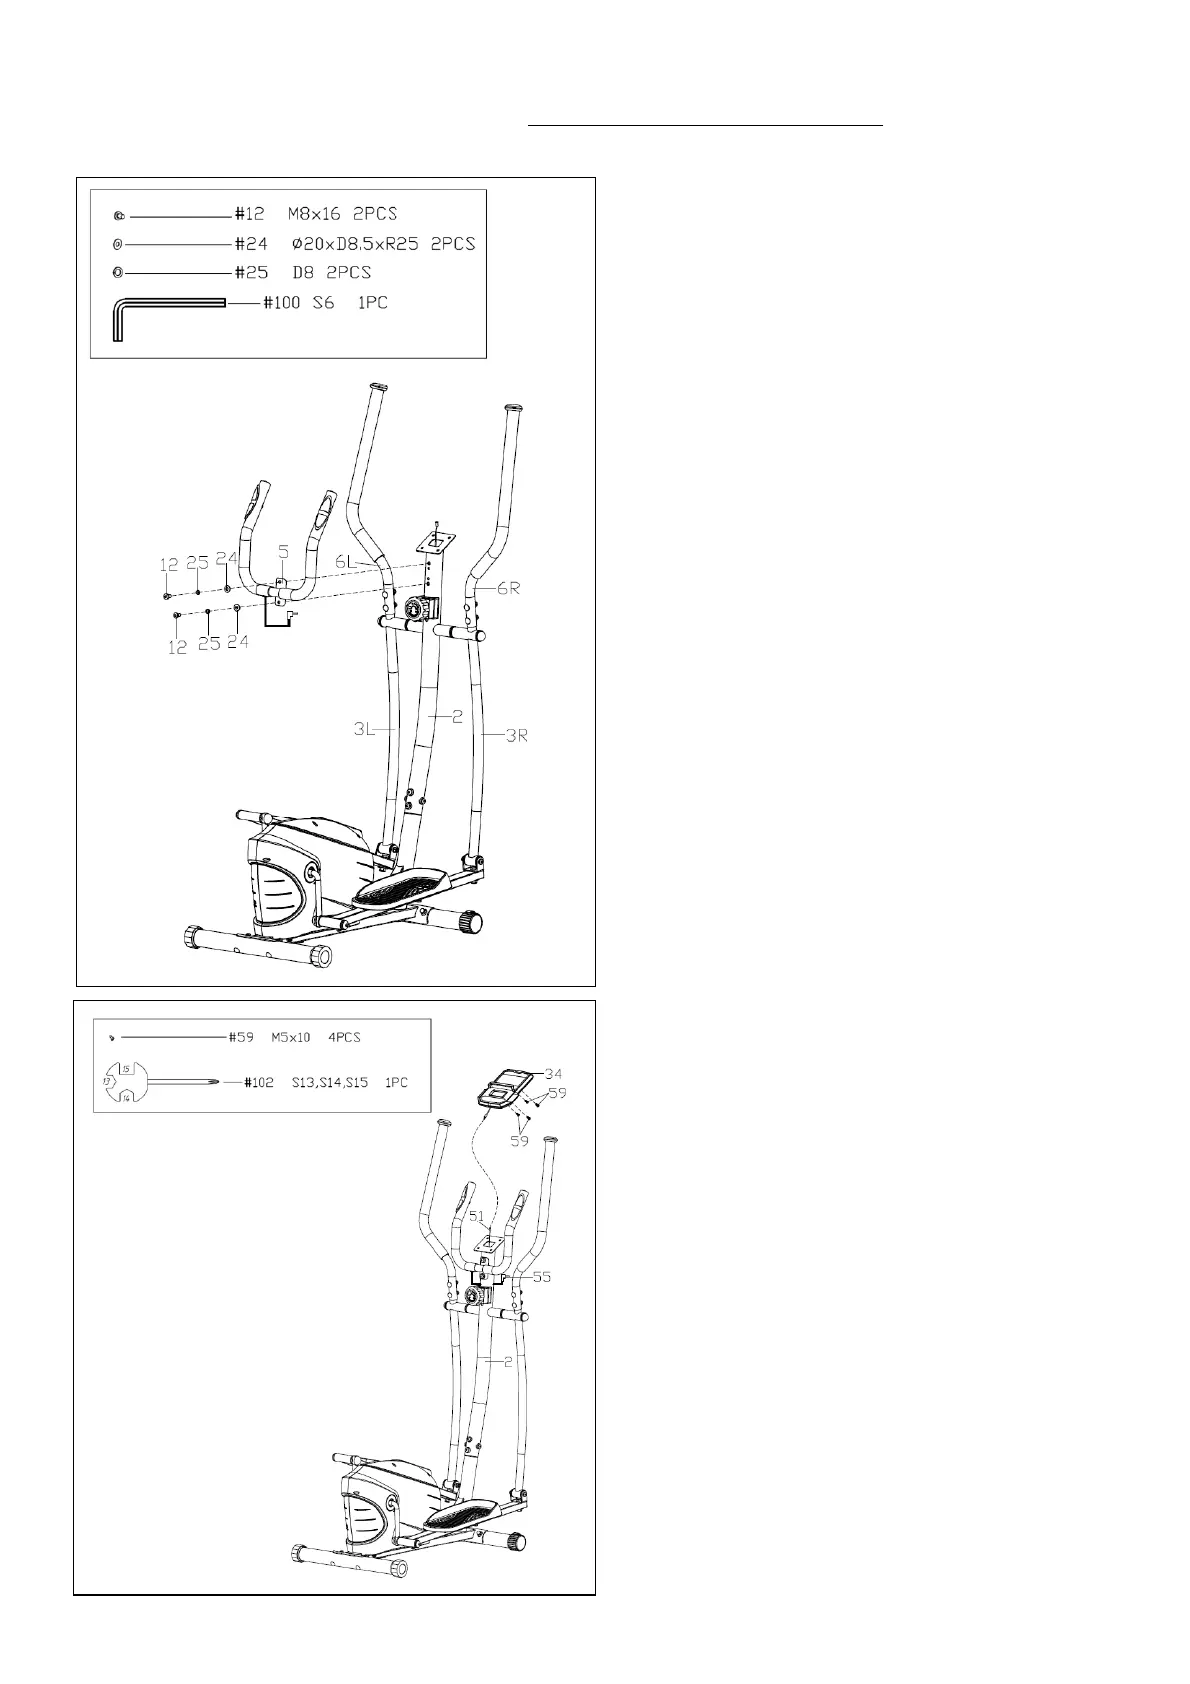
STEP 5:
Remove 2 Screws (No. 12), 2 Spring
Washers (No. 25) and 2 Arc Washers (No.
24) from the Handlebar Post (No. 2) using
Allen Wrench (No. 100).
Attach the Armrest (No. 5) to the Handlebar
Post (No. 2) in place. Secure it with 2
Screws (No. 12), 2 Spring Washers (No.
25) and 2 Arc Washers (No. 24) using Allen
Wrench (No. 100).
NOTE: If the Left & Right Handlebars (No.
6L & No. 6R) rubs against the Armrest (No.
5) during the workout please recheck if the
Left & Right Handlebars (No. 6L & No. 6R)
are assembled to Left & Right Swing Bars
(No. 3L & No. 3R) according to the label
marked with L or R.
STEP 6:
Remove 4 Screws (No. 59) from the Meter
(No. 34) with Spanner (No. 102).
Connect the Sensor Extension Wire 2 (No.
51) to the wire from the Meter (No. 34).
Attach the Meter (No. 34) to the bracket of
the Handlebar Post (No. 2) by using 4
Screws (No. 59) that were just removed
with Spanner (No. 102). Then plug the
Pulse Wire (No. 55) to the jack on the back
of the Meter (No. 34).
NOTE: To avoid damaging the wires, please
push them into the Handlebar Post (No. 2)
before secure the Meter (No. 34) onto the
bracket.
The assembly is complete!