15
6
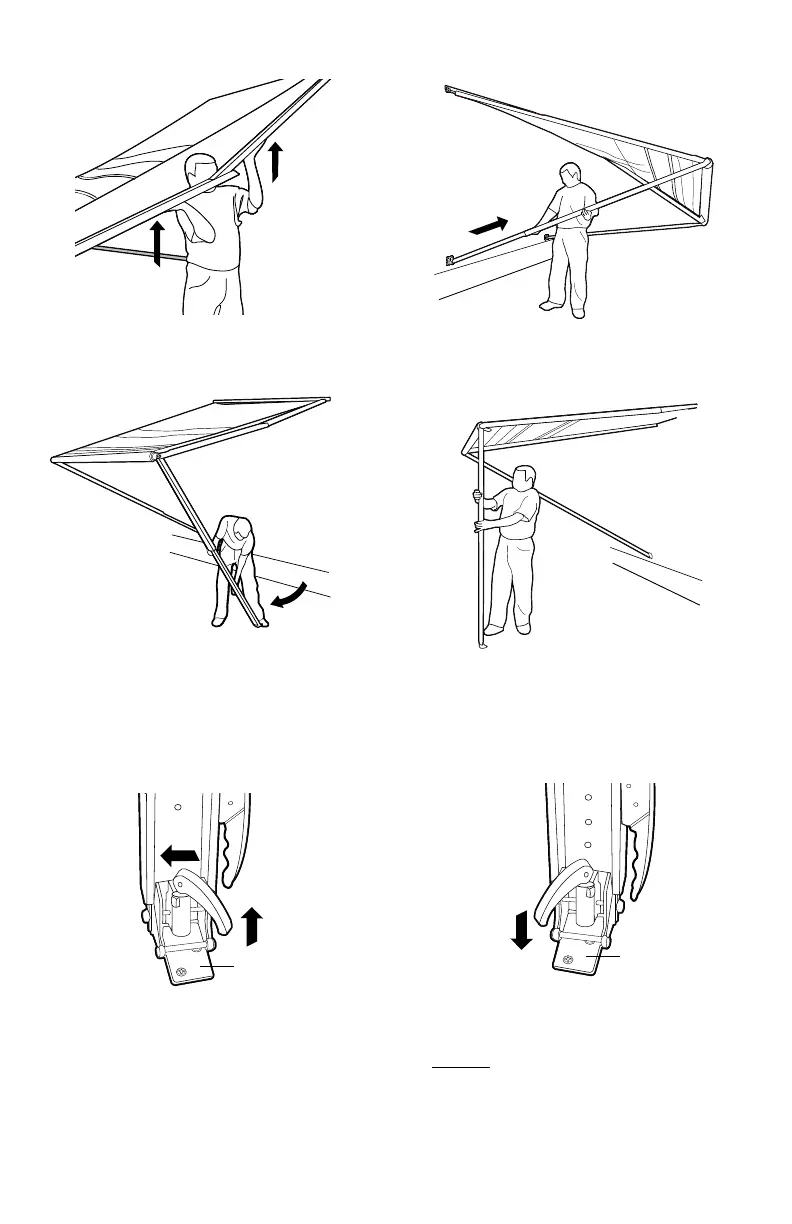
FIGURE 5
Push both rafters 'UP' until they lock.
FIGURE 6
Extend the LEFT arm until the front
roller reaches head height.
FIGURE 7
Unlatch the RIGHT arm from the wall
bracket. Swing the arm away from the
house, half way out, set it on the floor
and secure with your foot. Lower
that arm all the way down.
FIGURE 8
Swing the arm to the fully vertical
position.
FIGURE 9
Place the bottom of the arm over the
deck plate that you installed. Secure
the arm to the deck plate by lifting the
ground bracket handle and rotating
it clock-wise approximately 1/4 turn
until it locks.
FIGURE 10
Release the handle and make sure it is
locked in the 'down' position. Test
to be sure that the arm is secured to
the deck plate.
FIGURE 1
Extend both arms until the lift handles
reach waist height.
FIGURE 10
Extend both arms to the desired
height.
FIGURE 2
Release both arms from the deck
plates by lifting the ground bracket
handle and rotating approximately
1/4 turn counter-clockwise to unlock.
CLOSE:
WARNING: DO NOT LEAVE THE AWNING
UNATTENDED WITH BOTH ARMS VERTICAL.
YOU MUST AT LEAST BRING ONE ARM BACK
TO THE WALL BRACKET, AND LOWER THE
ANGLED ARM TO CREATE ENOUGH DROP
(FRONT TO BACK) AND PREVENT RAIN
FROM ACCUMULATING ON THE
FABRIC. FAILURE TO DO SO MAY RESULT IN
THE COLLAPSE OF THE STRUCTURE, WHICH
COULD CAUSE PERSONAL INJURY.
FIGURE 9
Release the handle and make sure it is
locked in the 'down' position. Test
to be sure that the arms are secured to
the deck plates.