21
[ Fig. 31 ]
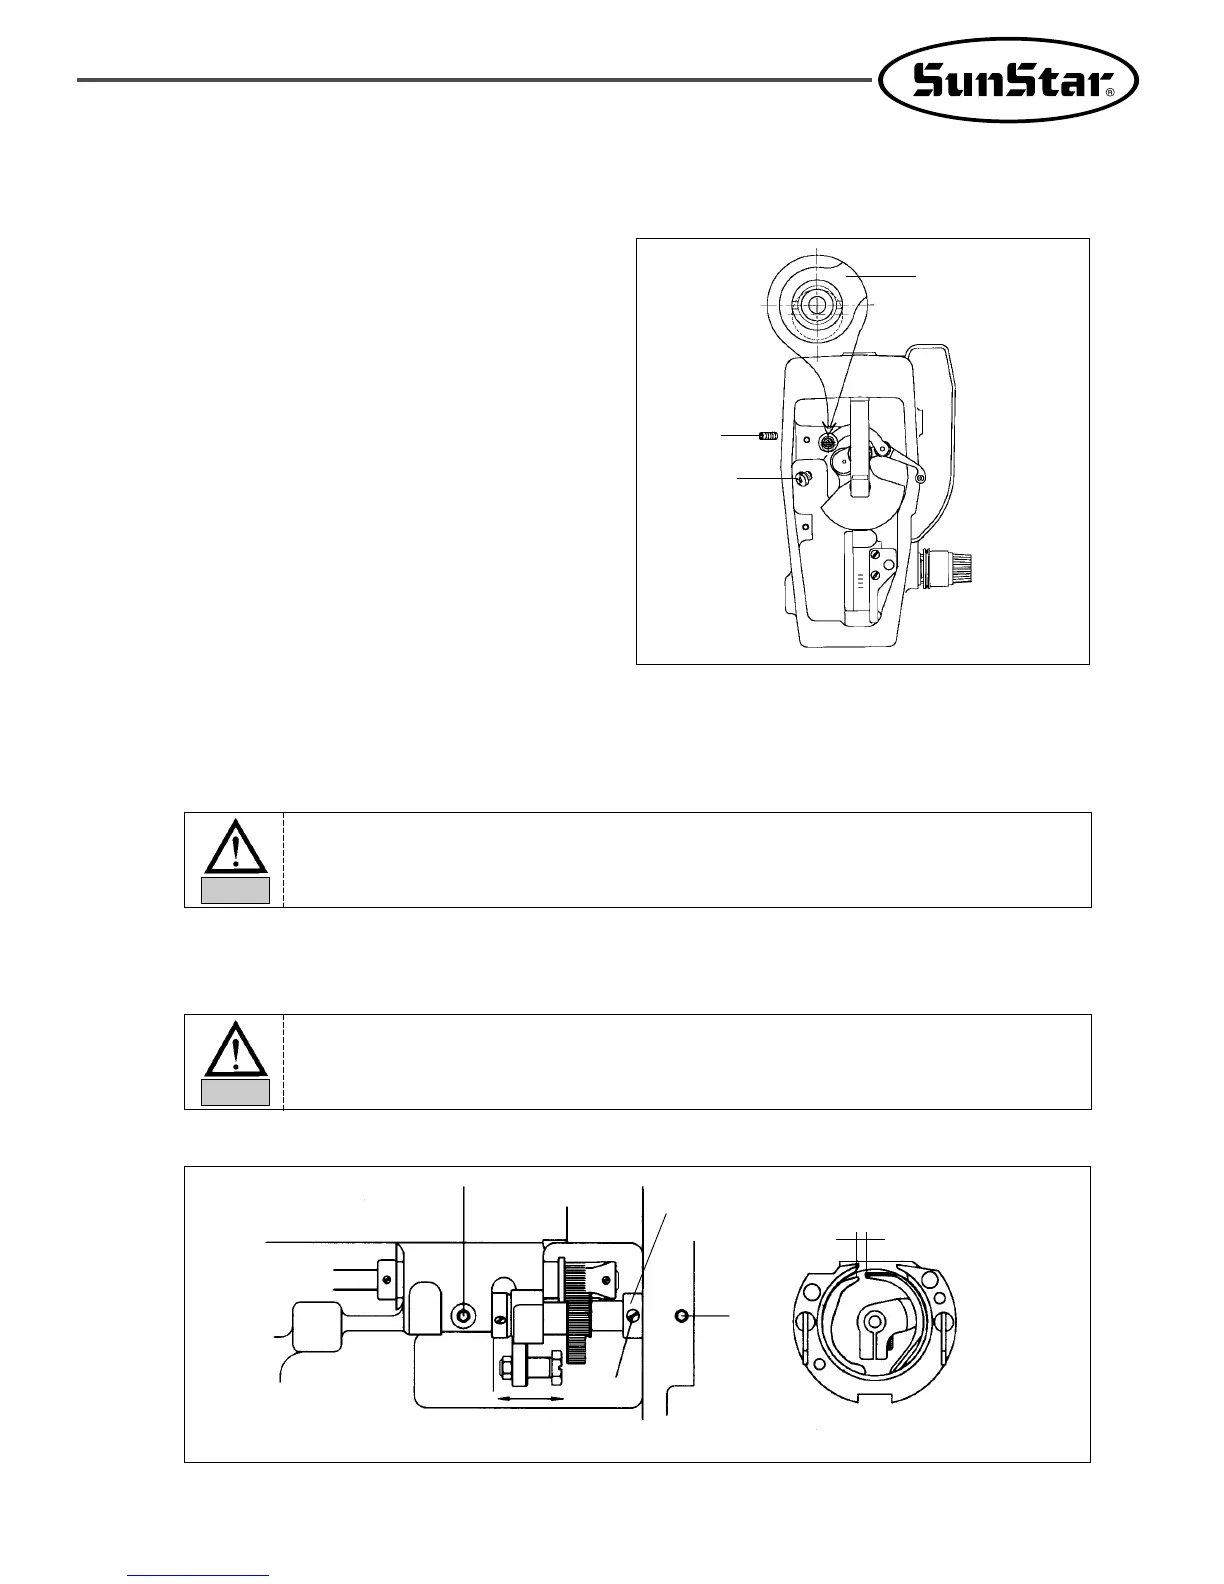
3) How to adjust the eccentricity of thread take-up crank axis
③
②
①
4) Adjusting the lower shaft gear and the rocking shaft gear
A. Unfasten screws ①, ②and ③.
B. While having the upper shaft turning, move the rocking shaft gear in the direction of the arrow to
the position where it will move easily without load.
C. Have the oscillator shaft collar(right) stick to the bed surface , and then tighten the collar screw.
D. Turn the oscillator shaft collar(right), still sticking to the bed surface , in the direction of the
arrow and make adjustments so the end of the shuttle drive will rotate smoothly with the backlash
of under 0.1mm.
E. Tighten screw ① and ③ back on firmly.
[ Fig. 32 ]
below 0.1mm
②
Oscillator Shaft
Collar(R)
①
③
→←
A. Disassemble the face plate from an
embroidery machine, then remove a clamp
screw in the thread take-up crank axis.
B. Loosen a fixed screw of the thread take-up
crank axis in the left of arm.
C. Rotate the thread take-up crankshaft③ to
place its eccentric part to the upper
direction. And adjust the driver’s groove
horizontally.
D. Tighten the fixed screw of the thread take-
up crank axis, then reassemble the clamp
screw of the thread take-up crank axis.
The machine may not operate when the rocking shaft gear in not in the right position.
Caution
If there is too much backlash the machine may make more noise than usual during
operation. And if there is not enough backlash, the machine may not operate.
Caution
 Loading...

