30
13) Setting up the synchro position(C Series)
A. Installing the synchronizer
ⓐ Fix the synchoronizer on the back side of
arm.
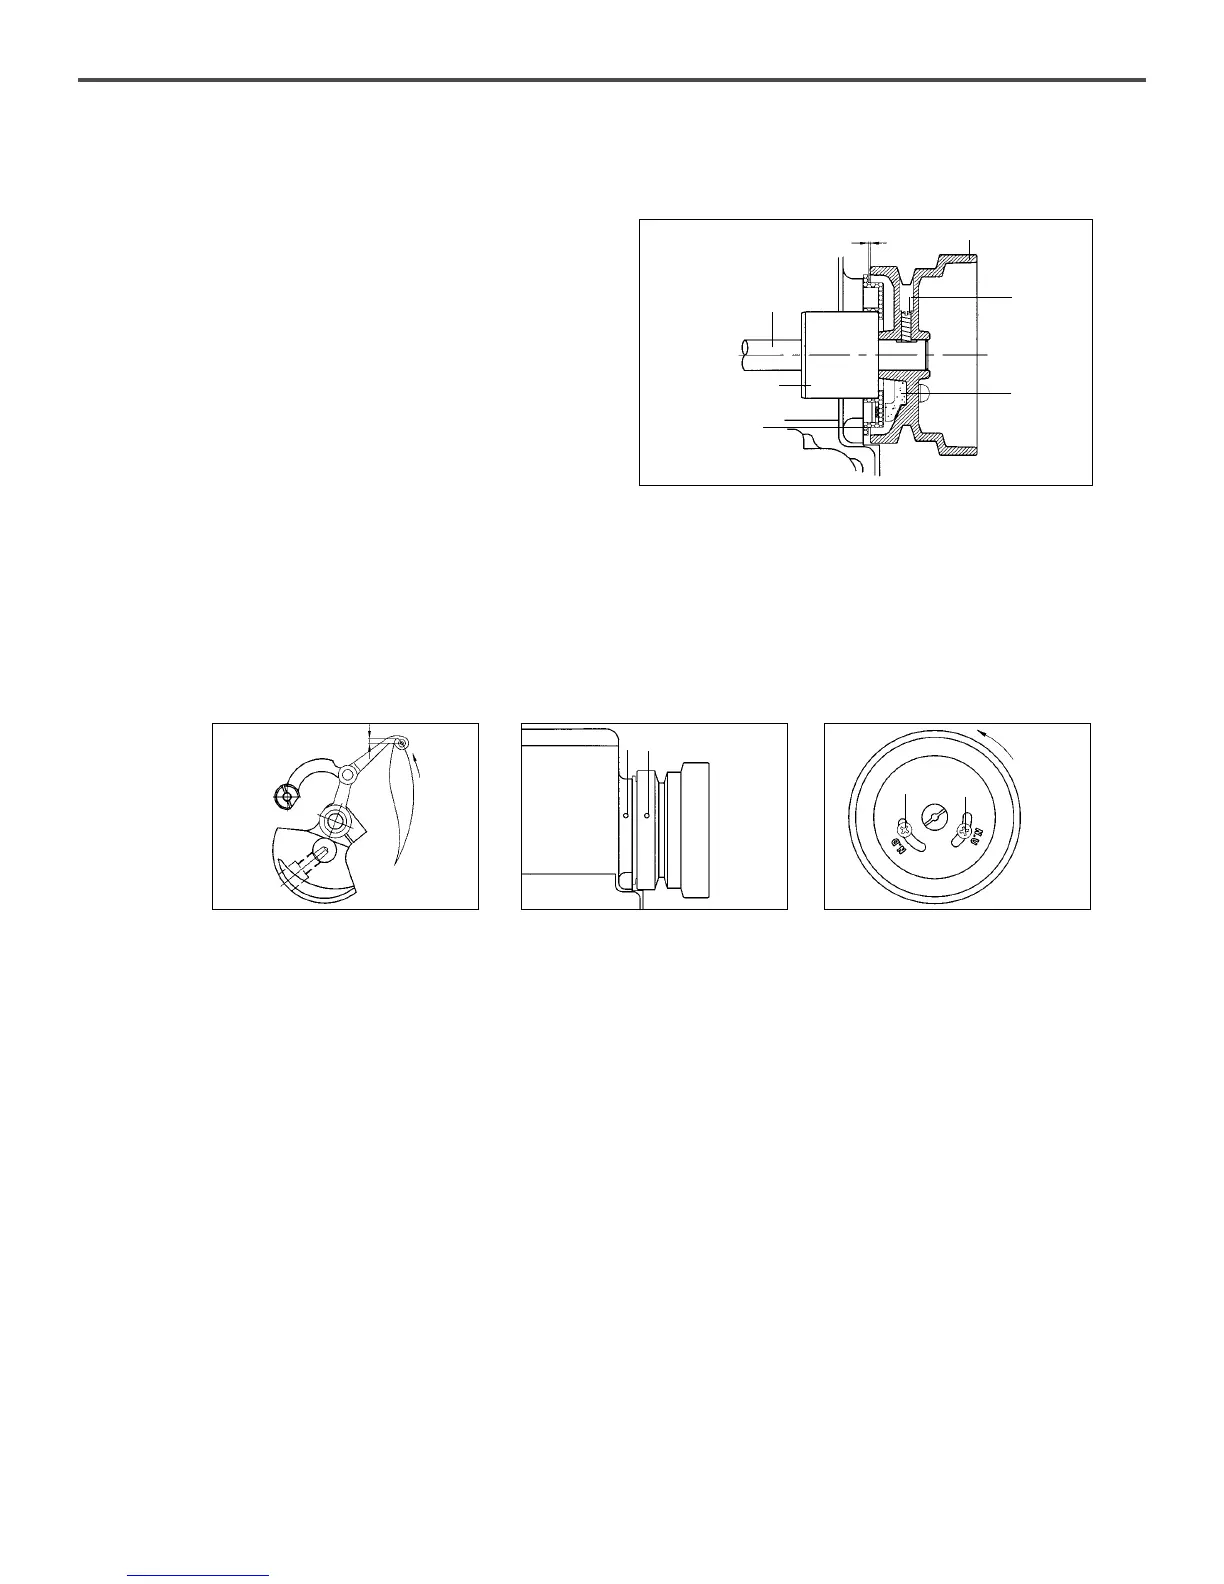
ⓑ Adjust the gap between pulley and synchronizer
to be 2.5mm, then fasten the fixing screw for
pulley.
[ Fig. 58 ]
Upper Shaft
Bushing(R)
Sychronizer
Upper
Shaft
Pulley
2.5mm
Pulley
Screw
Magnetic
Holder
[ Fig. 60 ]
[ Fig. 59 ]
[ Fig. 61 ]
B. Adjusting the position of position detector
ⓐ Adjust the position of take-up lever to be same as Fig. 61 by turning the pulley. At this time, the
white carving sign of pulley should be straight line with the carving sign of arm.
ⓑ Adjust the clamp screw① in the pulley’s punched point, and tighten the clamp screw① where the
pulley’s punched pointⓐ conforms to its inscribed pointⓑ.
ⓒ Unfasten the screw ② on the N.D carving sign and move to the right and left, then let it suspen
on the place where the needle bar just start ascending from the bottom.
Direct
ion of
Rotati
on
About 3mm
Direction of
Rotation
①
②
 Loading...

