26
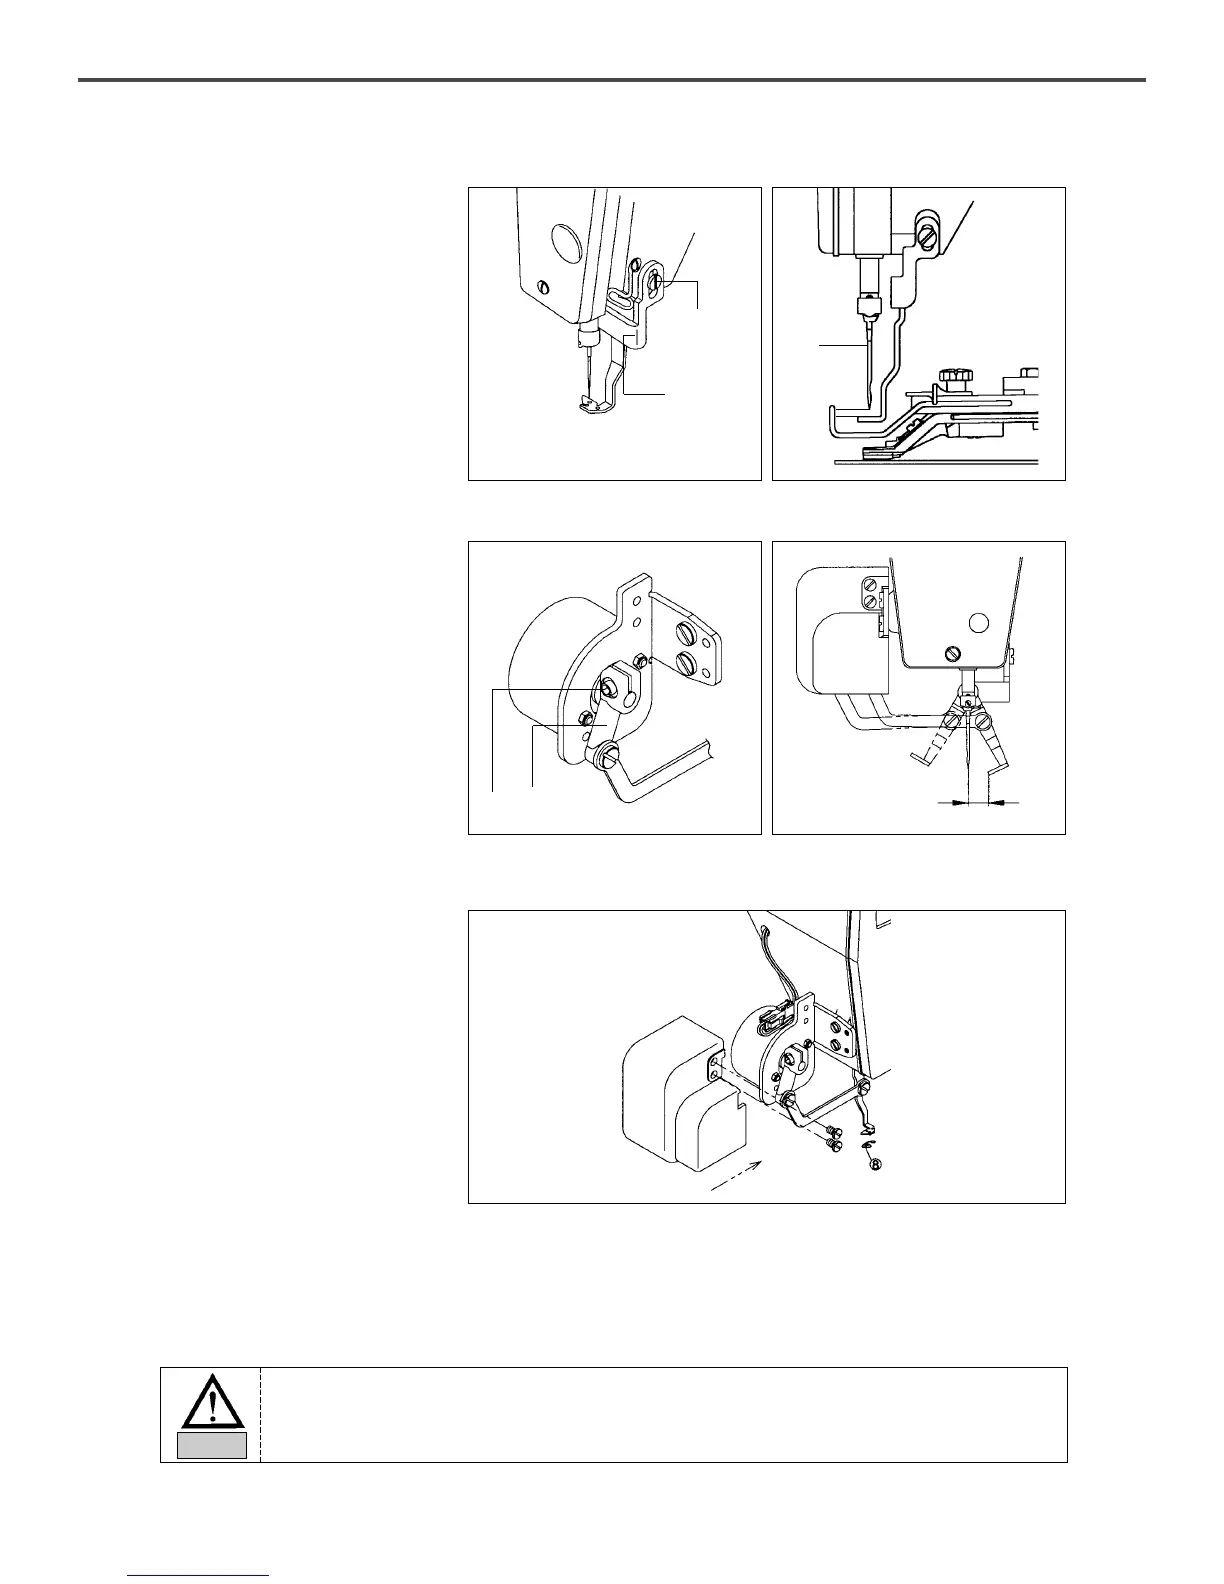
ⓓ Loosen the base clamp②, adjust
the thread base③ up and down
that the interval between the
thread wiper and the needle
center can be 2.5mm when the
thread wiper and the needle center
are in a straight line, then tighten
the clamp②
ⓔ Loosen the thread crank clamp④,
adjust the thread wiper crank⑤
that the thread wiper under sewing
standby can have the interval of
15~17mm from the needle center,
then tighten the wiper crank
clamp④.
ⓕ Finally, after arranging the
connector as shown in the
figure48, attach the wiper cover
⑥ by using wiper cover joint
screw⑦.
ⓖ The thread wiper spring⑧ attached on the thread wiper base has the function to hold upper thread after
thread trimming, and its proper tension is about 20~30g. (A little stronger than the tension of lower thread
in the bobbin case)If the tension of the thread wiper spring is strong, the thread may come upward the
button.
[ Fig. 44 ] [ Fig. 45 ]
[ Fig. 46 ]
[ Fig. 47 ]
[ Fig. 48 ]
②
①
2.5mm
③
④
⑤
15~17
To use the thread wiper solenoid, the sewing related function number, A-18 should be set up to
“100”. In addition to, check if A-14 is set up to “1”and A-31 to “0”.
Caution
 Loading...

