Website: www.sunsynk.com E-mail: sales@globaltech-china.com
13
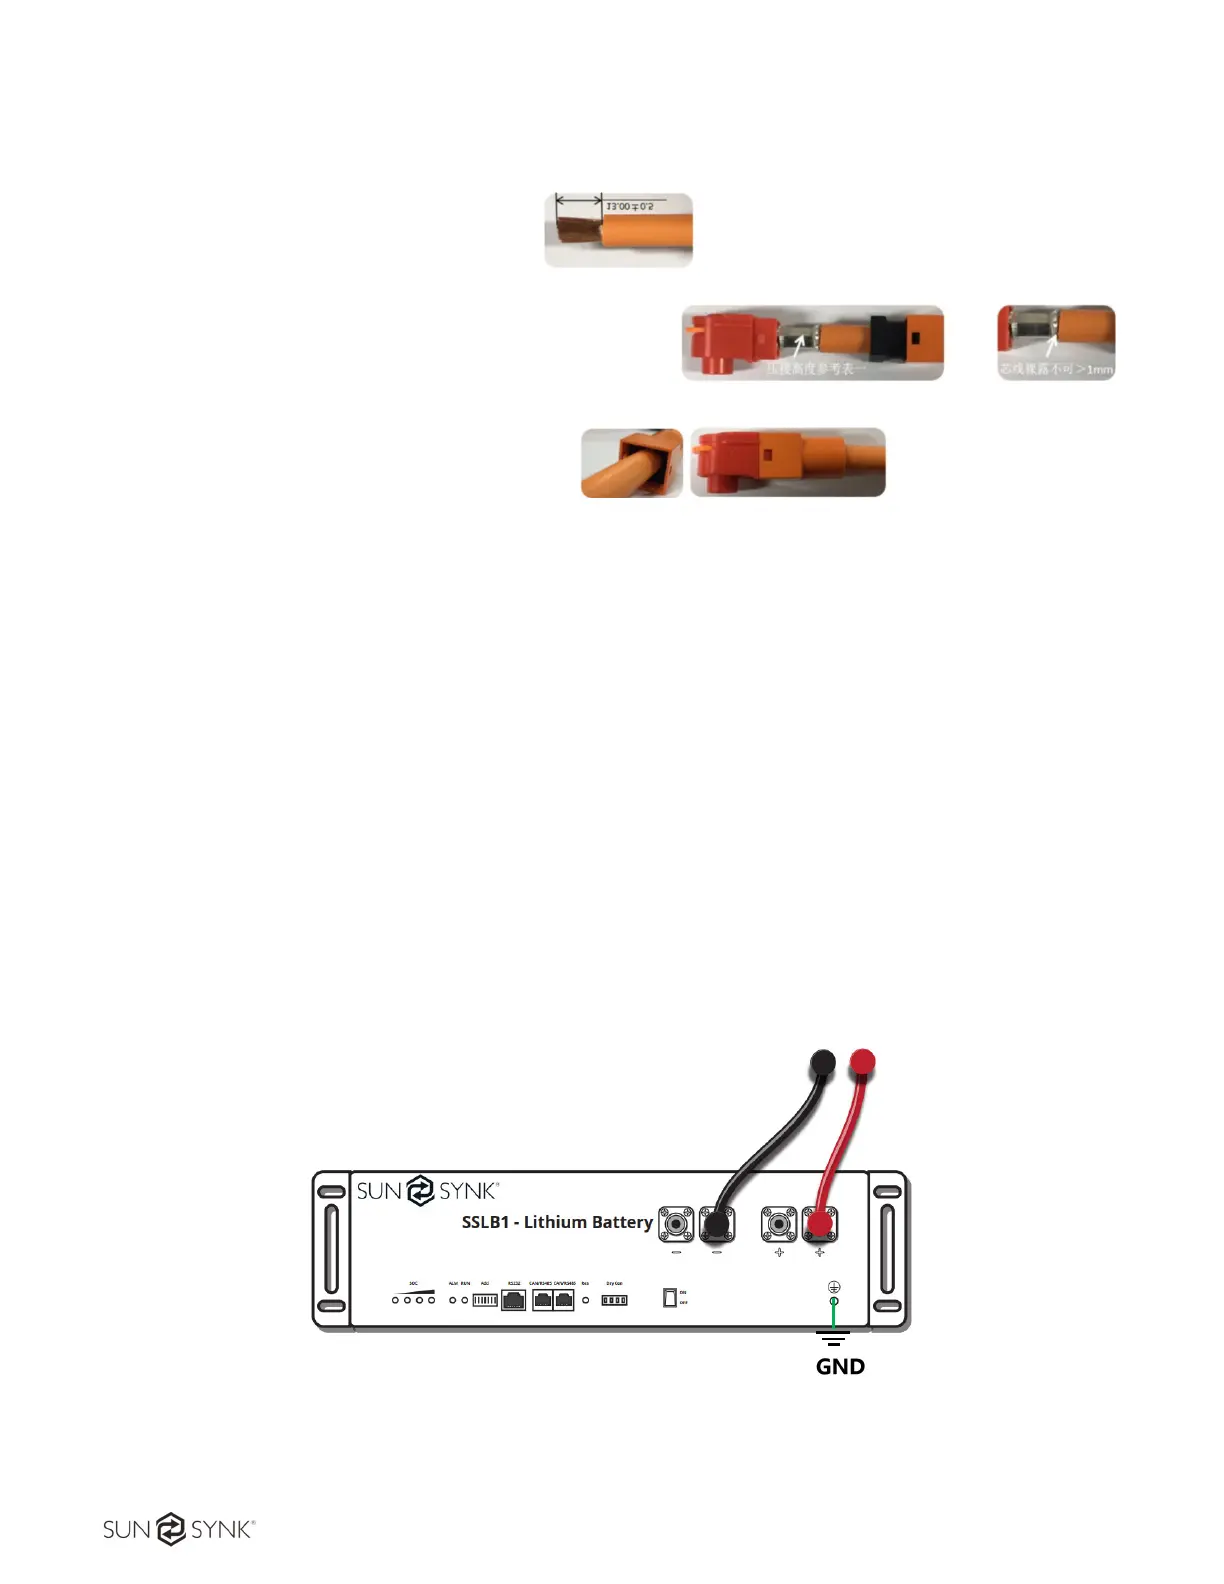
1.
Put wire through isolation cap and Tail-Hood.
2.
Swipe outer isolation layer of DC cable.
3.
The is used for the positive, and the negative for the
black contact. The end of the cable is bunched at the
terminal using a wire clamp.
4.
Tighten the isolation cap and plug contact.
5.
Put the positive and negative plug on to the system and tighten it.
6.
Use isolation cap for unused DC plug.
4.6. Master-Slave Configurations
The Master Pack and The Slave Pack, both with the same model (SSLB1), can be used as single unit as
well as multi-units (in parallel) mode. The customers must inform supplier if they intend to connect more
batteries (multi-units mode), so one can double-check master-slave settings, because DIP address
configuration is different if the number of batteries in parallel changes. The Master Pack can be used
individually, but Slave Pack cannot be used individually. Each battery can be set as the master or the
slave by changing DIP address configuration. Please refer to the attached best practice guide document.
4.6.1 Single Unit
If you are going to use only a single battery, it is only necessary to connect the positive and negative
cables.
Figure 5 - Single unit connection
4.6.2 Multi-Units
 Loading...
