SuperServer 1029P-WTR User's Manual
40
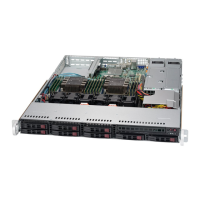
Figure 3-6. Replacing System Fans
6.
7. Power up the system and check that the fan is working properly before replacing the
chassis cover.
DVD-ROM Drive Installation
An optional slim DVD drive may be installed into the 1029P-WTR.
Installing a DVD-ROM Drive
Begin by removing power from the system as described in Section 3.1.
1. Unplug the power and data cables from the drive then remove the chassis cover.
2. Adding a new drive: Remove the mini-bezel (grate) from the drive bay The bezel can
be removed by pulling out the hard drive beneath the DVD-ROM, then pulling the mini-
bezel forward.
Replacing a drive: Locate the locking tab at the rear (left hand side when viewed from
the front of the chassis) of the DVD-ROM drive. Push the tab toward the drive and push
the drive unit out the front of the chassis.
3. Insert the new drive unit into the slot until fully seated. Add a new drive by following this
procedure in reverse order. You may hear the faint *click* of the locking tab when the
drive is fully inserted.
4. Reconnect the data and power cables to the drive then replace the chassis cover and
restore power to the system.
 Loading...