Super Intel VROC RAID Configuration for the X12 Motherboards User's Guide
7. Once you’ve enabled the feature: “Intel VMD for Volume Management Device on CPU1
(or another selected CPU),” you are ready to configure a desired device for VMD support.
From the available VMD devices displayed on the screen, select a desired device and
highlight it (to select it for VMD support).
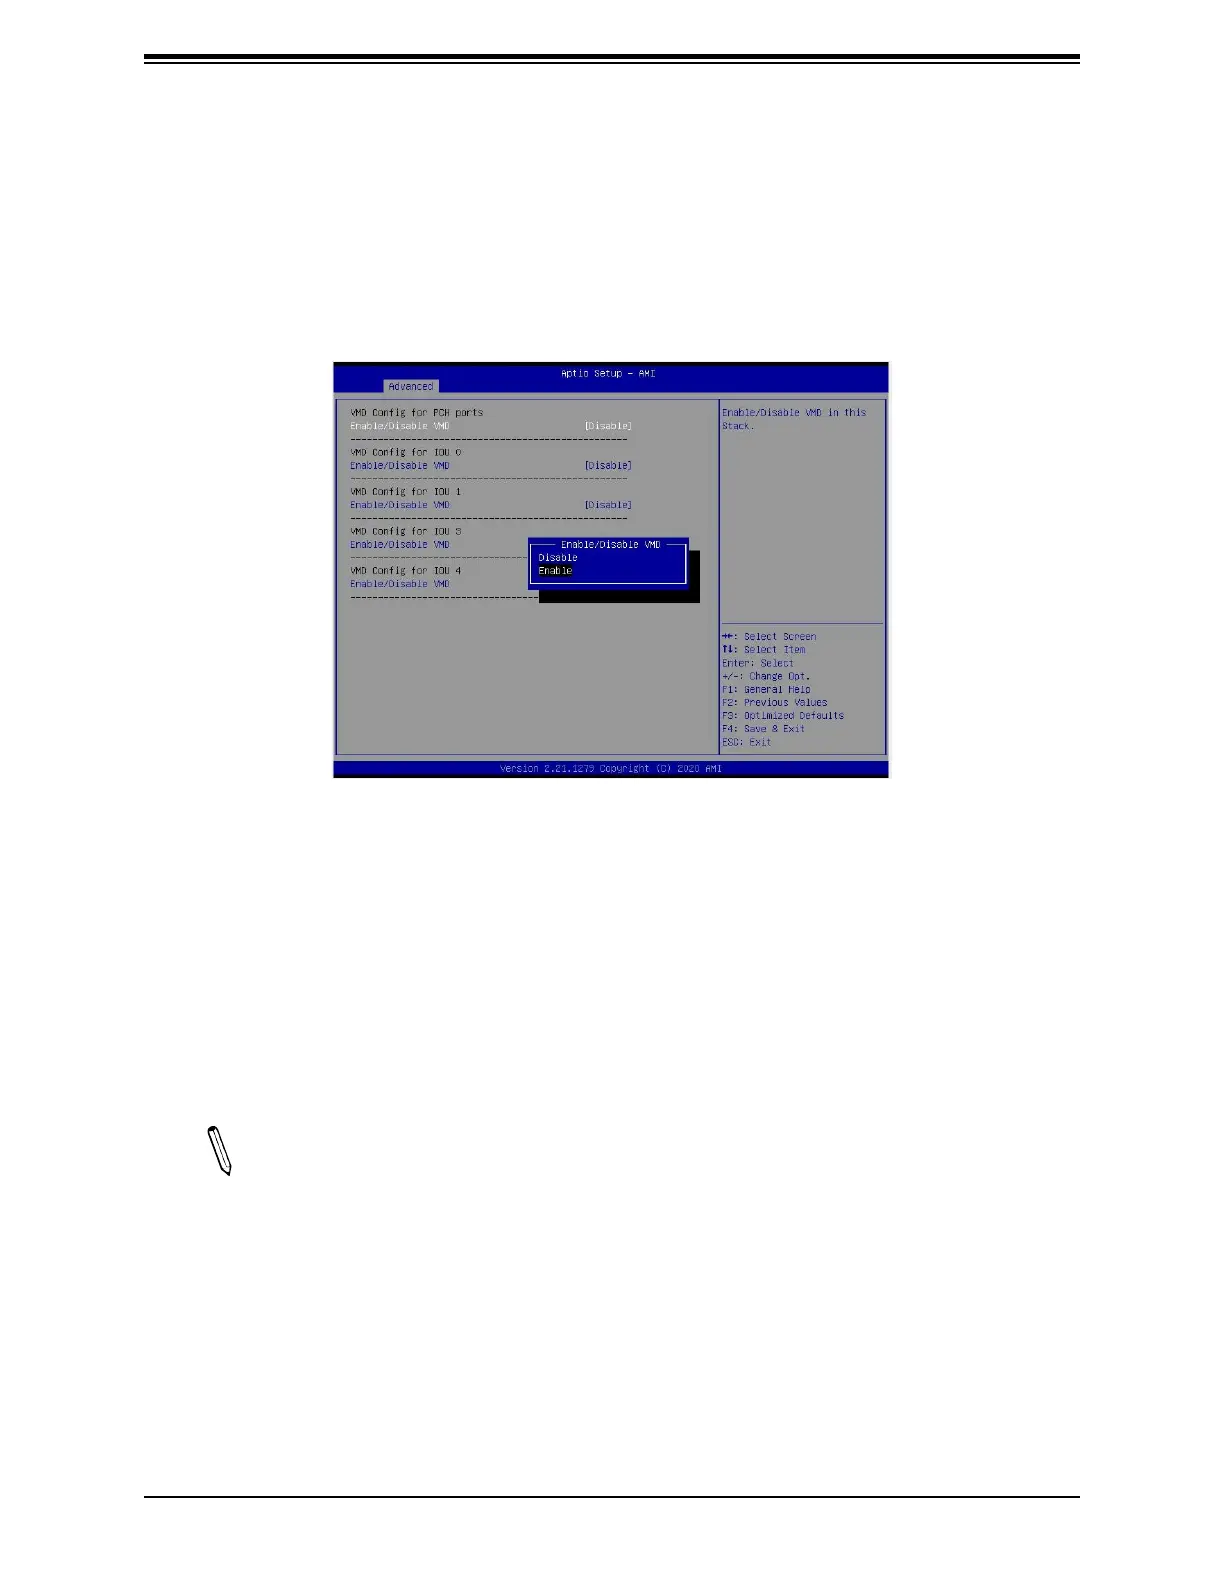
8. After selecting the VMD device, select <Enable> from the options pull-down box and press
<Enable> to enable VMD support for the selected device as shown below.
9. Repeat Step 7 ~ Step 8 to select and enable all devices of your choice for VMD support.
10. After all devices chosen by you are enabled for VMD support on the BIOS Setup
utility, install the physical VMD devices (such as add-on cards) on the slots that you've
configured for VMD support on the motherboard.
11. Press <F4> to save the settings and exit the BIOS Setup utility. Press <Del> during
system boot to enter the BIOS Setup utility.
Note: After you’ve enabled VMD support in the BIOS on a PCIe slot specified by you,
this PCIe slot will be dedicated for VMD use only, and it will no longer support any PCIe
device. To re-activate this slot for PCIe use, please disable VMD in the BIOS.
 Loading...