37
Chapter 2: Installation
2.5 M.2 Installation
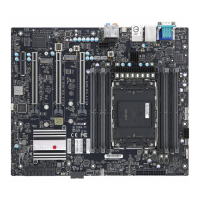
This motherboard has two M.2 M-key sockets
that support the 2280 and 22110 M.2 devices.
One stando is pre-installed into the position of
22110 mounting holes. Refer to the illustration
on the right for the locations of M.2 sockets and
mounting holes. Follow the steps below to install
the M.2 device.
Note: It is strongly recommended that you in-
stall an optional Supermicro M.2 heatsink (p/n
SNK-C0156L) on the M.2 device.
22110
2280
M.2 Heatsink Installation (Optional)
1. Remove the thermal pad protective lms
from the cover and the tray of the M.2
heatsink.
2. Place the M.2 device into the tray, then put the heatsink cover in place. Be careful to
align the holes on the tray with the holes on the cover.
3. Tighten the screws to secure the heatsink
assembly.
Heatsink Cover
Heatsink Tray
 Loading...
