In the Power Supply window of the Instrument list the user can see the
information about the current power source.
When the instrument is powered from its internal batteries, the “Battery”
icon is presented on the top line of the display. When voltage of the batteries
is too low for reliable measurements, the icon flashes or during attempt to
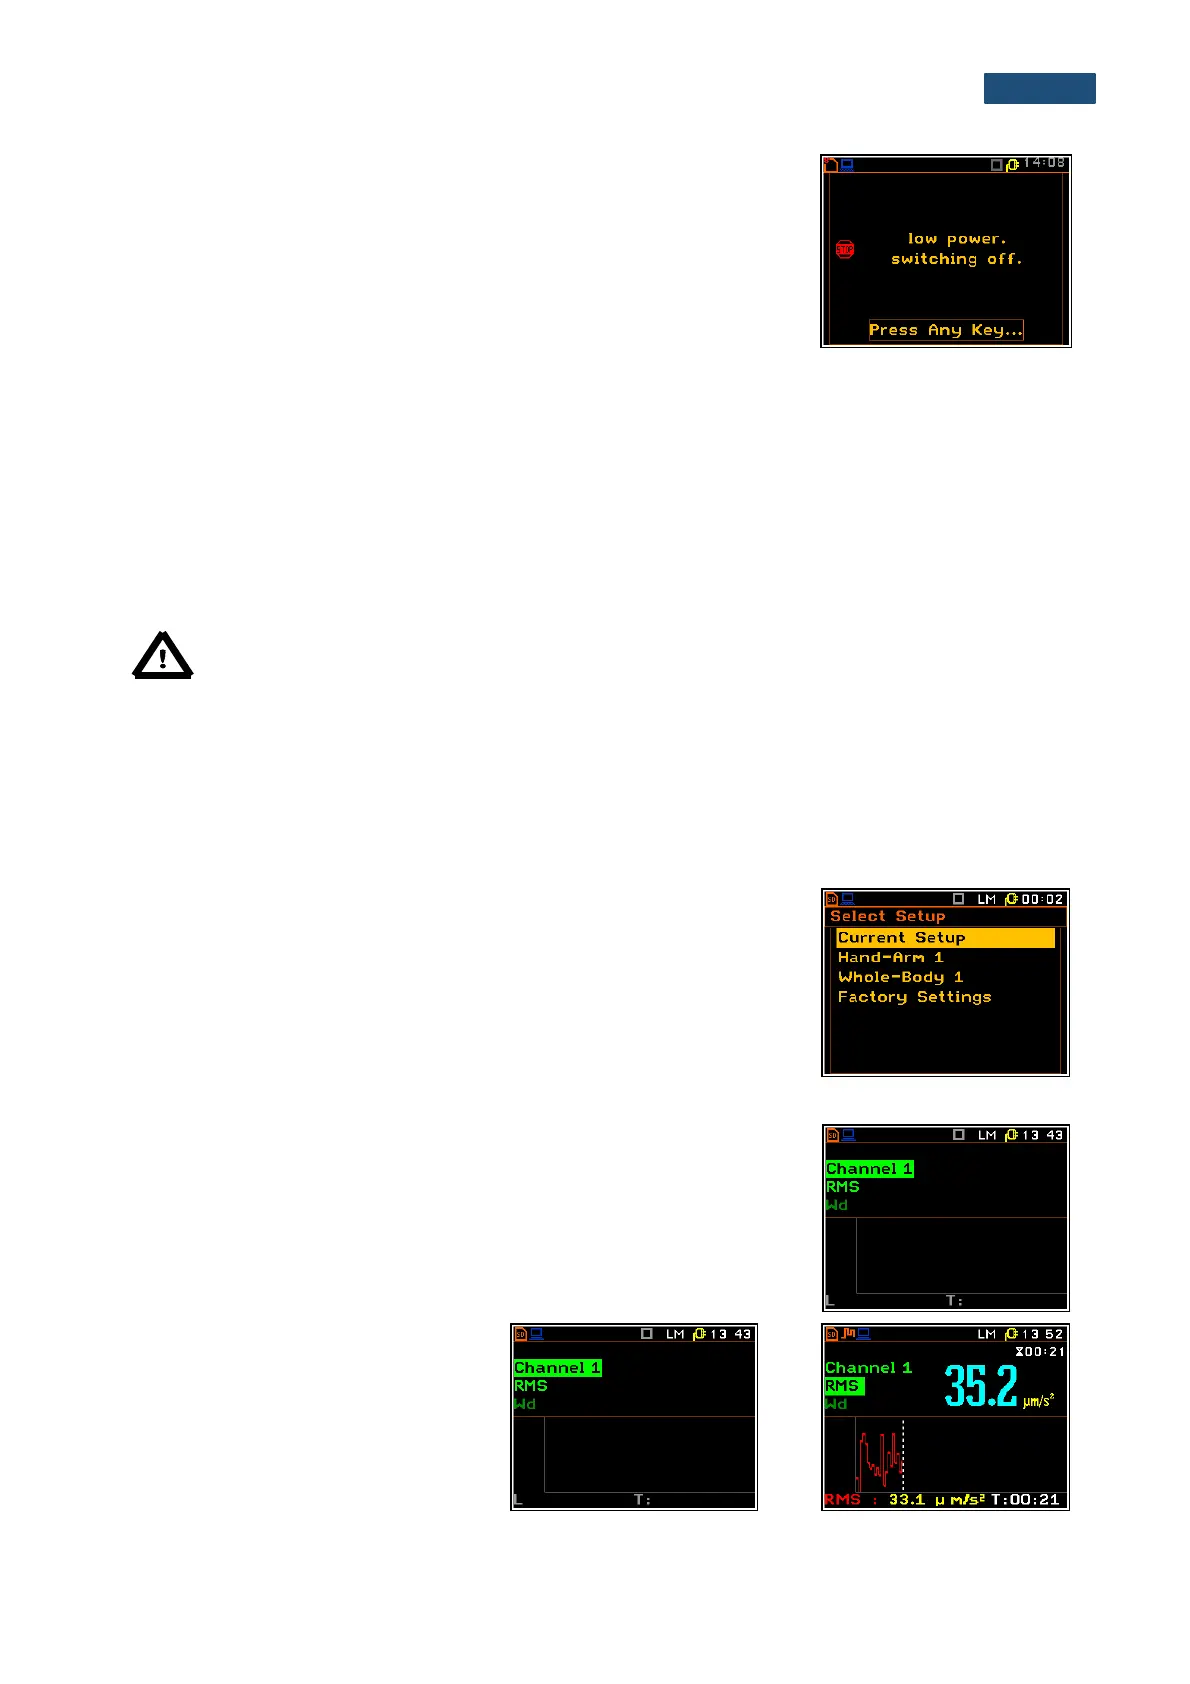
switch the instrument on the Low power message occurs on the display for
2 seconds and the instrument switches off by itself. To change the batteries
the user has to switch off the instrument, take off the black bottom cover of
the instrument, unscrew battery cover, slide the battery tubes out, change
the batteries taking care to observe the correct polarity and reassemble the
parts of the instrument. Fully charged set of 4 batteries ensure more than
12 hours of continuous operation of the instrument (with Dim LCD switched
on). The battery condition can be checked by means of the Battery
function. It is also presented continuously on the top line of display by
means of the “Battery” icon.
When there is a connection to the USB interface (USB Device socket is
connected by means of the cable to a PC or a USB power supply), the
“Computer” icon is presented on the top of the display and in the Battery
window there is the message USB Power: 0.00V.
Note: In the case when the “Battery” icon is red it is strongly recommended to use the external
power adapter or USB interface as soon as possible. to ensure reliable operation. If no suitable
external power source is provided the instrument will be switched off automatically after a short
time!
Prolonging the internal source of the instrument’s power can be achieved by reducing the brightness of the
screen when possible. The settings of Brightness and power saver function may be done in the Screen Setup
window (path: <Menu> / Display / Screen).
3.3. Initial Setup of the instrument
Switching the instrument on
To switch the power on the user should press the <Alt> and <Start/Stop>
push-buttons at the same time. The instrument goes the self-test routine
after switching on (displaying the manufacturer and the name of the
instrument) and then it enters the Select Setup window. This window
enables the user to select the predefined setup for specific measurements.
To ignore the selection, press the <Esc> push-button.
After selecting or skipping the predefined setup the unit has to warm-up for
one minute and then the measurement screen with one result and logger
screen (if Logger is active) or with two results (if Logger is Off) appears.
Press <ESC> to bypass the warm up time and go straight to the
measurement start if required.
Starting measurement
To start a measurement the user has to
press the <Start/Stop> push-button.
The results of the measurement are
displayed with the unit of the
measurement.

 Loading...


