English
7
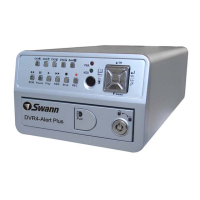
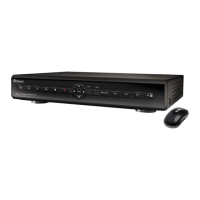
Layout of the DVR
1) Video Inputs 1 - 4: These are your primary video inputs.
Each accepts a standard composite video signal and connects
via a BNC connector.
The channels are labeled by number in the same order as they
will appear on your DVR’s interface.
2) Video Inputs 5 - 8: As 1) but apply to the 8-channel model
only.
3) Audio Inputs: These will accept a standard line-level signal
(<1V).
4) HDMI Output: The primary output of the DVR. For the
highest possible video output quality, we suggest using this
output.
t For best results, use a monitor/television capable of
displaying Full HD 1080p.
t Note that many televisions which can display 1080p
signals are not actually Full HD. These kinds of televisions
downscale a 1080p signal to the resolution of the screen.
For the best possible image, use a television/monitor
which can display 1920 x 1080 or higher.
5) VGA Output: For connecting a television or PC monitor
with a VGA input.
6) Audio Output: A standard line-level audio output.
7) Network Port: Where you can connect the DVR to a
network, typically directly into the router or network switch.
8) USB 2.0 Port: For connecting a USB mouse or a USB storage
device. We suggest connecting USB storage to the USB port
on the front of the DVR, and using the rear port for the mouse.
9) eSATA Port: To connect an external hard drive, to which
you can backup footage.
10) PTZ (RS485) Port: To connect the RS485 cables to control
a PTZ (pan, tilt, zoom) device to the DVR.
11) DC 12V Power Input: Where you connect the included DC
12V power adapter. Use only the supplied power adapter with
the DVR, and use the power adapter only with the DVR.
12) Power Switch: Master ON/OFF switch.
1) USB 2.0 Port: For connecting USB external storage to the
DVR for backup, or for applying new rmware.
2) Play/Pause: Opens the playback interface from the live
viewing mode. Pauses playback or resumes playback from
paused.
3) Quad (4ch)/All (8ch): Enters split-screen view, where the
screen shows one, four (“quad” mode 2 x 2) or eight (8ch only - 3
x 3 with one space blank) video feeds at once.
4) Menu: Opens the DVR’s menu, or goes back one step from
a submenu.
5) Select: As the name suggests, it selects an option or item
from a menu.
6) D-pad: For navigating around menus when you’re not using
the mouse. (Why aren’t you using the mouse? It’s awesome.)
7) IR Receiver: Where the DVR will pick up signals from the IR
remote control. If this is obstructed, the remote will not work.
8) Power LED: Will be lit whenever the DVR is supplied power
and turned on.
9) HDD LED: Will ash whenever the DVR is writing to/reading
from the installed hard drive.
21 3 4
7
5
8
6
9
1112 10 5 4 6 7 8 9 1 2 3
 Loading...