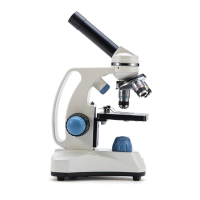
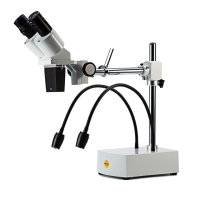
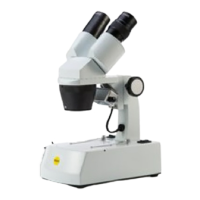
The Swift SW150 microscope is a versatile instrument designed for both seasoned professionals and beginner hobbyists, offering a comprehensive set of features for detailed observation. Its primary function is to magnify small specimens, allowing users to explore the microscopic world with clarity and precision.
Usage Features:
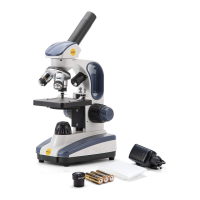
The microscope is designed for ease of use, starting with its straightforward assembly. Users are instructed to carefully remove the microscope from its packaging and place it on a sturdy, flat surface. The plastic cover from the eyepiece holder on the microscope's head should be removed, and an eyepiece then placed into the holder. Powering the device involves locating and attaching the power adapter, plugging it in, and then pressing the power button. The SW150 can also be powered by three AA batteries, offering portability.
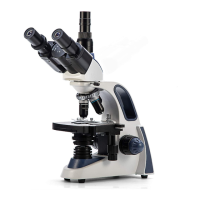
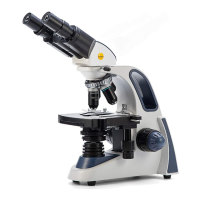
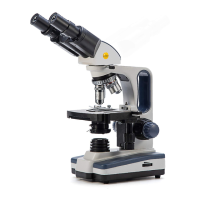
For observation, the microscope features a monocular head that can be rotated 360 degrees, allowing for comfortable viewing from either a forward- or backward-facing position. This flexibility ensures that users can adjust the viewing angle to suit their preference. Illumination is provided by dimmable top and bottom LED lights, offering versatility for different types of specimens. When beginning an observation, users should turn on the microscope and select the lower lamp setting. The illumination intensity can be precisely controlled using the dimming handwheel, allowing the user to set the lamp to the lowest brightness initially and then adjust it to a comfortable intensity.
Specimens are secured on a plain stage using slide clips. The microscope employs a triple revolving nosepiece, which holds achromatic objective lenses with magnifications of 4X, 10X, and 40X. This allows for total magnifications of 40X, 100X, 250X, 400X, and 1000X when combined with the wide-field 10X and 25X eyepieces. Users are advised to always start with the lowest magnification objective lens (4X) centered over the stage. Focusing is achieved through coaxial coarse and fine focus knobs. The larger coarse adjustment knob is used to bring the image into initial focus by slowly moving the stage closer to the objective. Once an image is formed, the blue fine adjustment knob is used to fine-tune for clarity and to observe different layers of the specimen. The slide can be manually moved across the stage to explore various parts of the specimen.
To increase magnification, the nosepiece is rotated clockwise to a higher magnification objective. A crucial tip is to ensure the objective does not strike the slide. If there isn't enough room, the coarse focus knob should be used to move the stage down and away before changing magnification. The microscope also features a single lens condenser with a 6-hole disc diaphragm, which helps in controlling the light passing through the specimen, enhancing contrast and resolution.
The SW150 supports both transmitted and incident illumination modes. For incident mode, which is suitable for solid specimens like hair or pollen, the illumination is switched to the upper light built into the body. The solid specimen is placed on the stage with the objective lenses on the lowest magnification setting, and the focusing steps are repeated to observe magnified details.
Maintenance Features:
Proper care is essential to maintain the quality and longevity of the Swift SW150 microscope. The manual emphasizes storing the instrument in a cool, dry place when not in use. A dust cover should always be used to protect the microscope from dust and debris, which can degrade optical performance.
For cleaning the lenses, a soft brush or compressed air is recommended to gently remove dust. Users are explicitly warned against touching the optical surfaces directly or disassembling the optical components of the microscope, as this can cause damage and should only be performed by a Swift technician. When an eyepiece is not in use, a plastic cover should be used to protect the eyepiece holder and ocular lens.
The microscope is designed with durability in mind, but users are encouraged to address common issues themselves before seeking professional service. A comprehensive troubleshooting guide is provided, covering various problems such as an uneven visual field, blurry images, poor image quality, dim light, image movement during focusing, objective lens collision with the slide, inability to focus at high power, and issues with the lamp. For example, if the visual field is uneven or dark at the edges, possible causes include the nosepiece not being locked in place, the slide not being centered over the bulb, a dirty objective or eyepiece lens, or the disc diaphragm hole selection being too small. Solutions range from rotating the nosepiece until a click is heard, centering the slide, cleaning lenses with compressed air or a soft brush, to rotating the disc diaphragm to a larger hole.
If the visual field is blurry or dirty, the issue could be a dirty objective or eyepiece lens, a dirty slide, or an eyepiece/objective lens not fully screwed into place. Solutions include cleaning the lenses or slide, and tightening the lenses. Poor image quality might stem from the absence of a cover slip, a slide that is too thick or thin, a slide placed upside down, or a dirty objective lens. Corrective actions involve using a cover slip, a lab-quality slide, flipping the slide, or wiping the lens with a soft cloth and glass cleaner.
Issues with light, such as dimness or flickering, are also addressed. If the light is too dim, the disc diaphragm hole selection might be too small, the lamp setting too low, or the voltage too low. Solutions include rotating the disc diaphragm, increasing intensity, or using the supplied power adapter. If the lamp doesn't turn on, it could be due to no power source (adapter not connected, batteries not installed) or a burned-out bulb, requiring a check of connections, battery installation, or bulb replacement. Flickering indicates the bulb might not be inserted correctly or the power adapter isn't fully plugged in, necessitating a check of these connections.
The microscope is backed by a warranty, with a five-year warranty for the microscope itself against manufacturing defects (excluding normal wear, routine maintenance, add-on accessories, damage from unauthorized repairs, accidents, alteration, shipping, misuse, or abuse). Electrical and video components have a one-year warranty, which does not cover light bulbs, batteries, fuses, or electrical cords. All warranties commence from the original purchase date, and proof of purchase is required for service. Swift provides free repair or replacement of warrantied parts, including labor, during the warranty period, though buyers are responsible for shipping costs. Warranty service is provided by authorized Swift Optical Instruments, Inc. technicians, who determine warranty eligibility. For international customers, standard warranty service is provided, but inbound and outbound shipping costs, including duties and taxes, are the consumer's responsibility.