17
ELEKTRISCHER ANSCHLUSS (Fig. 10) ELECTRICAL CONNECTIONS (Fig. 10)
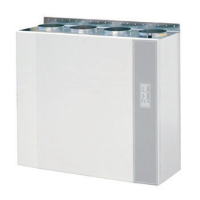
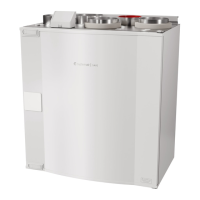
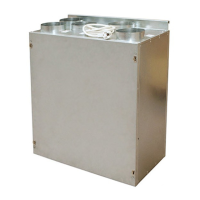
Das WRG-Gerät (2)
VR 400 DCV/B & VR 700 DCV wird steckerfertig ausgeliefert mit einem Schukostecker 10A,
230V, und ca. 1m Kabel.
Die Dunstabzugshaube DH (1)
VR 400 DCV/B ist für den Anschluß einer unserer speziellen DH, vorgesehen. Auch die DH
wird steckerfertig mit 1m Kabel und Schukostecker geliefert mit zusätzlich einer Steuerleitung
zum WRG-Gerät. Wenn die Klappe in der DH öffnet , gehen die Ventilatoren automatisch auf
max. Drehzahl. Installieren Sie ein 2-adriges Kabel für ein potential freies Signal von der
Haube zum Gerät. Das Kabel kann am Abluftkanal entlang oder in einem Leerrohr verlegt
werden . Die Dunstabzughaube wird auf der Leiterplatine im Gerät auf die Klemmen DI1 und
GND angeschlossen.
Fernbedienung (4)
In der Front des VR 400 DCV/B & VR 700 DCV ist eine Steuerung integriert. Es können aber
trotzdem eine oder mehrere Fernbedienungen, Type CD, angeschlossen werden. Als
Steuerleitung genügt eine 4-adrige Verbindung (12 V). (Abgeschirmtes Kabel verwenden bei
Verlegung zus. mit 230V-Kabeln). Als Verbindungskabel können auch Kabel mit
Westernstecker (ISDN) verwendet werden, siehe (3) (Zubehör). Die Verbindung kann aber
auch über vorhandene Klemmleisten in der Fernbedienung und dem Gerät hergestellt werden
(Klemmenbez. A, B, GND und 12V im Schaltplan). Bei Verwendung der Kleimmleisten Kabel
4x0,22 or 0,5 mm
2
installieren. Bei Installation von mehreren Fernbedienungen wird ein
Kupplungsstück (Y-Stück) für den elektrischen Anschluß im Gerät benötigt.
Digitaleingänge (fig. 10A)
Das Gerät ist mit einigen Digitaleingängen ausgestattet, um normale Funktionen zu
übergehen. , siehe 1-7 im Schaltplan. Eingänge auf Schlieser (normal offen), potentialfreier
Kontakt klemmen. Anschlüsse auf DI5 and DI6 müssen Tasterschalter sein (Impuls).
Drucküberwachung: Wird eine Drucküberwachung am Gerät angeschlossen, um Unterdruck
zu vermeiden (Holzofen, Dunstabzug, zus. Ventilator..), auf DI3 klemmen.
Zurück/Verlassen (Daheim/Urlaub): Funktion ist für längere Abwesenheit gedacht.
Geschlossener Kontakt DI7 = Zulufttemp. Zulufttemperartur wird auf 10
o
C gesenkt um
Energie zu sparen. Wird auch DI2 geschlossen, wird die Luftmenge automatisch dem
eingestellten Werd von DI2 angepasst.
Reset Filterstandzeit: Reset der Filterstandzeit kann über DI6 erfolgen durch einen
Tasterschalter. Oder über die CD-Fernbedienung.
Alarm: Der Alarmausgang wird auf folgende Weise verwendet:
Alt. A: Der Ausgang steuert ein Halbleiter-Relais (nicht verfügbar von Systemair), dass das
Alarmsignal weiterleitet. Steuerspannung (12V DC) wird von Terminal „12V/GND“ geholt.
Alt. B: Der Alarmausgang wird direkt an ein BMS-System angeschlossen (max 10mA/ca.
0,1VA).
Hinweis: AC-Spannung darf nicht zum Alarmausgang angeschlossen werden, (Siehe
Schaltplan für weitere Info).
The unit (2)
The VR 400 DCV/B & VR 700 DCV units are supplied with apx. 1 m cable and plug for 10A,
230V, single phase earthed connection.
The cookerhood (1)
VR 400 DCV/B is designed for connection to cookerhood, designed for this use. The
cookerhood is provided with apx. 1 m cable and plug for 10A, 230V, single phase earthed
connection and cable for potential free signal to unit. When opening the timer operated damper
in the cookerhood, the fans will automatically go to maximum capacity. Install a 2 lead wire for
potential free signal from cookerhood to the unit. The wire may be fixed to the extract duct or
installed in electrical tube. Cable from the cookerhood to be connected to terminals marked DI1
and GND on the PCB inside the unit.
Separate controller (4)
The VR 400 DCV/B & VR 700 DCV have control panel integrated, but can also be controlled
from one or more remote control panels, type CD. For necessary signal, install an unscreened,
4-lead connection (12V). (Screened cable to be used in areas exposed to EMC noise).
Extension cable with plugs (12V) to be installed between separate control panel and the unit
(3), alternatively to terminal blocks marked A, B, GND and 12V inside the unit (see wiring
diagram). Use 4x0,22 or 0,5 mm
2
cable when connecting between terminal blocks. When more
than one controller is installed, use one or more double inlet plugs in the plug on the unit as
necessary.
Digital inlets (fig. 10A)
The unit is provided with several digital inlets for overrunning of normal operation, see 1-7 in
wiring diagram,. Inlets to be connected to NO (normally open), potensial free contacts.
Contacts to DI5 and DI6 to be of type press buttons with automatic return.
Pressure guard: If unit is to be provided with pressure guard for compensation of under
pressure caused by separate ventilator, fire place etc., connect to DI3.
Home/leave: This function is especially meant for summer houses. Closed contact DI7 =
Supply air temp. automatically reduced by 10
o
C to save energy. By simultaneously closing
contact DI2, the airflow is automatically adjusted to the DI2 setting.
Reset of filter time: Reset of filter time may be done from DI6, using press button with
automatic return. Alternatively from CD-panel.
Alarm: The alarm output is used in the following fashion:
Alt. A: The output controls a semiconductor relay (not available from Systemair), which
forwards the alarm signal. Control voltage (12V DC) is taken from terminal ”12V/GND”.
Alt. B: Connect the alarm output directly to a BMS-system (max 10mA/ca. 0,1VA).
Note: AC votage must not be connected to the alarm output, (see wiring diagram for more
info.).
 Loading...