22
Fig. 11
INBETRIEBNAHME/GRUNDEINSTELLUNG
Checkliste nach der Installation:
Achtung! Wenn sich die Inbetriebnahme des Systems verzögert, muss das
Rohrsystem geschützt werden (mittels Blinddeckel), sodass eine
Luftzirkulation verhindert wird. Dies soll der Bildung von Kondenswasser
und Schäden an der Lüftungsanlage vorbeugen.
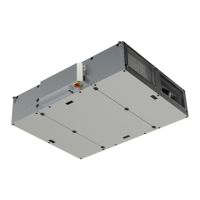
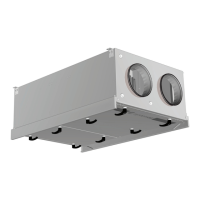
1. das Gerät ist entsprechend der Montageanleitung montiert (Fig 1)
2. Schalldämpfer sind eingebaut bzw. das Gerät ist ordnungsgemäß mit dem
Kanalsystem verbunden.
3. keine Geräuschübertragung vom Gerät oder den Auslässen
4. Frisch- und Fortluftkanäle sind installiert, damit kein Kurzschluß der Luftströme
entsteht.
5. Frischluftansaugung ist mit genügend Abstand von Schmutzquellen installiert (DH,
Zentralstaubsauger-Abluft, Trockner-Abluft...)
6. die Fernbedienung und Signallampen funktionieren (siehe Bedienungs- und
Wartungsanleitung: „Betrieb“).
7. Dunstabzugshaube (falls angeschl.) funktioniert zusammen mit WRG-Gerät (siehe
Bedienungs- und Wartungsanleitung: „Küchenabluft“).
8. Die Dunstabzugshaube muß eine dichtschließende Klappe haben (keine Abluft wenn
die Haube ausgeschaltet ist).
Einstellungen vor Inbetriebnahme
Eingeben der erf. Luftmenge (entspr. Planung) in l/s (1 m
3
/h ~ 0,28 l/s) über die CD-
Fernbedienung (fig. 11) wie unten beschrieben.
(Ist die erforderliche Luftmenge nicht vorgegeben, sollte ein 0,5 facher Luftwechsel für die
Normal Stufe angestrebt werden. Die Luftmenge erhält man durch multiplizieren der
Wohnfläche mit der Raumhöhe und Teilen des Produktes durch 2.
Beispiel: Wohnfläcke = 150 m
2
und Raumhöhe = 2,4 m erforderliche Einstellung der
Luftmenge auf Normalstufe auf 180 m
3
/h. bzw. 50 l/s).
Siehe auch Auslässe – Einstellung der Luftmenge.
COMMISSIONING
Checklist after installation:
NB! If start-up of the system is delayed, the duct system must be protected (by means
of bungs) so that air circulation is prevented. This is to avoid condensation and
damage in the ventilation unit.
1. the unit is installed in accordance with instructions (see fig. 1).
2. sound attenuators are installed and that the duct system is correctly connected to the
unit.
3. there is no noise from the unit or from diffusers and louvers.
4. Outdoor air intake and discharge is installed so that short circuit of the air streams is
avoided.
5. Outdoor air intake is positioned with sufficient distance to pollution source (kitchen
ventilator exhaust, central vacuum system exhaust or similar).
6. control panel and lamp signals function (see user and maintenance instructions,
"Operation").
7. Cookerhood (if installed) is operating (see User and maintenance instructions, "Kitchen
Extract").
8. The cookerhood is equipped with a damper leaving no opening in closed position (without
opening for basic ventilation).
Before starting the system:
Set required airflows (commissioned/calculated) in l/s (1 m
3
/h ~ 0,28 l/s) from the CD panel
(fig. 11) as described below.
(If the building's ventilation requirements are not calculated, 0,5 air changes per hour should
be used on Normal ventilation. Calculate by multiplying the building's living area by ceiling
height, and divide the result by 2.
Example: Living area = 150 m
2
and ceiling height = 2,4 m require setting on Normal ventilation
of 180 m
3
/h. I.e. apx. 50 l/s).
Also see Diffusers/Louvers - Setting of air volume.
 Loading...