3
INTRODUKTION INTRODUCTION
Villavent produziert seit 1980 Lüftungs- und Wärmerückgewinnungsanlagen. Diese Geräte sind
und werden in Tausenden von Gebäuden in Norwegen und im Ausland eingesetzt.
Alle daraus gewonnenen Erfahrungen haben wir in das System Villavent einfließen lassen.
Ebenso wurde die letzte Untersuchung über den Zusammenhang zwischen Innenraumklima und
dem menschlichen Wohlbefinden berücksichtigt. Große Beachtung gilt der Qualitätssicherung .
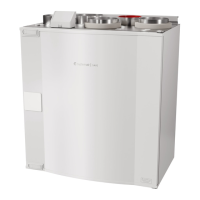
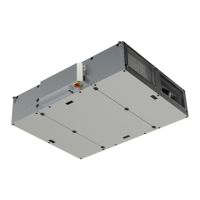
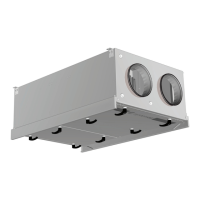
VR 400 DCV/B wurde auch für den Wohnungsbau entwickelt. Eine eingebaute Bypassführung
der Küchenabluft ermöglicht den Anschluß einer Dunstabzugshaube an das Lüftungssystem.
Abluft von der Haube wird am Wärmetauscher vorbei direkt über den Abluftventilator nach
außen geführt.
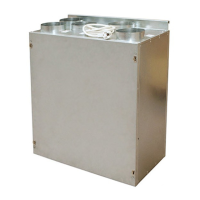
Achtung! VR 400 DCV/B kann mit dem Bedienteil rechts oder links geliefert werden, diese
Anleitung zeigt nur das Linksmodell.
Selbst wenn wir alle Erfahrungen bei der Entwicklung der Anlage haben einfließen lassen, so
hängt der letztliche Erfolg doch in großem Maße von der Installation und der Handhabung ab.
Darum sollten Sie diese Anleitung vor
der Montage aufmerksam durchlesen.
Villavent ventilation units with heat recovery have been manufactured since 1980. The units
are installed in thousands of buildings in Norway, with increasing numbers in the U.K.
Experience from these installations is incorporated in the Villavent-units. The latest results
from the studies of the indoor climate and it’s influence on our health are taken into
consideration, and great emphasis is given to quality and performance.
VR 400 DCV/B is also designed for installation in apartments, where duct runs, smells and
pollution from the cookerhood extract very often becomes a challenge. A built-in bypass
solution in the unit makes it possible to connect a cookerhood to the ventilation system.
Extract from the cooker is led directly through the extract fan, bypassing the exchanger block.
Note! VR 400 DCV/B is supplied as a right and a left hand model. This manual only
shows the left hand model.
However even after we have put all our experience in developing the unit, the final result
depends on the quality of the total installation and maintenance. The installation instructions
should therefore be read carefully before starting the installation.
INHALT INDE
STANDORTWAHL Seite 4
R
OHRSYSTEM Seite 6
Allgemeines Seite 7
Kanal-Verbindungen Seite 9
Schalldämpfer Seite 9
Flexible Rohre Seite 9
Kondensbildung/Wärmedämmung Seite 9
ZU- UND ABLUFTVENTILE Seite 11
Auslässe / Abluftventile und Dunsthaube Seite 11
Volumenstrom-Einstellung Seite 11
Luftzirkulation Seite 13
Kamine, Dunsthauben, Trockner etc. Seite 13
E
LEKTRISCHER ANSCHLUSS Seite 17
Das WRG-Gerät Seite 17
Die Dunstabzugshaube Seite 17
Fernbedienung Seite 17
Digitaleingänge Seite 17
A
LTERNATIV: MONTAGEANLEITUNG: WASSERFÜHRENDES HEIZ-
ODER KÜHLREGISTER Seite 18
A
UTOMATISCHE ENTEISUNGSFUNKTION Seite 19
Z
UBEHÖR Seite 19
I
NBETRIEBNAHME/GRUNDEINSTELLUNG Seite 22
Checkliste nach der Installation Seite 22
Einstellungen vor Inbetriebnahme Seite 22
Einstellen der Luftmenge Seite 23
S
CHALTPLAN Seite 24
I
NSTALLING THE UNIT
POSITIONING AND ACCESS page 4
D
UCT SYSTEM page 6
General page 7
Connecting the duct system page 9
Attenuation page 9
Flexible ducting page 9
Condensation-/heat insulation page 9
DIFFUSERS/LOUVERS page 11
Inlet diffusers/ Extract louvers page 11
Setting of air volume page 11
Air circulation page 13
Fireplace, kitchen ventilator etc. page 13
E
LECTRICAL CONNECTIONS page 17
The unit page 17
The cookerhood page 17
Separate controller page 17
Digital inlets page 17
A
LTERNATIVE: INSTALLING BATTERY FOR WATER-BORN HEATING/COOLING page 18
A
UTOMATIC DEFROST FUNCTION page 19
A
DDITIONAL EQUIPMENT page 19
C
OMMISSIONING page 22
Checklist after installation page 22
Before starting the system page 22
Commissioning of airflow page 23
WIRING DIAGRAMS page 24
 Loading...