26 Page
Installaon
Installaon Manual
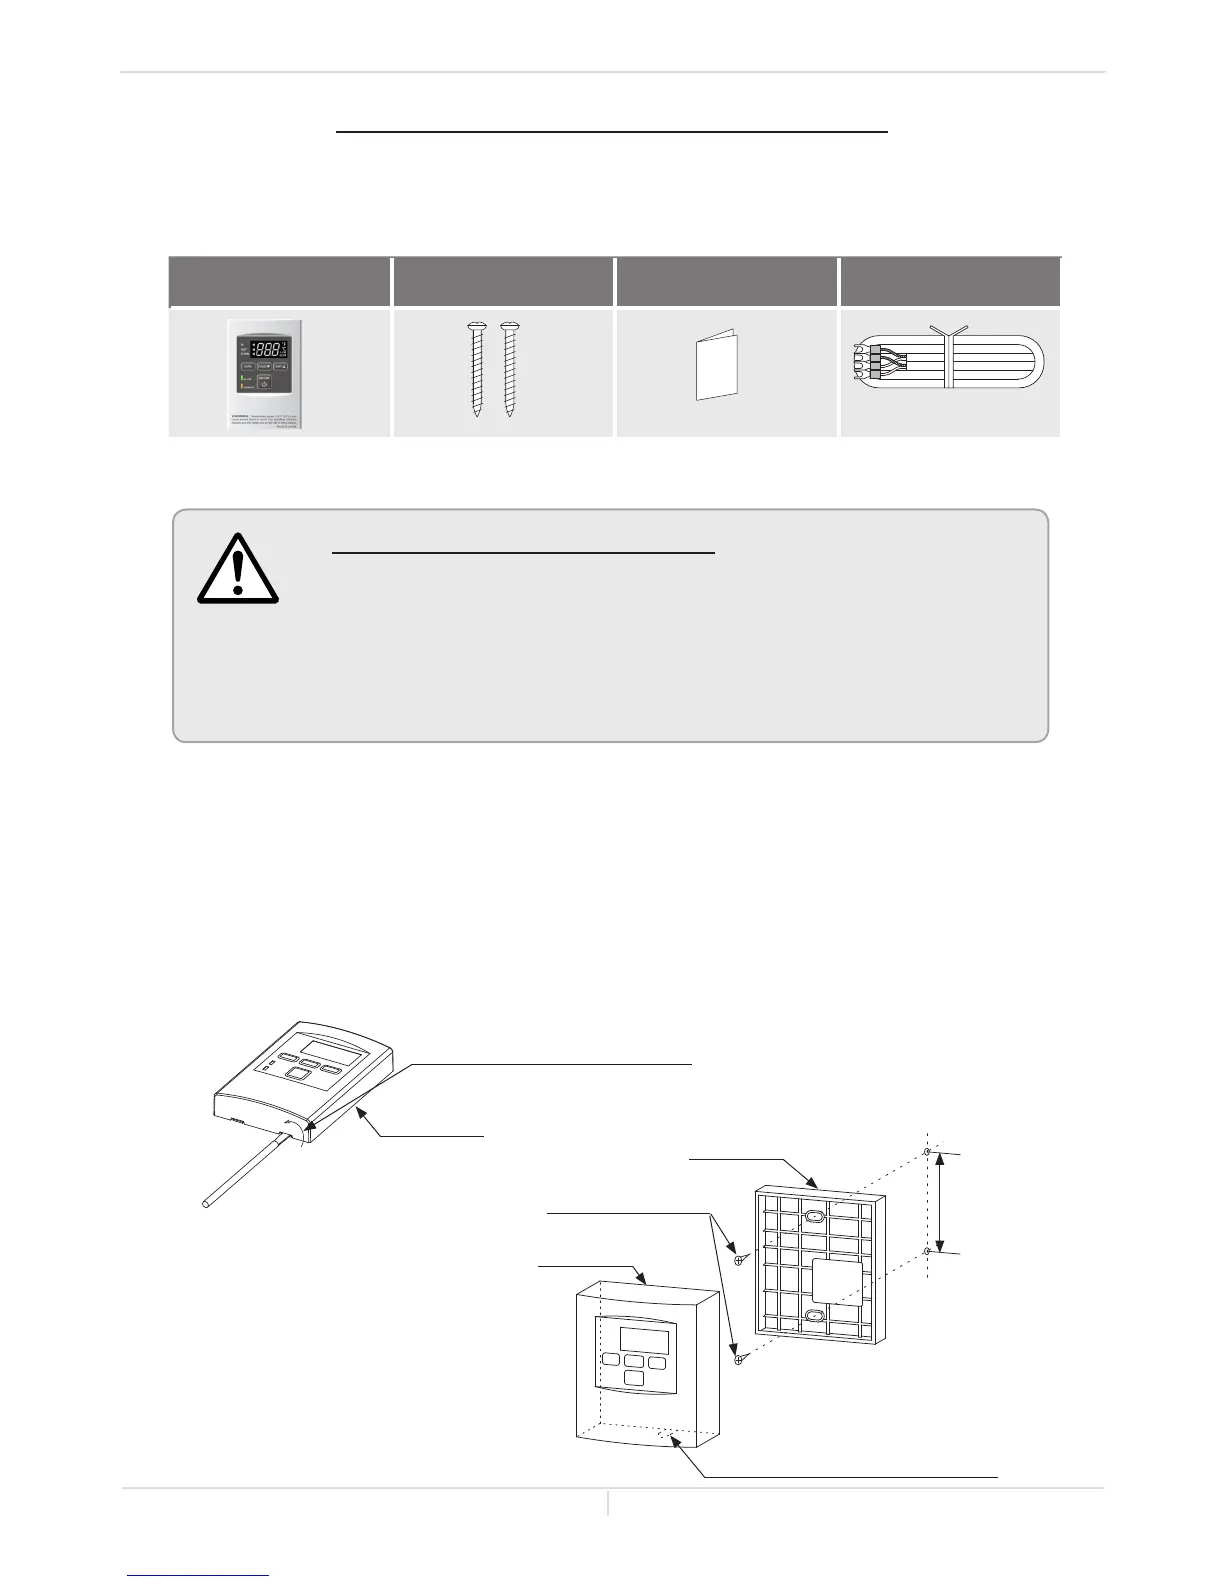
Fig.B
Back plate
3-1/4 inches
Attach the screws
Cut out the partition with pliers
Main body
Fig.A
Main body
Twist
Press and twist flat head
screwdriver against the cutout.
Only the outdoor model comes with the temperature remote controller, which is an
oponalaccessoryfortheindoormodel.
Check that these items below are included with the remote controller.
Temperature
RemoteController
Screws Manual RemoteControllerCable
Qty: 1 Qty: 2 Qty: 1
Qty: 1
TEMPERATURE REMOTE CONTROLLER
-INSTALLATION-
<MountingandWiringtheRemoteController>
1. Takeoffthe“Backplate” from the remote controller with a flat head screwdriver. (Fig.AandB)
2. Attachthe“Backplate” on the wall with the two provided screws. (Fig.B)
• ThisremotecontrollerisNOTwaterproof
Do not install in high temperature environments, steamy conditions (such as a
bathroom), outdoors, in direct sunlight, or within the reach of children.
Make sure the remote controller does not come into contact with water or oil.
• Do not place the remote control wiring close to other wires from other
products.
• Do not extend the remote control wiring more than 400 ft. (122 m).
CAUTION

 Loading...


