15
Model C707 Operating Procedures
USE EXTREME CAUTION when handling
the beater assembly. The scraper blades are very
sharp and may cause injury.
Step 2
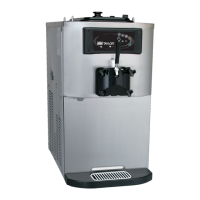
Install the beater assembly.
If the blades are in good condition, take one of the
scraper blades and slip it under the hook at the front
of the beater. Wrap the blade around the beater,
following the helix and pushing the blade down onto
the helix as you wrap. At the back end of the beater,
slip the blade under the hook.
Figure 9
Repeat this step for the second scraper blade.
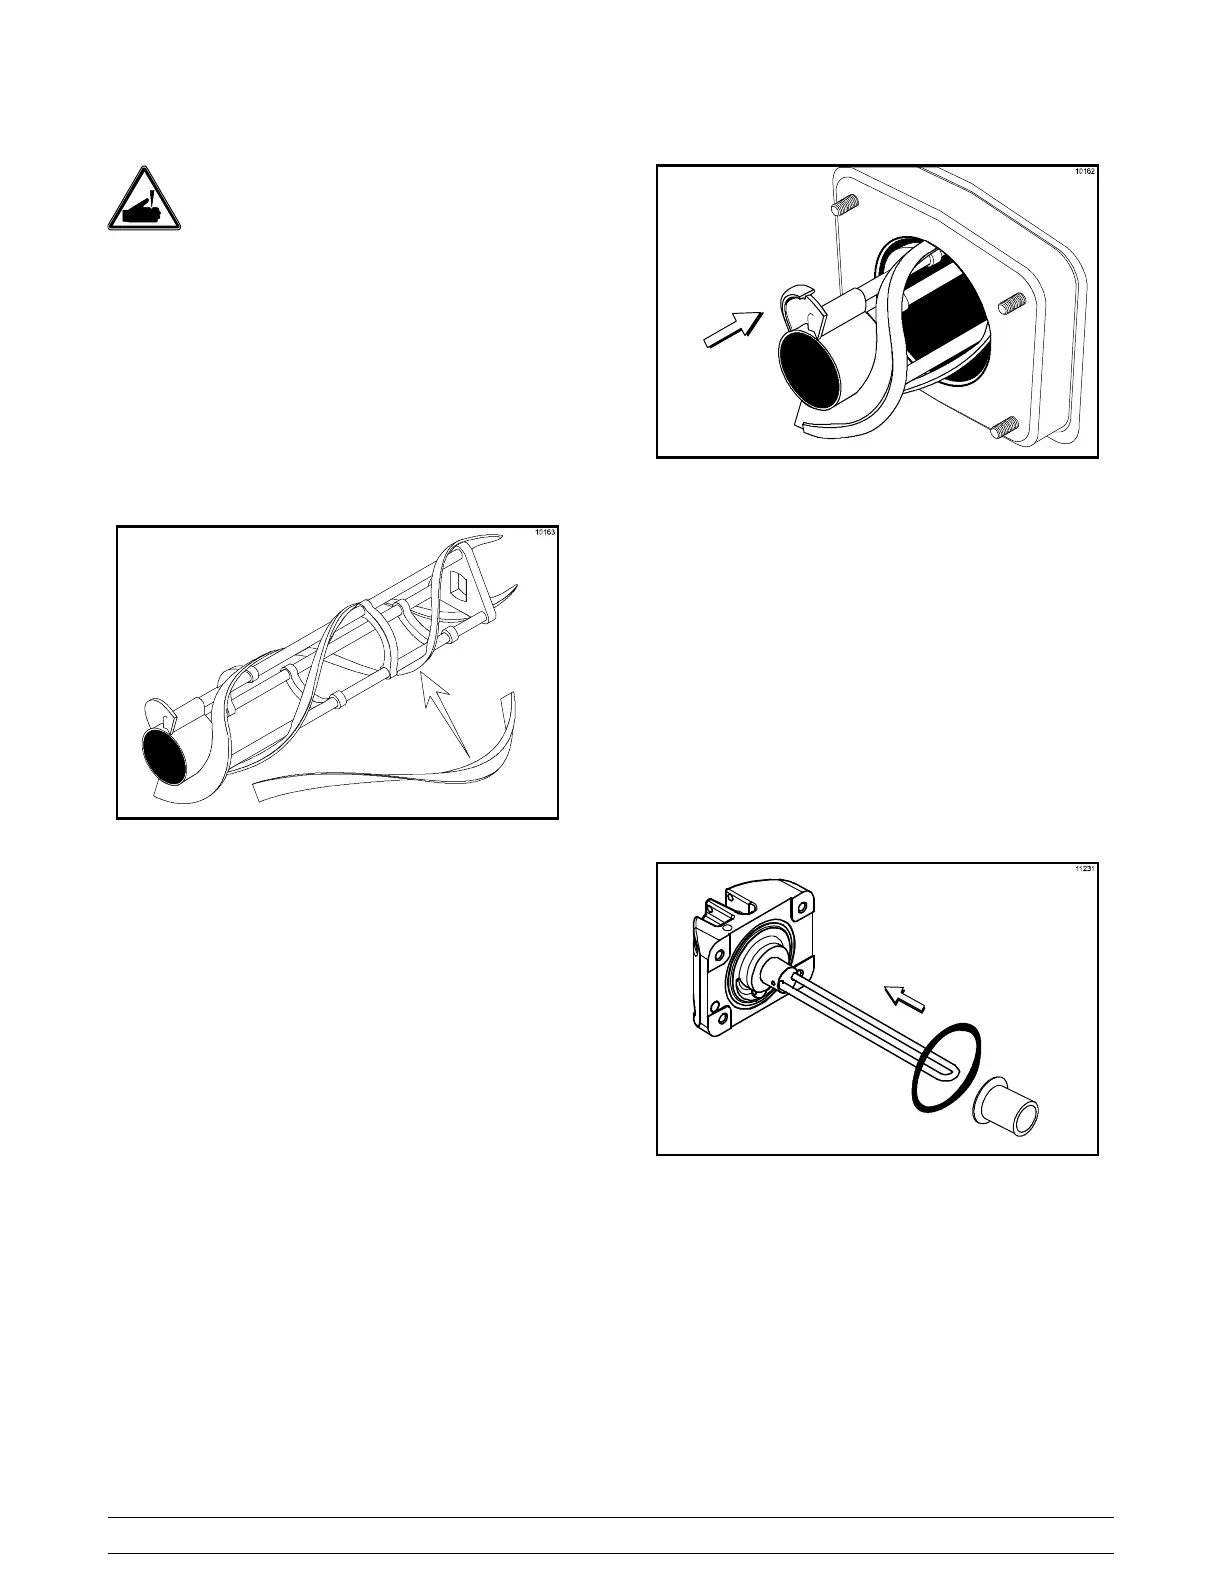
Holding the beater securely, slide the beater into the
freezing cylinder about one- third of the way in.
Looking into the freezing cylinder, align the hole at the
rear of the beater with the flats on the end of the drive
shaft.
Slide the beater the remainder of the way into the
freezing cylinder and over the end of the drive shaft.
The beater should fit snugly but not so tightly that the
beater cannot be turned slightly to engage the drive
shaft.
Figure 10
Make sure the beater assembly is in position over the
drive shaft. Turn the beater slightly to be certain that
the beater is properly seated. When in position, the
beater will not protrude beyond the front of the freezing
cylinder.
Step 3
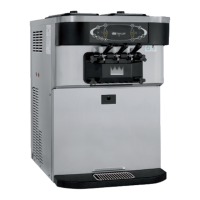
Assemble the freezer door. Place the large rubber
gasket into the groove on the back side of the freezer
door.
Slide the white plastic front bearing over the baffle rod
onto the bearing hub making certain that the flanged
end of the bearing is resting against the freezer door.
Do not lubricate the gasket or the front bearing.
Figure 11