EasyManua.ls Logo

Taylor C860 User Manual

Taylor C860
82 pages
To Next Page IconTo Next Page
Page #1 background imageLoading...
Page #1 background image
This manual is for the exclusive use of licensees and employees of McDonald's Corporation.
©2006 McDonald's Corporation November, 2006 (Original Publication) Printed in
All Rights Reserved (Updated July, 2019 ) The United States of America
EM SD11
Warranty
Warranty information is contained in this Equipment Manual. Refer to the warranty information listed in the Limited Warranty on
Equipment and Limited Warranty on Parts sections and to the warranty classifications listed in the Parts Identification/Function
section when service is performed on your machine.
It is recommended that the operator take the necessary time to carefully read through the complete warranty
information.Thoroughly understand your warranty protection before you begin operation.
For any questions pertaining to the Taylor Warranty, please contact Taylor Company, Rockton, Illinois 61072.
Clamshell Grill
Taylor Models C850, C852, C854, C856, C858, & C860
This equipment chapter is to be inserted
in the appropriate section of the
Equipment Manual.
Manufactured exclusively for
McDonald's
®
By
Taylor Company
®
750 N. Blackhawk Blvd.
Rockton, IL 61072
McDonald's® Hotline:
(877-435-7623)
service@taylor-company.com
TABLE OF CONTENTS
Warranty ......................................................................................................................................................... 3
Introduction ..................................................................................................................................................... 3
Safety .............................................................................................................................................................. 3
Parts Identification/Function and Exploded View ............................................................................................ 6
Important to The Operator ............................................................................................................................ 27
Equipment Setup and Close Procedures ...................................................................................................... 31
Menu Screens ............................................................................................................................................... 35
Sausage, Circular Bacon and Patty Placement Guide ................................................................................. 47
Standby Procedures ..................................................................................................................................... 49
Cleaning After Each Run of Product (Using Lower Release Sheets) ........................................................... 49
Cleaning After Each Run of Product (Not Using Lower Release Sheets) ..................................................... 50
Daily Cleaning Procedures (Using Lower Release Sheets) ......................................................................... 52
Cleaning Procedure-24 Hour Stores (with Lower Release Sheets) .............................................................. 60
Daily Cleaning Procedures (without Lower Release Sheets) ........................................................................ 60
Cleaning Procedure-24 Hour Stores (without Lower Release Sheets) ......................................................... 67
Quarterly Recovery Mode Procedures .......................................................................................................... 67
Troubleshooting Guide .................................................................................................................................. 73
Equipment Troubleshooting .......................................................................................................................... 74
Product Troubleshooting ............................................................................................................................... 75
Limited Warranty on Equipment .................................................................................................................... 76
Limited Warranty on Parts ............................................................................................................................ 78
Ordering/Service Information ........................................................................................................................ 81

Table of Contents

Question and Answer IconNeed help?

Do you have a question about the Taylor C860 and is the answer not in the manual?

Taylor C860 Specifications

General IconGeneral
ModelC860
BrandTaylor
TypeSoft Serve Freezer
Power SupplyElectric
MaterialStainless Steel
RefrigerantR404A
Mix Hopper Size6.5 qt
Phase1

Summary

SAFETY

PARTS IDENTIFICATION AND EXPLODED VIEWS

C850 Exploded View

Detailed breakdown and identification of parts for the C850 model.

C850/C852 Right Side View

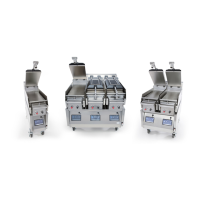
Visual representation of the right side of C850/C852 models.

C850/C852 Left Side View

Visual representation of the left side of C850/C852 models.

C854 Exploded View

Detailed breakdown and identification of parts for the C854 model.

C856 Exploded View

Detailed breakdown and identification of parts for the C856 model.

C858 Exploded View

Detailed breakdown and identification of parts for the C858 model.

C860 Exploded View

Detailed breakdown and identification of parts for the C860 model.

ACCESSORIES

IMPORTANT TO THE OPERATOR

Crew Menu Touchscreen

Interface overview for the Crew Menu on the touchscreen.

Manager's Menu Touchscreen

Interface overview for the Manager's Menu on the touchscreen.

Home Menu Touchscreen

Interface overview for the Home Menu on the touchscreen.

OTHER SYMBOL DEFINITIONS

EQUIPMENT SETUP AND CLOSE PROCEDURES

Installing Upper Platen Release Sheets

Step-by-step guide for installing release sheets on the upper platen.

Changing Release Sheets

Procedures and conditions for changing release sheets.

Startup Grill

Steps to safely start the grill before operation.

INSTALLING LOWER RELEASE SHEETS

OPERATOR CONTROLS AND SETTINGS

Manager's Menu-Passcode Access

Steps to access the Manager's Menu using a passcode.

Auto Calibrate Key

Instructions for initiating and performing auto calibration.

Date/Time Key

How to enter and set the date and time on the grill.

Scale Key

Selecting the temperature scale (Celsius or Fahrenheit).

Volume Key

Adjusting the volume setting for the grill.

Brightness Key

Adjusting the screen brightness settings.

Language Key

Selecting the desired language for the grill interface.

Font Limits Key

Changing the size of the screen font.

Seconds Only Key

Adjusting the countdown timer display.

Firmware Manager Key

Accessing the configuration screen for firmware management.

Grill Mode Key

Selecting between manual and automatic grill modes.

COOKING PRODUCT

Recipe Management

Procedures for managing and editing product recipes.

CREATE RECIPE

Recipe Configuration Details

Detailed settings and parameters for configuring grill recipes.

Recipe Information

Information fields for defining product recipes and cooking parameters.

SELECT RECIPE

Create Recipe

Process for naming and creating a new recipe.

SURFACE TEMPERATURE CALIBRATION

ADJUST COOK TIMES

PATTY PLACEMENT GUIDES

Laying Pattern

Instructions on how to lay patties on the grill.

Fresh Product Patty Placement Guide

Guidelines for placing fresh product patties on the grill.

PULLING PATTERN

STANDBY PROCEDURES

CLEANING AFTER EACH RUN OF PRODUCT (USING LOWER RELEASE SHEETS)

Squeegee the lower release sheet

How to squeegee the lower release sheet during cleaning.

Squeegee the upper release sheet

How to squeegee the upper release sheet during cleaning.

CLEANING AFTER EACH RUN OF PRODUCT (NOT USING LOWER RELEASE SHEETS)

DISPLAY THE CURRENT STATUS

WIPE DOWN MODE

DAILY CLEANING PROCEDURES (USING LOWER RELEASE SHEETS)

DAILY CLEANING PROCEDURES (WITHOUT LOWER RELEASE SHEETS)

Rinsing and Storing Release Sheets

Rinse the upper and lower release sheets

Rinsing release sheets after cleaning.

Remove the release sheet locking clips

Removing and cleaning release sheet clips.

Place all release sheets flat

Storing release sheets correctly after cleaning.

Cleaning Pad and Bottle Preparation

Firmly attach the cleaning pad

Securing the cleaning pad to the holder.

Using the Kay® grill cleaning pad holder

Distributing grill cleaner with the pad holder.

Remove the cap from the dosing bottle

Preparing the grill cleaner dosing bottle.

Grill Plate Scrubbing

Scrub the upper and lower plate

Scrubbing grill plates during cleaning.

Scrub the upper platen with the Kay® double-sided grill brush

Using a brush for stubborn grime on the upper platen.

Wipe the lower plate

Wiping the lower plate after scrubbing.

Grease Can and Guard Handling

Remove and empty the grease cans

Handling grease cans during cleaning.

Remove the rear grease guard

Detaching the rear grease guard for cleaning.

Continue cleaning through the Clean mode

Following Clean mode until lower plate rises.

Grill Surface Wiping and Reinstallation

With the grill pulled out, wipe down the front and back areas

Wiping grill surfaces with the universal pad.

Rinse the upper platens and lower plates

Rinsing grill components after cleaning.

Reinstall the upper release sheets

Reinstalling upper release sheets before use.

Release Sheet Bubble Removal

Squeegee the air bubbles and wrinkles

Removing air bubbles and wrinkles from release sheets.

CLEANING PROCEDURE-24 HOUR STORES (WITHOUT LOWER RELEASE SHEETS)

QUARTERLY RECOVERY MODE PROCEDURES

Ensure Recovery mode programming

Verifying Recovery mode setup before cleaning.

Press the Recovery key

Accessing the Recovery mode interface.

The Recovery mode is on

Confirmation that Recovery mode is active.

Press the STANDBY button

Initiating the recovery process using the standby button.

Release Sheet Wiping and Rinsing

Wipe the exposed surface of the release sheets

Wiping the surface of release sheets with a cloth.

Rinse the upper release sheets

Rinsing upper release sheets after cleaning.

Upper Platen Cleaning

Remove the release sheet locking clips

Removing and cleaning release sheet locking clips.

Spray the upper platens with grill cleaner

Applying grill cleaner to upper platens.

Platen Surface Cleaner Application

Firmly attach the cleaning pad

Securing the cleaning pad to the holder.

Apply the grill cleaner to the platen surfaces

Applying cleaner to platen surfaces.

Using the Kay® grill cleaning pad holder

Distributing grill cleaner with the pad holder.

Plate Scrubbing and Grease Can Handling

Scrub the upper and lower plate

Scrubbing grill plates during cleaning.

Scrub the upper platen with the Kay® double-sided grill brush

Using a brush for stubborn grime on the upper platen.

Remove and empty the grease cans

Handling grease cans during cleaning.

Tool Pad Usage and Grill Surface Wiping

Remove the multi-use tool pad

Removing and attaching tool pads for cleaning.

With the grill pulled out, wipe down the front and back areas

Wiping grill surfaces with the universal pad.

Reinstall the upper release sheets

Reinstalling upper release sheets before use.

Grease Pan and Guard Reinstallation

Wash and rinse the grease pans

Washing and rinsing grease pans.

Reinstall the grease pans

Reinstalling grease pans after cleaning.

Reinstall the rear grease guard

Reinstalling the rear grease guard.

CLEANING PROCEDURE-24 HOUR STORES (WITHOUT LOWER RELEASE SHEETS)

QUARTERLY RECOVERY MODE PROCEDURES

Ensure Recovery mode programming

Verifying Recovery mode setup before cleaning.

Press the Recovery key

Accessing the Recovery mode interface.

The Recovery mode is on

Confirmation that Recovery mode is active.

Press the STANDBY button

Initiating the recovery process using the standby button.

Recovery Cleaning Steps

Put on heat-resistant gloves

Wearing protective gloves for cleaning.

Remove and empty the grease cans

Handling grease cans during recovery cleaning.

Remove all of the clips, bars, and release sheets

Removing components before recovery cleaning.

Carbon Buildup Removal and Cleaner Application

Scrape off as much carbon buildup as possible

Removing carbon buildup with a scraper.

Apply sufficient Kay® QSR heat activated grill & toaster cleaner

Applying cleaning solution to grill surfaces.

Platen Soaking and Scrubbing

Lower both of the upper platens

Lowering upper platens onto the coated surface.

Scrub the lower cook surface

Scrubbing the lower cook surface with cleaning pad.

Grease Trough and Release Sheet Reinstallation

Remove and empty the grease trough

Emptying and cleaning the grease trough.

Reinstall the upper and lower release sheets

Reinstalling release sheets after cleaning.

TROUBLESHOOTING GUIDE

EQUIPMENT TROUBLESHOOTING

PRODUCT TROUBLESHOOTING

LIMITED WARRANTY ON EQUIPMENT

LIMITED WARRANTY ON PARTS

ORDERING/SERVICE INFORMATION

Parts Warranty

Information regarding parts warranty coverage.

Release Sheets

Part numbers for ordering upper and lower release sheets.

Related product manuals