6
3. Quick operation guide
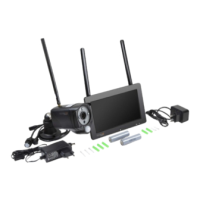
3.1 Start up the TX-128 Set
→ Open the battery compartment and put in the rechargeable batteries (2x
type 18650). Close the battery compartment.
→ Put a MicroSD card (max. 128GB) into the MicroSD card slot on the right
side of the monitor. (Necessary for recordings; format the MicroSD card after
first start up)
→ Connect the monitor (5V/2.5A) and the camera (12V/1A) with the power
adapter to a socket outlet. Both devices start automatically.
→ Choose the language by navigating with the top and bottom arrow on the
monitor. Click on done.
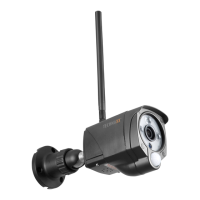
→ The camera included to the set is paired with the monitor from the factory.
Note: Every further camera you need to pair once.
→ One touch anywhere on the touch screen to show the menu bar on the
bottom.
→ Select the house symbol to open the main menu
→ Choose System Setup to set the Wireless Internet connection.
→ Click on Wireless Internet and enable it.
→ After that choose Hotspot List, wait for a few seconds until your WiFi router
name is shown. You can navigate through the pages by clicking on the arrows
left and right.
Note: TX-128 only supports 2.4GHz WiFi.
→ Click on your Wifi router name. Automatically a new interface shows up.
Enter your WiFi network key. When you are finished, click on Enter and then
on connect. (The WiFi Symbol on the top should change from having a red X
over to a yellow exclamation mark to the normal WiFi symbol.
→ The monitor is now connected to your WiFi router.
→ Next Step. Choose Record Setup from the main menu.
→ Choose storage manage and click on format. All saved data on the
MicroSD card are erased. Be sure doing it.
Now you should be ready for use.