EasyManua.ls Logo

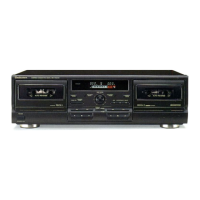
Technics RS-TR474

Technics RS-TR474
50 pages
To Next Page IconTo Next Page
To Previous Page IconTo Previous Page
Loading...
Procedure
1-2-5-6
Headphones
jack
P.C.B.
e
Remove
the
headphones
jack
P.C.B.
in
the
direction
of
arrow.
mete
Removal
of
the
rear
panel
Procedure
1-3-10
Rear
panel
1.
Remove
the
6
screws(
@~
@).
For
[P,
PC]
areas.
2,
Remove
the
5
screws(
@
~
@).
For
[E,
EB,
EG]
areas.
3.
Remove
the
rear
panel
in
the
direction
of
arrow.
W@
The
difference
types
of
capstan
motor
terminal
are
used
for
the
units.
When
assembling/reasembling,
refer
to
the
Fig.
1
and
Fig.
2.
3
Notice
for
mounting
the
motor
P.C.B.
1.
Cut
the
bent
terminal
of
capstan
motor
with
a
nipper.
2.
Solder
while
pressing
the
part
with
a
©
screwdriver
or
an
equivalent
tool.
Capstan
motor
terminal
Cut
the
terminals
Cf
5
)
indicated
by
hatching.
©
screwdriver
Cut
the
terminal
indicated
by
hatching.
Procedure
1-2-5-6
Power
switch
P.C.B.
1.
Remove
the
1
screw(
@).
2.
Tilt
the
power
switch
P.C.B.
in
the
direction
of
arrow@,
and
then
remove
it
in
the
direction
of
arrow®.
Removal
of
the
motor
P.C.B.
(DECK
1,
DECK
2)
Procedure
1-2-5->11
Reel
motor
terminals
Capstan
motor
terminals
Motor
P.C.B.
1.
Remove
the
2
screws(@,.
@).
2.
Unsolder
the
reel
motor
and
capstan
motor
terminals.
3.
Remove
the
1
claw
and
have
the
P.C.B.
rise
a
little.
Terminals
of
capstan
motor
Soldering
iron
Fig.
1
4,
Putting
a
soldering
iron
securely
on
the
capstan
motor
terminal
and
raising
the
motor
P.C.B.
in
the
direction
of
arrow,
unsolder
connected
part.
Note)
When
removing
the
motor
P.C.B.,pull
out
the
P.C.B.
severely
because
the
connectors(CN1B,
CN2B,
CS971,
CS971A)
are
connected.

Other manuals for Technics RS-TR474

Related product manuals