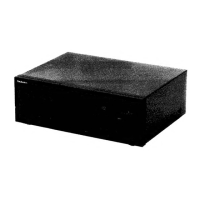
RS-X101
@
CONTENTS
Page
Page
*
Location
of
Controls
.......-.:-:ccccseecsesessesasseseseees
2,3
¢Terminal
Guide
of
IC’s,
©
HOW
tO
Connection............ceeeseeeseeeeeeeeceeseseeeeeeeeeeeees
4
Transistors
and
Diodes.
............:cccssesseeers
25
©
ACCOSSOMOS
i.
oi.secssccessvensQcesscedsealvaniesascigecseiceesssivenveetes
4
©
BloCK
Diagram.
.........csecssccessctecssssccnsesssssssenseces
26,
27
Convenient
Features
for
Recording..............ess0
5
Wiring
Connection
Diagram
..............ccecseessesees
28
©Timer
Recording/Playback
............cccscscsssessessssesseens
5
¢Replacement
Parts
List
(Cabinet
Parts)
...............
29
¢
Disassembly
Instructions.............sceeeeseeeeneeee
6~8
Cabinet
Parts
Location...
esessseeseeseeees
30,
31
eInformation
on
Power
Supply
Jig
.........:scccssceeeeees
9
Mechanical
Parts
Location
(DECK
2)..............
32,
33
Measurement
and
Adjustment
Methodes.....
10~12
Replacement
Parts
List
Terminal
Function
of
1C’S...........cccceeeeseseeeeeee
13,
14
(Mechanical
Parts).............cccccecsccsesseseees
34,
35
©
Printed
Circuit
Boards
.0........cccccsscssssessseceereeee
15~18
Mechanical
Parts
Location
(DECK
1)..............
36,
37
*Schematic
Diagram.
...........cccccsssseeseesereseseees
19~25
Replacement
Parts
List
(Electrical
Parts).....
38,
39
Resistors
&
Capacitors.........c.ccccesescsesrees
40,
41
Mi
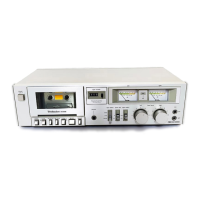
LOCATION
OF
CONTROLS
1
2
3
4;
15
Controls
common
to
both
tape
decks
Synchro-start
button
(SYNCHRO
START)
This
button
can
be
used
to
start
a
tape-to-tape
recording,
simultaneously
starting
tape
deck
1
(the
playback
deck)
and
[1]
Power
on/standby
_—
switch
tape
deck
2
(the
recording
deck).
(POWER)...For
(EG)
area
only.
DECK
ON/OFF
switch
(DECK)...For
others.
Edit-recording
tape-speed
buttons/indicators
(TAPE
EDIT
SPEED)
[2]
Reverse-mode
selector
(REVERSE
MODE)
These
buttons
can
be
used
to
select
the
recording
speed
This
selector
can
be
used
for
selection
of
the
reverse
mode
when
a
tape-to-tape
recording
is
made.
(for
either
playback
or
recording).
[3]
Tape
counter
(DECK
2
COUNTER)
[9]
Dolby
noise-reduction
button/indicator
Indicates
the
amount
of
tape
movement.
(DOLBY
NR)
. ’
This
button
is
used
to
reduce
the
“hissing”
noise
heard
from
[4]
Tape
counter
reset
button
(RESET)
the
tape.
This
button
can
be
used
to
reset
the
tape
counter
indication
to
“000”.
[5]
Input
level
meter
(PEAK
LEVEL)
During
playback,
this
meter
indicates
the
level
of
the
recorded
sound
source.
During
recording,
it
indicates
the
level
being
recorded,
adjusted
by
the
recording-level
controls.
[6]
Recording-level
control
(REC
LEVEL)
This
control
can
be
used
to
regulate
the
recording
level
of
tape
deck
2.