EasyManua.ls Logo

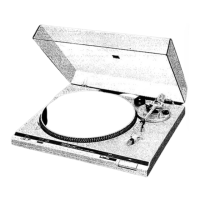
Technics SL-B20

Technics SL-B20
17 pages
To Next Page IconTo Next Page
To Previous Page IconTo Previous Page
Loading...
Placement
Place
the
unit
in
a
stable
and
horizontal
position
where
there
is
little
or
no
vibration.
Place
the
unit
away
from
the
speakers
so
that
it
will
be
subject
to
as
little
direct
sound
radiation
as
possible.
Do
not
place
the
unit
where
it
will
be
exposed
to
direct
sunlight,
dust,
moisture
or
heat.
Place
it
in
a
well
ventilated
location.
N=
ob
@
N
Put
a
record
on
the
turntable
mat.
.
If
the
cartridge
has
a
detachable
stylus
protector,
remove
it.
.
Release
the
arm
clamp.
.
Set
the
speed
selector
to
the
correct
speed.
(Fig.
8)
.
Set
the
cueing
control
to
the
‘¥”’
position.
(Fig.
9)
.
Move
the
tonearm
over
the
record.
The
strobe-illuminator/pilot
lamp
will
light
up
and
the
platter
will
rotate.
Set
the
cueing
control
to
the
‘“‘W”’
position.
(Fig.
10)
The
tonearm
will
descend
and
play
will
begin.
At
the
end
of
the
record,
the
tonearm
will
automatically
return
to
the
arm
rest
and
the
turntable
will
stop.
Stopping
the
turntable
Push
the
stop:switch.
(Fig.
11)
The
tonearm
will
return
to
the
arm
rest
and
the
turntable
will
stop.
m@
Temporarily
interrupting
play
Set
the
cueing
control
to
the
““W”
position.
(Refer
to
Fig.
9.)
This
will
make
the
tonearm
rise
off
the
record.
B
Playing
45-rpm
records
having
large
center
holes
Put
the
45-rom
adaptor
over
the
center
spindle.
(Fig.
12)
Set
the
speed
selector
to
the
“45”
position.
(Fig.
13)
@
if
the
unit
is
not
to
be
used
for
some
time
Secure
the
tonearm
with
the
arm
clamp.
If
the
cartridge
has
a
detachable
stylus
protector,
put
it
back
on
after
use.
Close
the
dust
cover.
Adjustments
8
Arm-lift
height
adjustment
The
arm-lift-height
(distance
between
the
stylus
tip
and
the
record
surface
when
the
cueing
control
is
at
the
“¥”
position)
has
been
adjusted
at
the
factory
to
approximately
5
to
8
mm
(3/16’'~5/16’’).
(Fig.
14)
If
the
clearance
is
too
narrow
or
too
wide,
turn
the
adjust-
ment
screw
clockwise
or
counterclockwise.
(Fig.
15)
Clockwise
rotation
—distance
between
the
record
and
stylus
tip
is
decreased.
Counterclockwise
rotation
—distance
between
the
record
and
stylus
tip
is
increased.
m@
Adjustment
of
automatic
return
position
(Fig.
16)
(Remove
the
rubber
cap.)
1.
Put
the
stylus
protector
on
the
cartridge.
2.
Move
the
tonearm
toward
the
center
of
the
record.
The
auto-return
adjustment
screw
will
appear.
If
the
tonearm
tends
to
return
to
the
arm
rest
before
the
play
has
finished,
—turn
counterclockwise.
If
the
tonearm
fails
to
return
after
the
final
groove,
—turn
clockwise.
@
Speed
adjustment
(pitch
control)
(Fig.
17)
There
are
strobe-lines
cut
on
this
turntable
platter
to
indicate
correct
rotational
speed.
If
the
strobe-line
appears
to
be
moving
as
the
turntable
rotates,
adjust
while
playing
a
record.
1.
Set
the
speed
selector
to
the
speed
to
be
adjusted.
2.
Watch
the
dot
pattern
on
the
side
of
the
platter.
Turn
the
pitch
control
one
way
or
the
other
until
the
dots
appear
to
stand
still.
This
is
the
correct
speed.
3.
Turning
the
pitch
control
in
the
‘+’?
direction
increases
the
speed.
4,
Turning
the
pitch
control
in
the
‘““—”
direction
decreases
the
speed.
Note:
Strobe
dot
pattern
This
unit's
strobe
illuminator
operates
at
the
AC
line
frequency
which
generally
has
a
0.2%
fluctuation.
This
fluctuation,
when
present,
may
make
the
strobe
pattern
appear
to
change.
However,
actual
turntable
speed
does
not
change,
because
the
DC
motor
is
not
affected
by
AC
power
line
frequency.

Related product manuals