EasyManua.ls Logo

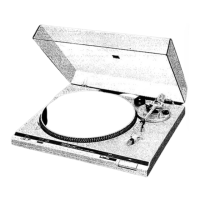
Technics SL-B20

Technics SL-B20
17 pages
To Next Page IconTo Next Page
To Previous Page IconTo Previous Page
Loading...
Thank
you
for
choosing
the
SL-B20.
For
optimum
performance
and
safety,
please
read
these
instructions
carefully.
Before
use
|
Caution:
@Do
not
plug
in
the
AC
power
plug
before
completing
assembly.
@
Attach
the
dust
cover
last
to
make
assembly
and
adjustments
easier.
@These
instructions
apply
to
units
of
different
color.
@
Checklist
of
parts
Turntable
unit
Turntable
platter
00.2.0...
c
cence
eee
eee
eee
1
Turntable
mat
0...
ccc
eee
eee
ree
es
1
Dust
COVEr
oo...
cece
cece
tenet
net
ene
eeee
1
A5-rpm
adaptor
1.6...
cece
eee
ee
cee
eee
ene
ees
1
Stereo
phono
cable
...
0.66.6...
eee
eee
ete
nee
1
Ground
wire
(GND)
...........
cee
eee
ee
eee
e
ees
1
AC
power
Gord...
..
6...
ee
cee
eee
eee
ees
2's
Ggtybubs
tne
artca
tecSinces
1
m@
Remove
tape
on
side
of
cartridge.
(This
prevents
the
stylus
assembly
from
shaking
loose
during
shipment.)
(Fig.
1)
Use
the
stereo
phono
cable
to
connect
the
turntable
to
your
amp
or
receiver.
Be
sure
that
the
white
plugs
are
connected
to
the
left
channel
jacks
and
the
red
plugs
are
connected
to
the
right
channel
jacks.
Plug
the
ground
wire
into
the
turntable’s
ground
jack
and
connect
the
wire’s
spade
plug
to
the
amp
or
receiver's
ground
(GND)
screw.
Regarding
the
AC
cord,
plug
the
female
end
into
the
turntable
AC
jack
and
plug
the
other
end
into
an
AC
wall
socket.
(Fig.
2)
Note
that
hum
may
occur
if
you
neglect
to
connect
the
ground
wire.
m@
Plug
in
the
AC
power
plug
Plug
the
AC
power
plug
into
an
AC
wall
socket.
Caution:
Never
plug
into
a
DC
socket.
Make
sure
the
turntable’s
AC
line-voltage
selector
is
matched
to
your
local
voltage
before
plugging
in
the
AC
power
plug.
If
the
pre-selected
voltage
is
different
from
your
local
voltage,
turn
the
AC
line-voltage
selector
with
a
screw-
driver
so
that
it
corresponds
to
your
local
voltage.
The
AC
line-voltage
selector
is
under
the
platter.
(Fig.
2)
&
Installing
the
turntable
platter
1.
Place
the
platter
on
the
center
spindle.
2.
Holding
the
belt
by
the
ribbon,
fit
the
belt
over
the
capstan.
Then
remove
the
ribbon.
(Fig.
3)
3.
Place
the
turntable
mat
on
the
platter.
Note:
After
placing
the
mat
on
the
platter,
turn
the
platier
clockwise
about
ten
full
rotations
by
hand.
This
is
necessary
to
assure
correct
operation
of
the
automatic
mechanism.
About
stylus
pressure
(tracking
force)
The
tracking
force
is
already
set
to
1.25
g
so
no
adjustment
is
necessary.
(Fig.
4)
When
records
with
a
high
modulation
level
are
played
or
when
the
turntable
is
used
where
the
temperature
is
low
or
in
a
location
subject
to
vibrations,
sound
may
be
distorted
and
the
stylus
may
skip.
If
this
occurs,
rotate
the
stylus-pressure
adjustment
knob
at
the
rear
to
the
‘4
5’
setting.
(Fig.
5)
If
the
knob
is
set
to
‘'1.0”’
the
tracking
force
will
be
lighter.
@
Adjusting
the
anti-skating
control
(Fig.
6)
This
is
set
to
the
same
level
as
the
tracking
force
(1.25);
there
is
no
need
to
adjust
it
yourself.
However,
if
the
index
mark
()
is
off
center,
reset
it
to
the
proper
position.
If
the
tracking
force
is
set
to
1.5
g,
the
anti-skating
control
also
must
be
set
to
‘‘1.5”’.
@
Attaching
the
dust
cover
(Fig.
7)
Hold
both
sides
of
the
cover
and
lower
it
into
the
hinge
slots.
To
remove
the
cover,
open
it
and
pull
upward.
Note:
Opening
or
closing
the
cover
during
play
may
cause
vibrations
and
groove
skipping.
if
you
must
open
the
cover
during
play,
do
so
very
gently.

Related product manuals