STEP
1
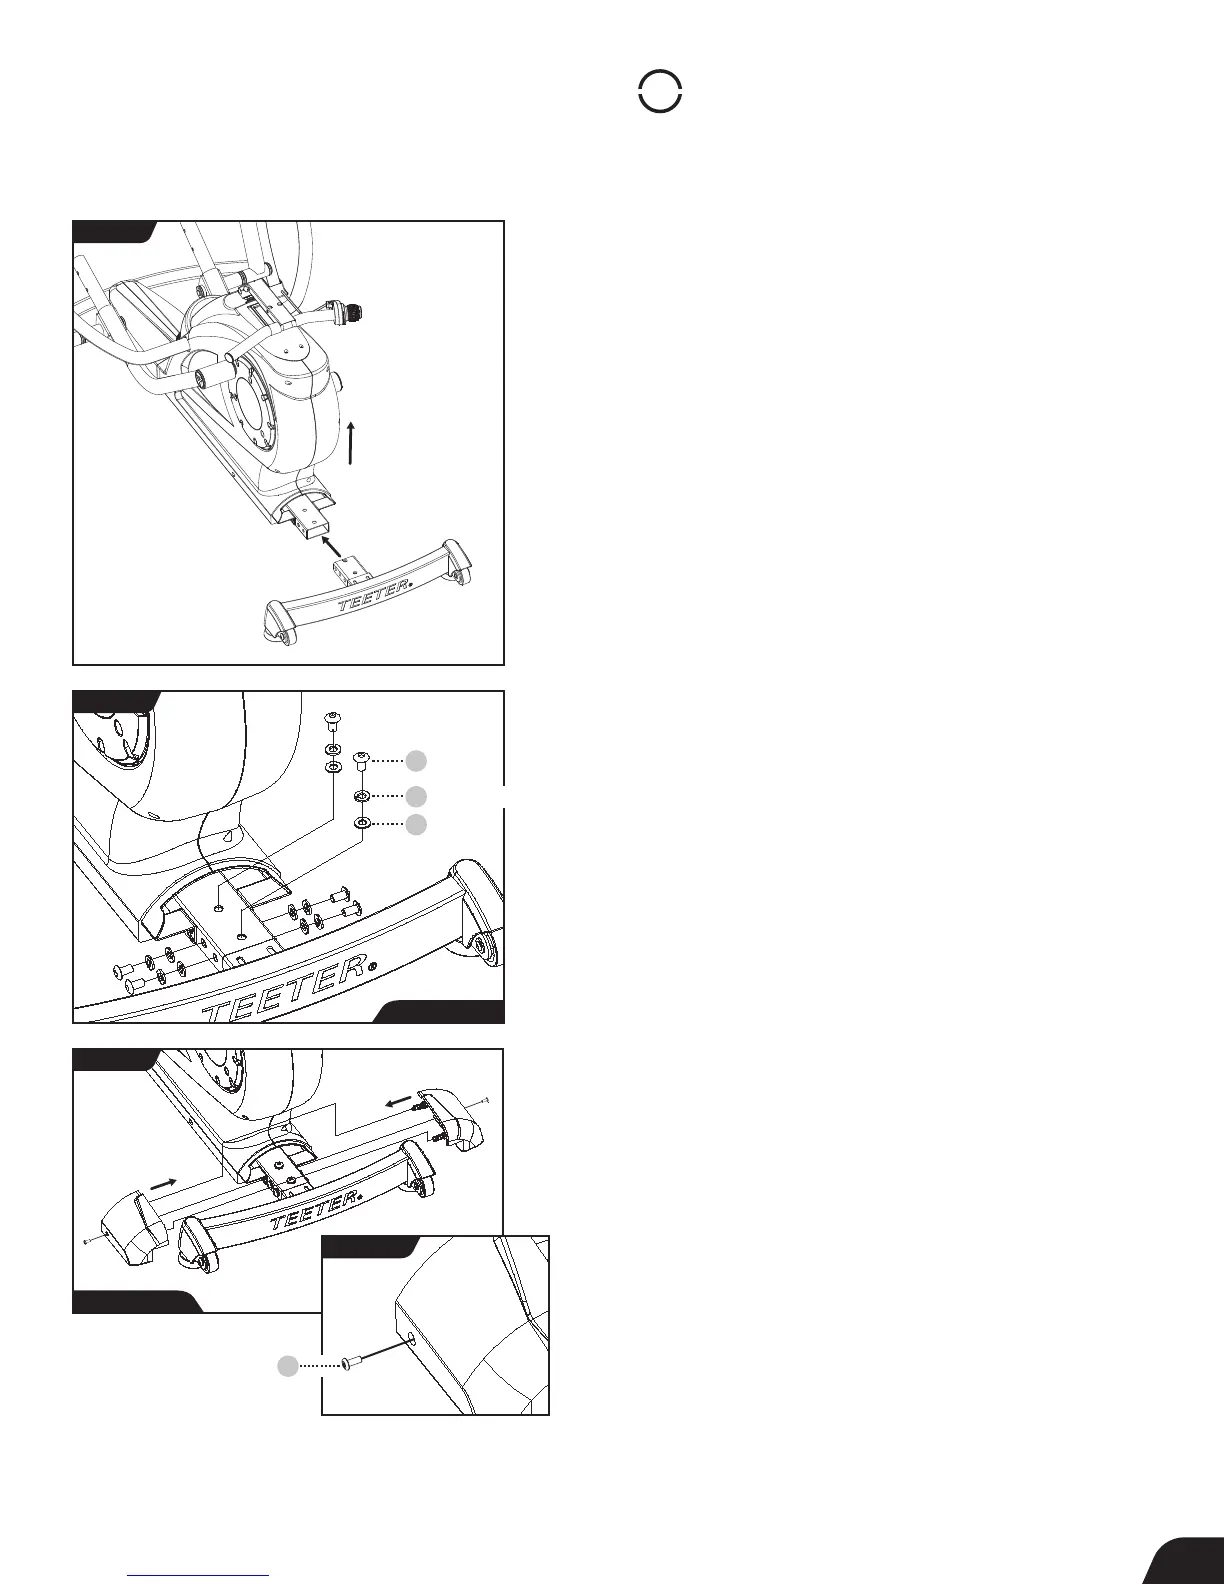
Assemble Rear Stabilizer
NOTE:
• Always hand tighten all the bolts or screws in each step before
fully tightening with the wrench or screwdriver.
• For reference, the Front, Back, Right and Left of the equipment
is labeled on Page 3, Understanding Your FreeStep
™
.
Attach Rear Stabilizer
• Remove the Base from the packaging and position it on a level
surface on the floor.
• Remove the wooden plug from the Main Support Tube in the
back of the Base and discard it.
• Lift the Base slightly from the back and insert the Rear Stabilizer
into the Main Support Tube at the back of the Base (Figure 1).
• Use the Step 1a Hardware Kit to attach the Rear Stabilizer.
First hand tighten 6 × Bolts with 6 × Spring washers and
6 × Washers on the Rear Stabilizer Joint. The Spring Washers should
always be on the outside and closer to the bolt than the Washers.
Use the Allen wrench to fully tighten each bolt (Figure 2).
Attach Rear Stabilizer Cover Set
• Locate the Rear Stabilizer Cover Set, noting the Right and Left
markings, and the Step 1b Hardware Kit.
• Attach the Right Rear Stabilizer Cover by loosely tightening the 1
x Machine Screw (Figure 3).
• Attach the Left Rear Stabilizer Cover to the Right by joining the
alignment pegs and pushing together for a snug fit.
• Insert 1 x Machine Screw to secure the Left Rear Stabilizer, then
finish tightening both Machine Screws with the Screwdriver.
FIGURE 1
FIGURE 2
Step 1a Hardware
Step 1b Hardware
FIGURE 3
FIGURE 3a
10 8
9
8
Bolt
Spring Washer
Washer
61
Machine Screw
6
Lift
Insert