10VORTEK Doc.# VT5 OM 050499, Rel. 2.1
sures which are mounted in the center of each bar. In both cases the bar elec-
tronics connect to the Transmitter via prefab cables, which are factory-connected
to the bar electronics enclosures.
Direction of Flow- The probes must be positioned so that they face into the
airflow: the Safety Cables on the ends of the bars leading
out of the fan inlet bell,
and the mounting brackets facing back into the fan inlet bell. On bars for fan
inlets over 24" I.D., the bar electronics controller has an airflow direction label
affixed to it for your convenience.
Mounting the Probe Bars- Hold the bars in place as shown in the drawing
(choose the drawing that matches the fan type which you are working with).
Make sure the bars are positioned as described above. Mark, on the inlet bell
surface, the mounting hole locations of the brackets on the ends of the bars.
Remove the bars from the inlet and drill pilot holes for #14 self-tapping screws
where you marked them.
Remove the brackets from the ends of the bars (
be careful not to lose the bolts,
nuts and Safety Cables). Screw the brackets to the inlet bell surface using thread
locking compound and #14 self-tapping screws.
Re-attach the bars to the installed mounting brackets, being careful to face the
bars in the correct direction, and to re-attach the Safety Cables as they were
before. Tighten the NyLok nuts on the bar mounting bolts sufficiently to prevent
loosening of the nuts through vibration. Note: If a screw, nut, or bolt is stripped,
replace it with the same type fastener. If a drilled pilot hole is stripped, DRILL
ANOTHER HOLE and move the probe according.
DO NOT USE STRIPPED HOLES OR FASTENERS AS DAMAGE TO THE
PROBES AND FAN CAN RESULT FROM PROBES COMING LOOSE AND
BEING DRAWN INTO THE FAN WHEEL!
Stretch the Safety Cables outward from the bars towards the outside of the fan,
leaving no slack in the cable. The eyelet on the end of the cable must be
screwed to a sturdy, metallic surface such as the bell, fan casing, or bearing
support. Mark where you intend to srew the eyelets, and drill #14 self-tapping
screw pilot holes. Using thread locking compound and #14 self-tapping screws,
screw the eyelets down, tighening the screws sufficiently to prevent loosening
due to vibration, but DO NOT STRIP THEM!
Run the cables out to where the Transmitter will be mounted, leaving sufficient
slack to allow easy plugging and unplugging of the cables into the transmitter
receptacles.
2.2 Transmitter Mounting and Location
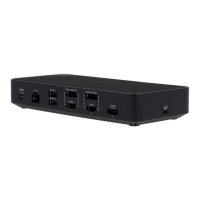
General- The transmitter is typically located in close proximity to the duct inser-
tion probe bars and transmits a 4-20mA signal over long distances to the custom-
ers control system.
Transmitter Location- The VorTek transmitter is small and designed for mount-
Chapter 2 Installation
 Loading...