Installation and Setup cont’d
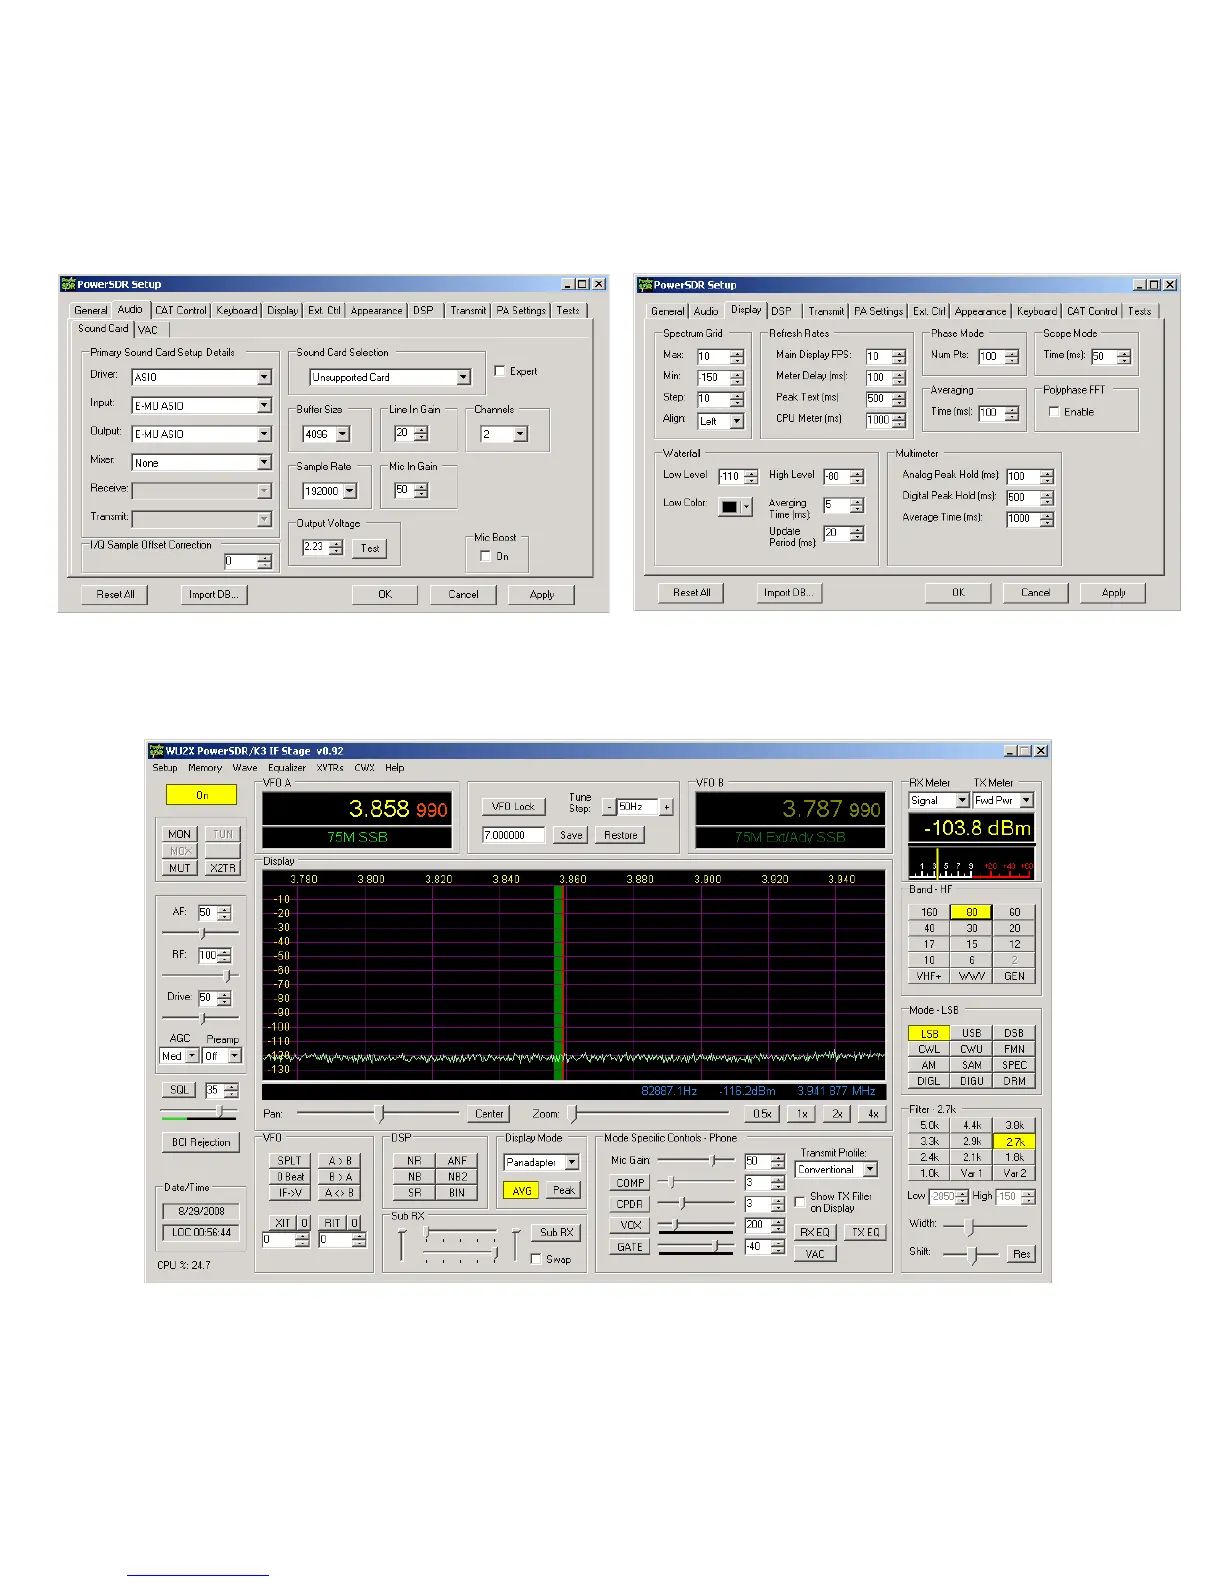
Go to the Setup>Audio tab>Sound Card sub tab, pictured below. Set the sound card to “Unsupported Card”. Select the correct driver
for your sound card. For most modern professional sound cards, this will be ASIO, but if the card is older you may have to use WDM.
Select your sound card Input and Output, and select None for Mixer. Set the sample rate to the maximum supported by your card, set
Buffer Size to 2048 or 4096 and click Apply. Other settings can be ignored, although I found with my E-MU 0202 card that it wouldn’t
start reliably unless I selected Expert Mode and set Latency to 2ms. Other cards may require a higher setting, up to about 25 ms.
In the Display tab, the vertical scale should be set for a displayed range of -10 to -130 dBm for now (entered range of +10 to –140dBm).
I set Averaging to 200ms, but you may find a different value better. Some users like settings as high as 1000ms. This determines the
averaging when the AVG button is pressed in the main PowerSDR screen, and trades off lower displayed noise for lag when updating
the display. All other settings can be left as they are for now. Click Apply and close the Setup window.
On the main PowerSDR screen, click on the Standby/On button in the upper left and you should hear LP-PAN on your sound card
monitor speaker. Display Mode should be set for "panadapter", and AVG turned on now. To display maximum bandwidth, the PAN
slider should be centered, and the Zoom slider should be all the way to the left. The frequency display should roughly match the VFOA
frequency of the K3. The noise floor with no antenna connected to the K3, K3 preamp OFF, PowerSDR preamp setting set to OFF,
should be between –110 and –120 dBm, and should be flat with no signals, as shown above. We will calibrate the levels later, but the
noise floor should be roughly in the range shown. It depends somewhat on whether you have the K3 buffer mod installed. More on this
in the Calibration section below.