Wireless Modem Router
81
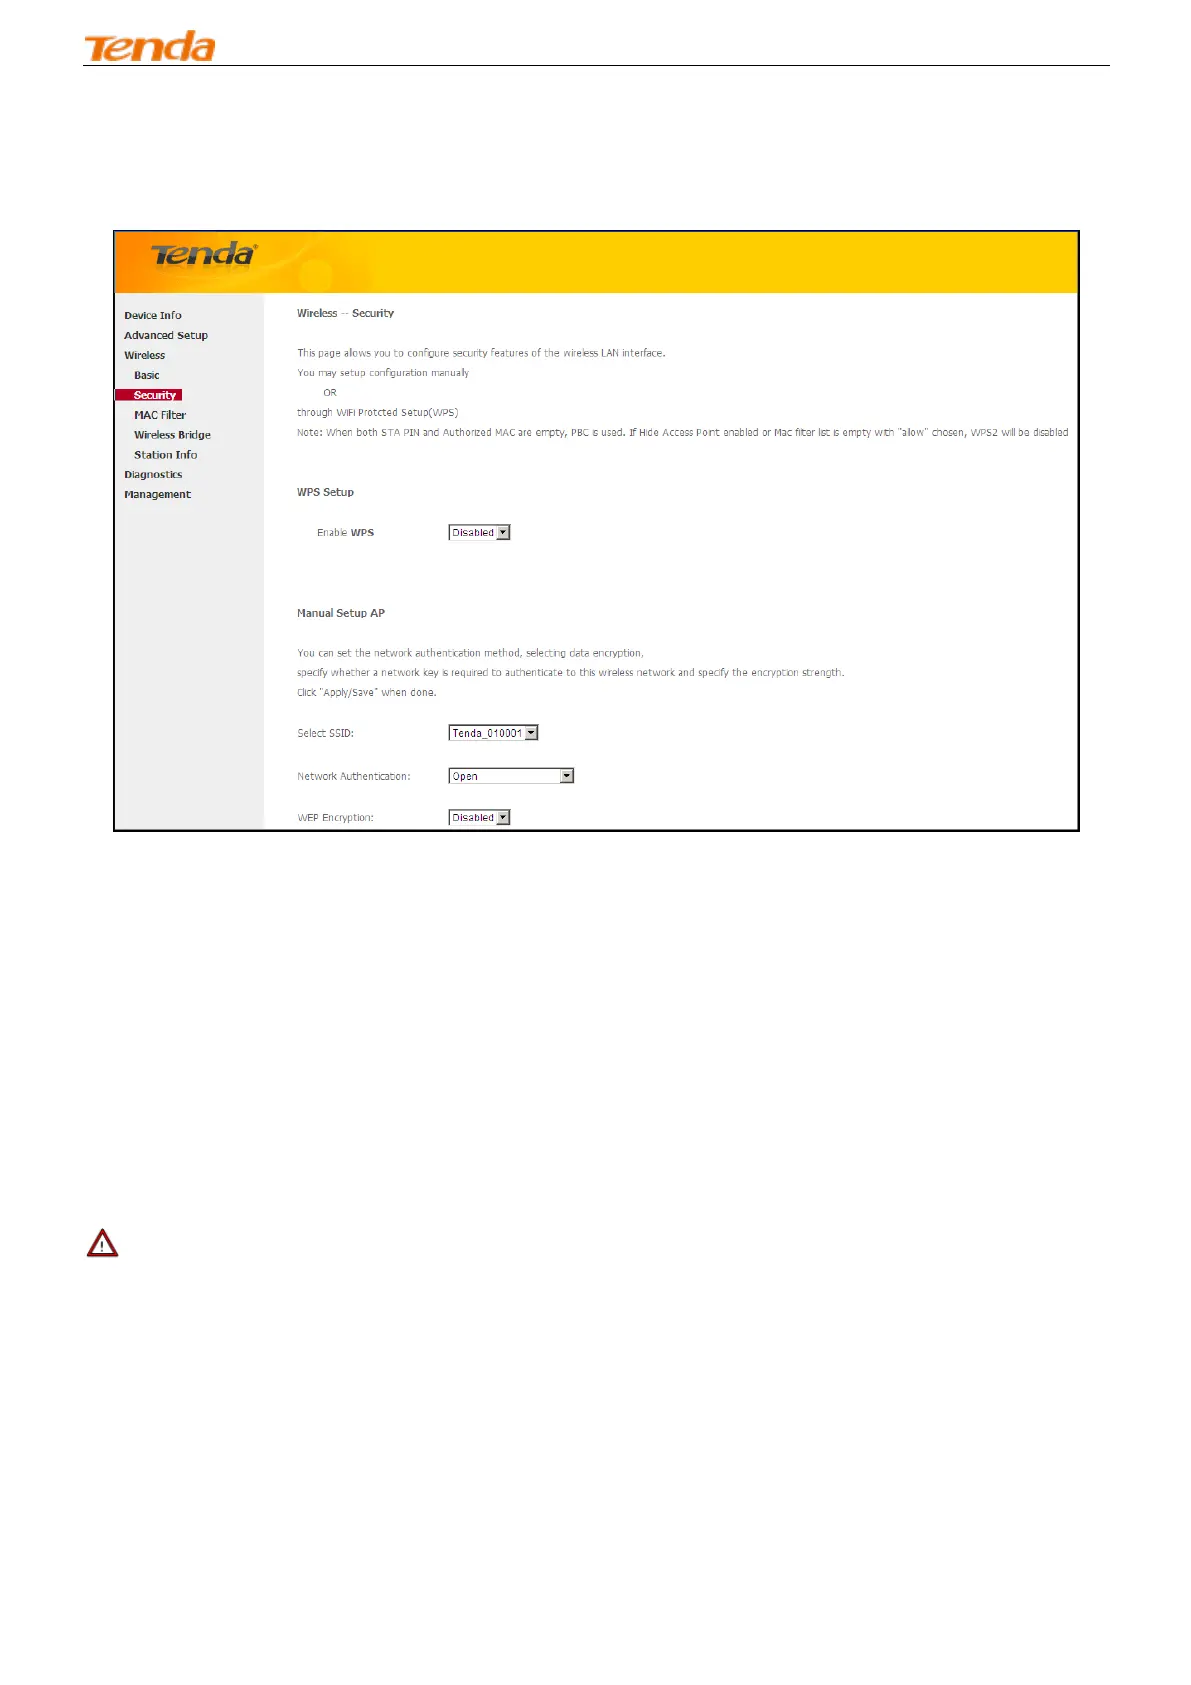
4.3.2 Security
This page allows you to configure security features of the wireless LAN interface. You may setup configuration
manually OR through WiFi Protected Setup (WPS).
WPS Setup
Wi-Fi Protected Setup makes it easy for home users who know little of wireless security to establish a home network, as
well as to add new devices to an existing network without entering long passphrases or configuring complicated settings.
Simply enter a PIN code on the device web interface or press hardware WPS button (on the back panel of the device) and
a secure wireless connection is established.
WPS Button: Press the hardware WPS button on the device for 1 second and the WPS LED will keep blinking for about
2 minutes. Within the 2 minutes, press the WPS button on your wireless computer or other device. When the WPS
displays a solid light, the device has joined your wireless network.
PIN: To use this option, you must know the PIN code from the wireless client and enter it in the corresponding field on
your device while using the same PIN code on client side for such connection.
Enable WPS: Check/uncheck to enable/disable the WPS function. It is enabled by default.
_________________________________________________________________________________________________
Note:
1. To use the WPS security, the wireless client must be also WPS-capable.
2. When both STA PIN and Authorized MAC are empty, PBC is used. If Hide Access Point enabled or Mac filter list is
empty with "allow" chosen, WPS2 will be disabled.
_________________________________________________________________________________________________
Manual Setup AP
You can set the network authentication method, selecting data encryption, specify whether a network key is required to
authenticate to this wireless network and specify the encryption strength.
Click "Apply/Save" when done.
 Loading...