8
Congure Wireless Settings
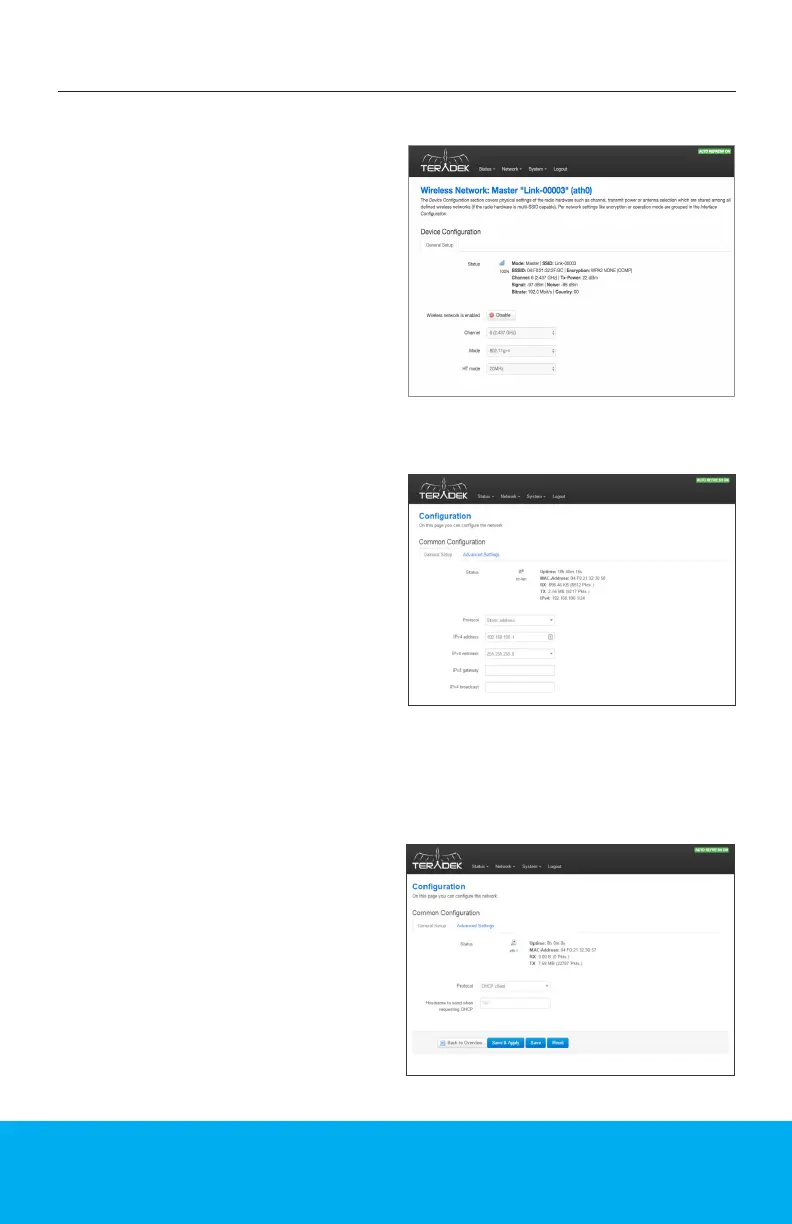
Each wireless conguration page (Fig. 5)
contains options to congure the Wi-Fi
channel, network mode (802.11a/b/g/n/
ac), channel bandwidth or HT Mode, SSID,
and security options. After modifying any
settings, click Save if you plan to make
more changes, or Save and Apply to
enable the new conguration.
The LAN Conguration page (Fig.6)
contains Link Pro’s IP address settings,
DHCP server conguration, and other
settings that may need to be changed if
connecting Link Pro to another network.
These settings do not need to be modied
if Link Pro is used as a stand-alone
access point.
When connecting Link Pro to another
network with an existing DHCP server,
uncheck the box next to ‘Enable DHCP
server’ before connecting Link Pro to the
other network to avoid IP address conicts.
The WAN port allows you to connect Link
Pro to a cable/DSL modem for Internet
connectivity. In most cases, WAN settings
will be auto-negotiated when Link Pro
is connected to the modem. The WAN
Conguration page (Fig.7) contains a
number of advanced options that may
be necessary to establish an Internet
connection with some service providers.
From the top menu on the web UI,
navigate to the Wireless Network page,
then click Congure next to the network
you want to set up.
Congure Local Network (LAN) Settings
Congure Internet (WAN) Settings
NETWORK CONFIGURATION
Fig. 5
Fig. 6
Fig. 7