54
Operating Instructions Wheel Loader TL120
Working Operation5
5.2.2 Assembly of work attachments
Procedure for changing directly mounted work
attachments
• Lower the work tool to the ground and position so
that it cannot tip over.
• Remove the pin of the linkage and the pin of the lift
frame.
• Move the lift frame out of the work attachment and
install a new one.
Procedure for changing work attachments with
mechanical quick-attach system
• Lower the work tool to the ground and position so
that it cannot tip over.
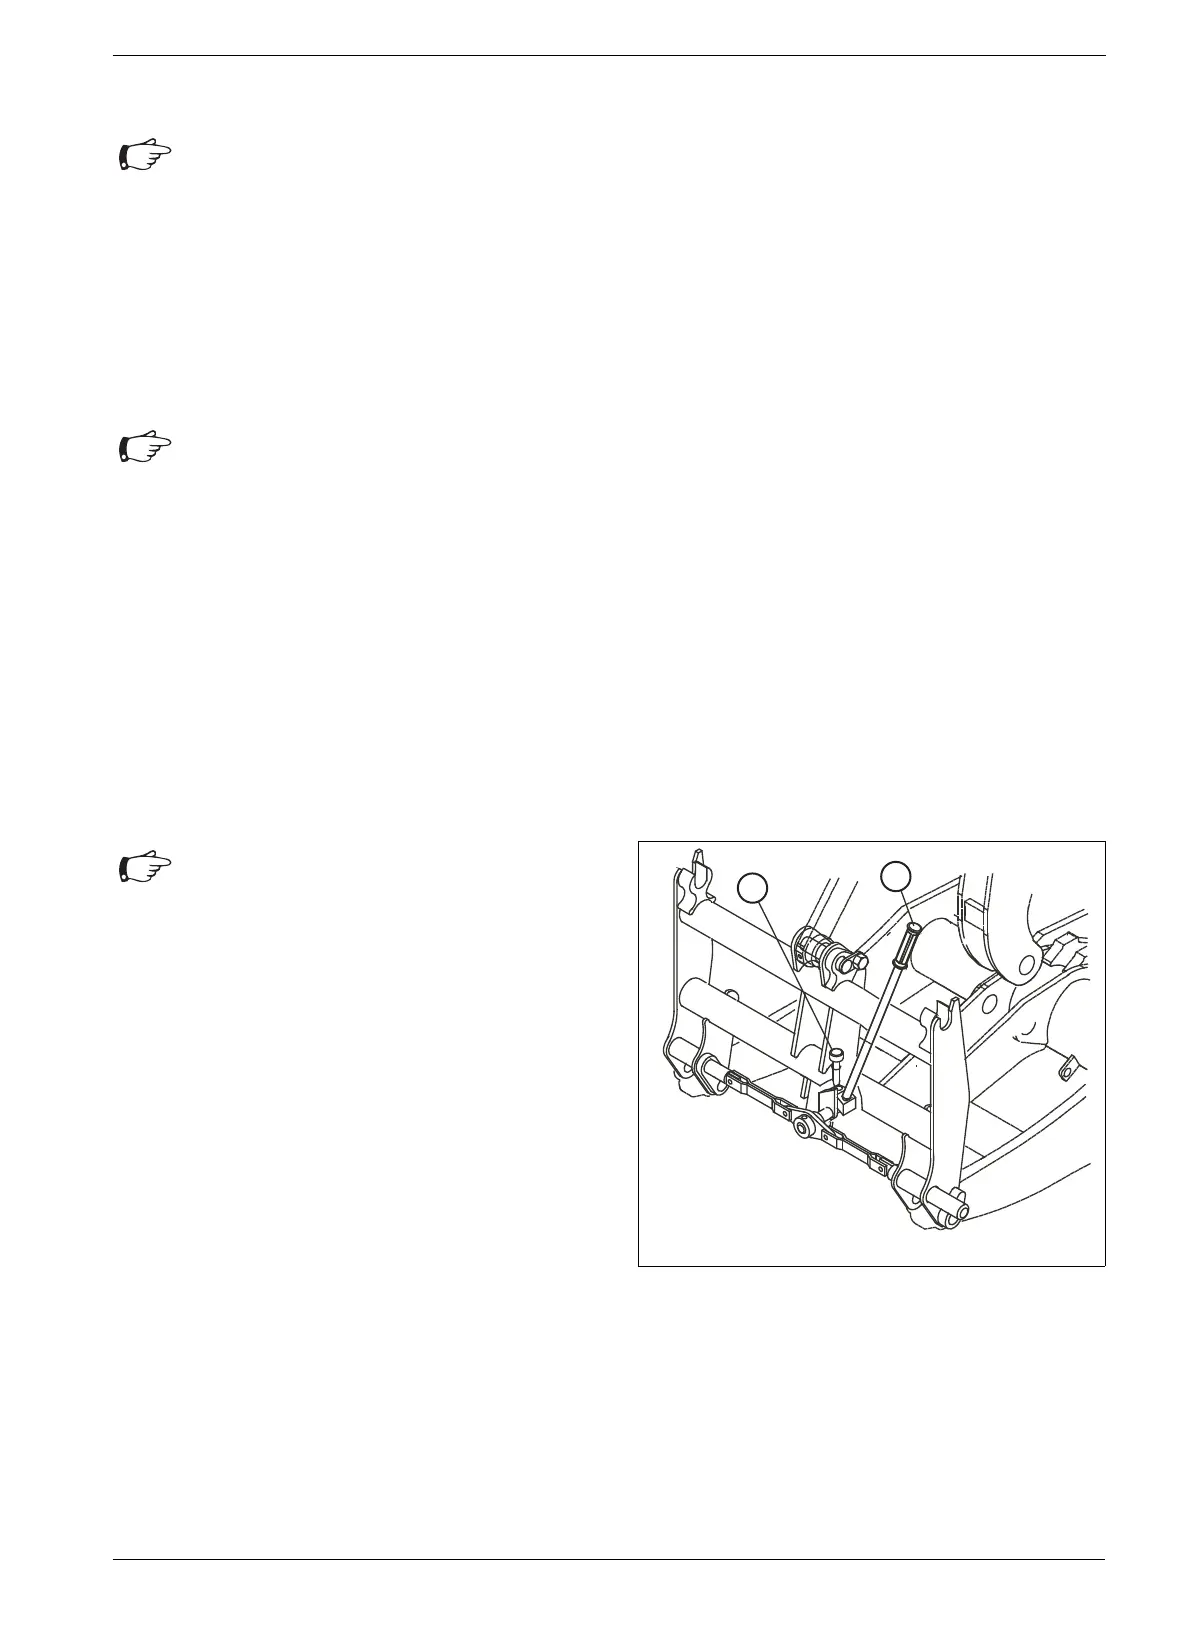
• Raise pin (23/2) and open the quick-mount hitch
using the control rod (23/1) until the locking bolts
are completely retracted.
• Check the function of the quick-mount hitch lock
and lubricate the pins if required.
• Attach another work attachment and close the
quick-mount hitch until the locking bolts are
completely extended and the lock clicks in.
• Ensure that the work attachment and the lock are
properly seated.
• The control rod is kept in the left-hand storage box
in the cab.
Attention
• Ensure that the bearings of the lift frame,
work attachment and quick-mount hitch
are free from dirt.
• Before disconnecting hydraulic
connections, the system must be released
from pressure.
Attention
• In the event of a hydraulically operated
attachment, first of all the hydraulic
connection must be disconnected
(system must be without pressure).
Fig. 23 Quick-attach system
Attention
• In the event of a hydraulically operated
attachment, first of all the hydraulic
connection must be disconnected
(system must be without pressure).
 Loading...