53
MAIN MENU
USB STICK
LANGUAGE
GPS / TIME
INTERNAL MEMORY
SERVICE
EXIT SET
→
→
MAIN MENU
USB STICK
LANGUAGE
GPS / TIME
INTERNAL MEMORY
SERVICE
EXIT SET
→
→
INTERNAL MEMORY MENU
TEST DATA LIST
PRINT OUT
SEND TO PC
SEND TO CARD
ERASE MEMORY
EXIT SET
→
→
INTERNAL MEMORY MENU
PRINT OUT
SEND TO PC
SEND TO CARD
ERASE MEMORY
EXIT SET
→
→
PLEASE CONNECT TO
USB-PORT OF PC
EXIT EXIT
PC connected
EXIT EXIT
EXIT PRINT
→
1 30/06/13 44,9
2 30/06/13 46,1
3 30/06/13 48,0
4 30/06/13 48,2
5 30/06/13 49,2
→
→
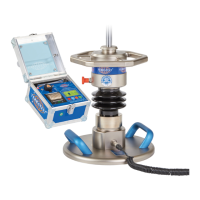
7.5 Internal Memory
The last 2000 tests will automatically be saved in the internal memory of
the testing computer, even if the external medium (USB stick) is not in
use. The test data can be transferred from the internal memory to the
external medium, if required.
The USB cable port allows test data to be transferred to a PC for analysis
using the USB cable (included in the basic package).
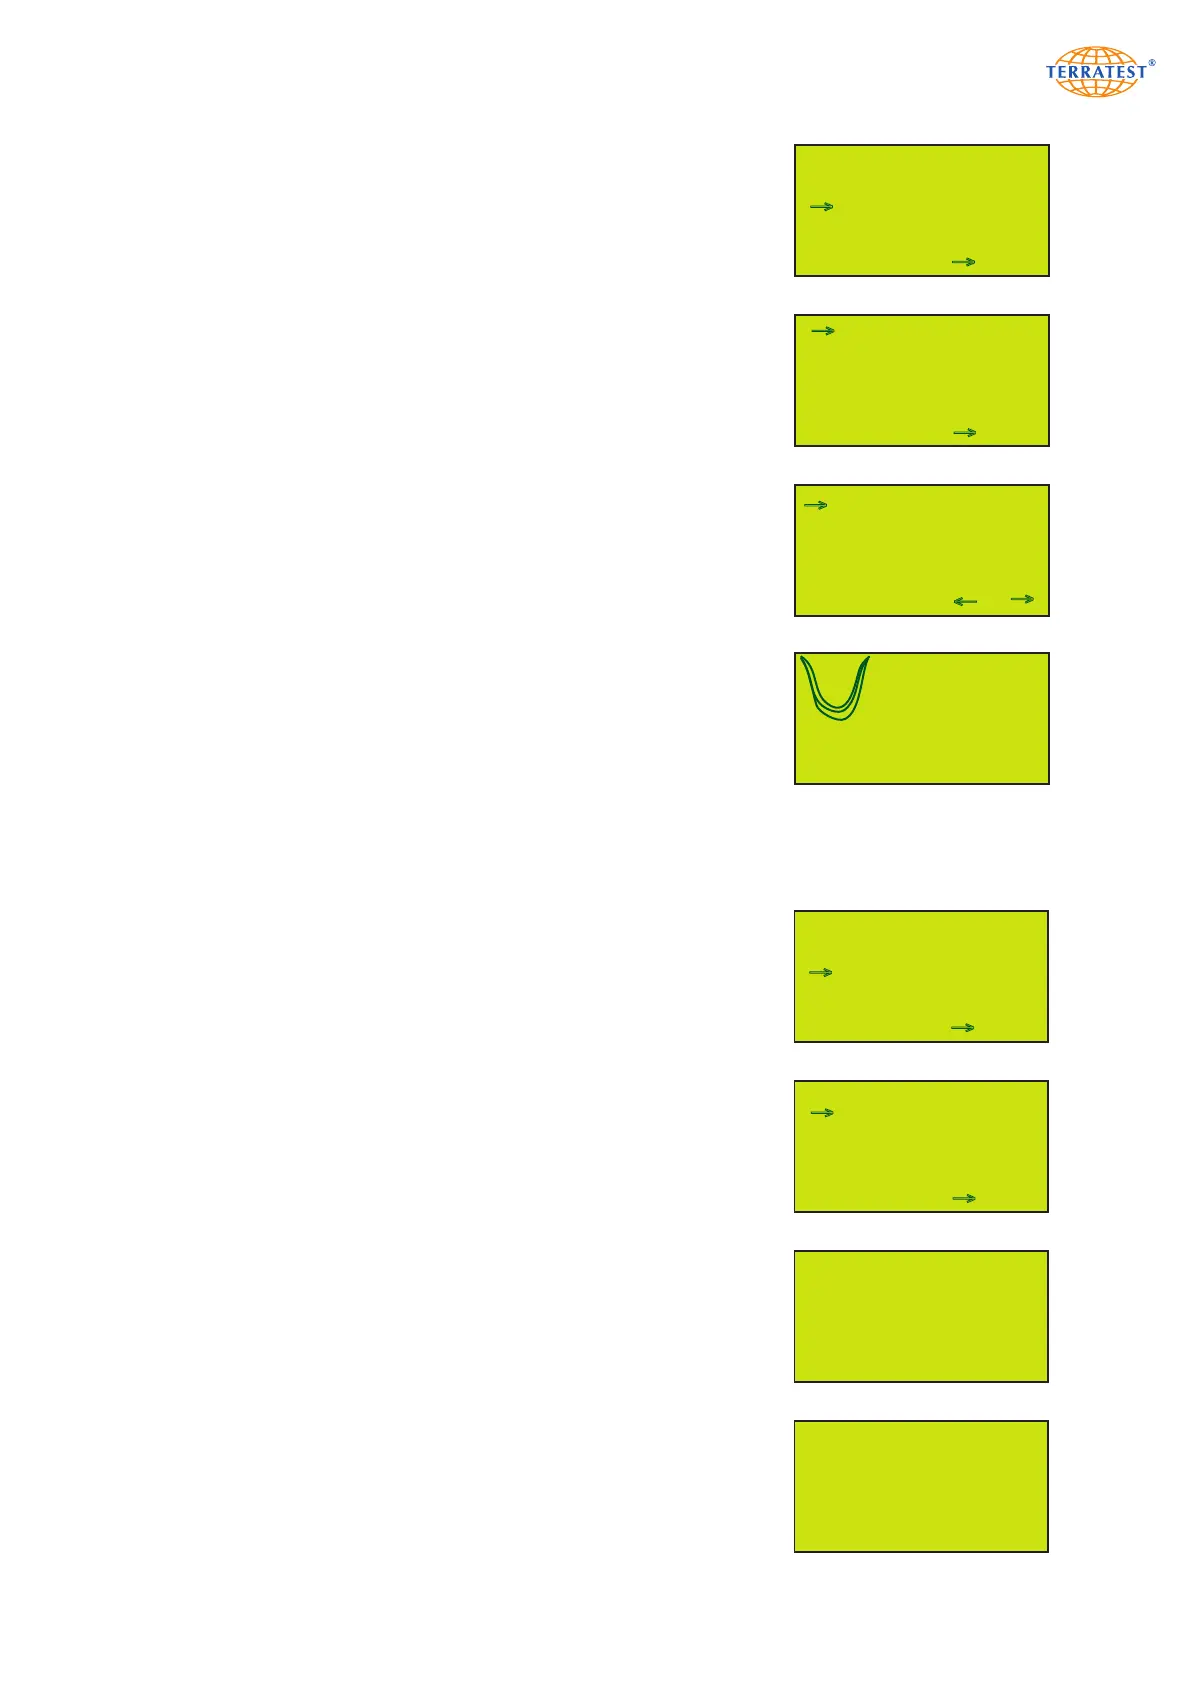
7.5.1 Printing from the Internal Memory
Turn on the device by pressing the ‘START’ button. Then enter the ‘MAIN
MENU’ by pressing the ‘SELECT’ button. Use the ‘SELECT’ button to
move the arrow and select ‘INTERNAL MEMORY’ from the menu. Press
the ‘START’ button (SET) to enter the ‘INTERNAL MEMORY’ menu.
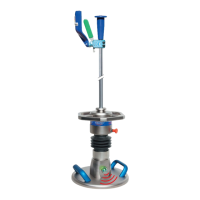
Position the arrow on ‘PRINT OUT’ and press ‘START’ (SET) to enter the
‘TEST DATA LIST’ of the internal memory. All test data saved in the internal
memory will be shown on the display, including the consecutive data
record number, date, and Evd value. Move the arrow with the ‘START’
and ‘SELECT’ buttons to select the data record which you would like to
print. Upon pressing the ‘PRINT’ button (SHOW) the test data of the
selected test will be shown. Press the ‘PRINT’ button again to print the
corresponding test protocol. If no test data is saved in the internal memo-
ry, ‘MEMORY IS EMPTY’ will appear on the screen for a few seconds. The
screen will then return automatically to the ‘INTERNAL MEMORY’ menu.
Pressing the ‘RESET/OFF’ button (EXIT) will direct you back to the
‘TEST DATA LIST’. Press the ‘RESET/OFF’ button (EXIT) again to return
to the ‘INTERNAL MEMORY’ menu. Press the ‘RESET/OFF’ button (EXIT)
again to return to the ‘MAIN MENU’. Press the ‘RESET/OFF’ button (EXIT)
again to return to the ‘STATUS REQUEST’. Pressing the ‘START’ button
will start the test procedure.
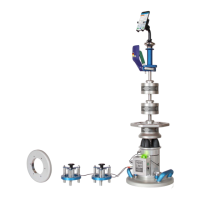
7.5.2 Internal Memory to PC
Turn on the device by pressing the ‘START’ button. Enter the ‘MAIN
MENU’ by pressing the ‘SELECT’ button. Use the ‘SELECT’ button to
move the arrow and select ‘INTERNAL MEMORY’ from the menu. Press
the ‘START’ button (SET) to enter the ‘INTERNAL MEMORY’ menu.
Position the arrow on ‘SEND TO PC’ and press the ‘START’ (SET) button
to load the test data directly into the ‘TERRATEST 2.0’ software. Establish
the USB connection between the testing computer and PC by plugging in
the USB cable included in the basic package. Upon initial connection of
the testing computer to the PC the respective driver will have to be installed
from the supplied CD ROM ‘TERRATEST 2.0’. For help, refer to the
chapter ‘Driver installation for the testing computer’ (see page 74). If
there is no connection to the PC, the instruction ‘PLEASE CONNECT TO
USB-PORT OF PC’ will appear on the display.
After the USB connection has successfully been established ‘PC connected’
will appear on the display.
s4=0,366mm
s5=0,364mm
s6=0,364mm
44,9 MN/m
2
s/v=2,277 ms
EXIT PRINT 2/127 NEXT