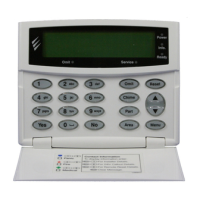
Premier 412/816/832 Quick Guide
2 INS184-8
Programming Guide
This Quick Guide details the menu numbers required to programme the control panel, and should be used
alongside the installation manual INS159.
Zone Programming
Menu:
Zone Types Menu: Wiring Types Menu: Zone Attributes 1
00: Null
01: Delay 1
02: Delay 2
03: Interior Follower
04: Interior Instant
05: Perimeter Instant
06: Fire
07: PA Silent
08: PA Audible
09: Medical
10: 24-Hour Tamper
11: Trouble
12: 24-Hour - Gas
13: 24-Hour - Water
14: 24-Hour - High Temp
15: 24-Hour - Low Temp
16: Momentary Keyswitch
17: Maintained Keyswitch
18: Push To Set
0: Normally Closed
1: Normally Open
2: Single EOL - N/C & N/O (Burglary)
3: Single EOL - N/O (Fire)
4: Single EOL - N/C
5: Single EOL - O/C Tamper
6: Single EOL - S/C Tamper
7: Double EOL
8: Zone Doubled
9: Triple EOL
1: Enable Instant Internals
2: Enable Bell
3: Delayed Bell
4: Pulsed Bell
5: Enable Instant Strobe
6: Enable User Chime
7: Enable Transmission Delay
8: Enable Transmission
Menu: Zone Attributes 2 Menu: Zone Attributes 3
1: Enable Manual Bypass
2: Enable Stay Bypass
3: Enable Force Arming
4: Quick Response Time
5: Enable Cross Zoning
6: Enable Soak Test
7: Enable Swinger Shutdown
8: Enable Double Knock
1: Change to Delay 1 on Stay Arm
2: Change to Follower on Stay Arm
3: * Zone Warning
4: * Auto Reinstate if Force Armed
5: Disable Keyswitch if Away Armed
6: * Disable Exit Faults
7: Truncate Exit Delay
8: Forced Walk Test
* = Attributes 3, 4 and 6 change
when zone is programmed as a key
switch type:
3 = Key Switch is Instant Arming
4 = Key Switch will Stay Arm/Disarm
6 = Disable Auto Arm
Menu:
Zone Partitions &
Menu:
Zone Text (LCD Only) Editing Keys
01: Enabled for Partition 1
02: Enabled for Partition 2
03: Enabled for Partition 3
04: Enabled for Partition 4
05: Enabled for Bypass Group 1
06: Enabled for Bypass Group 2
07: Enabled for Bypass Group 3
08: Enabled for Bypass Group 4
. , ? ! 1 @ ” - &
a b c 2 A B C
d e f 3 D E F
g h I 4 G H I
j k l 5 J K L
m n o 7 M N O
p q r s 7 P Q R S
t u v 8 T U V
w x y z 9 W X Y Z
Space 0 , # *
Move Left/Right
Backspace (delete)
 Loading...

