Texi Joy 13 67
EN
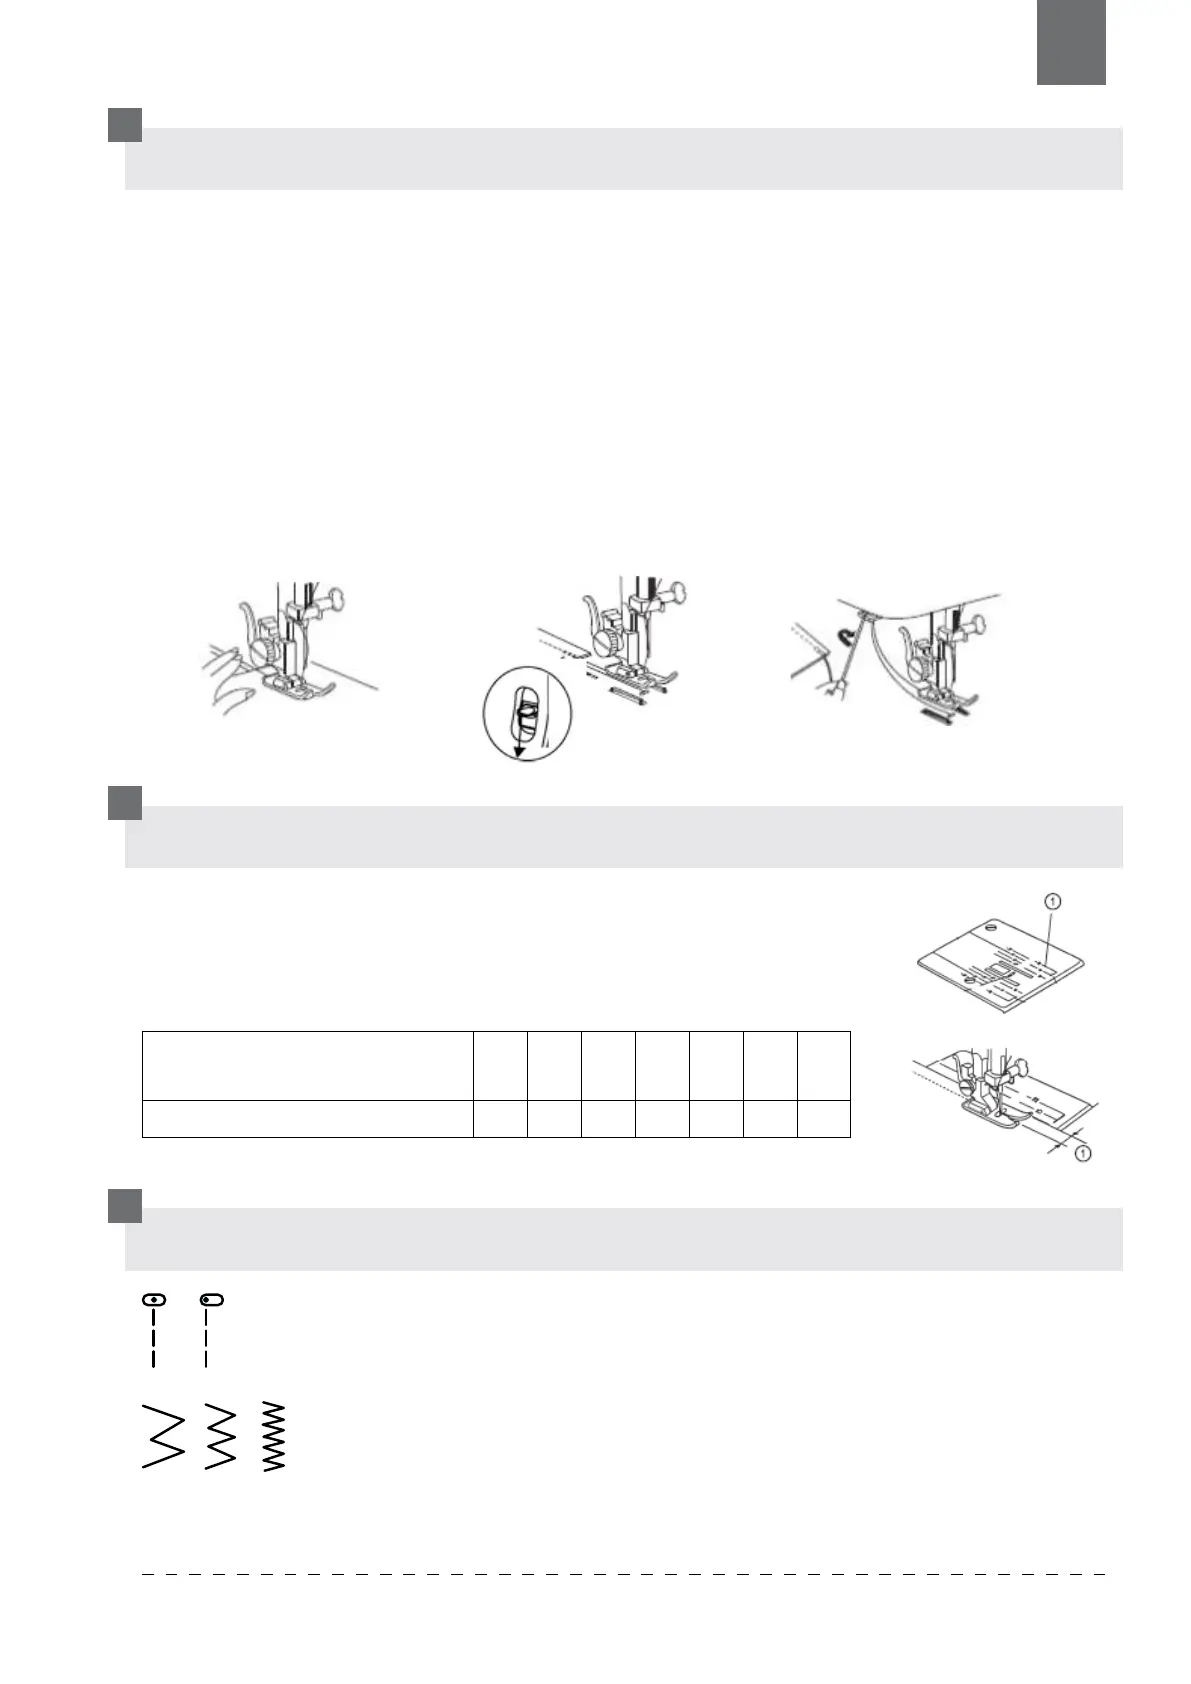
STARTING TO SEW
MARKS ON THE NEEDLE PLATE
1. Raise the presser foot and position the fabric next to a stitching guide line on
the needle plate.
2. Lower the needle into the fabric.
3. Lower the presser foot and smooth the thread towards the back. Depress the
foot control.
4. Gently guide the fabric along the guide line letting the fabric feed by itself.
5. For fastening the ends of seams, press the reverse stitch button and sew several
reverse stitches.
6. Raise the presser foot and remove the fabric, drawing the threads to the back.
7. Cut the thread using the cutter located behind presser foot. Leave around 15 cm
of both threads.
Line on the stitch plate help to guide material evenly.
Distance from stitch (from the central needle position) to the
edge of material is marked on the drawing.
Numerical value marked on
the plate
10 15 20 3/8 4/8 5/8 6/8
Distance in cm 1.0 1.5 2.0 1.0 1.3 1.6 1.9
TYPES OF STITCHES
ZIGZAG (C,D,E) - it can be used for sewing safety stitches, decorative
stitches, to sew on applique etc. To change width of the stitch dial
needed value between B and C.
STRAIGHT (A,B) – most popular, can be used for: lockstitch, gathering,
quilting, zipper sewing and many more. For dierent type of operation use
correct foot.

 Loading...