OPERATION AND SERVICE INFORMATION
Page 15
Owner’s Manual and Service Guide
Read all of Manual to become thoroughly familiar with this vehicle. Pay particular attention to all Notes, Cautions and Warnings
found. This is normal, resulting from engine run-in. At
subsequent oil changes, the presence of metal chips
may indicate possible engine damage.
Wear eye protection to reduce the
possibility of splashed solvent
contacting the eyes when clean-
ing oil filter.
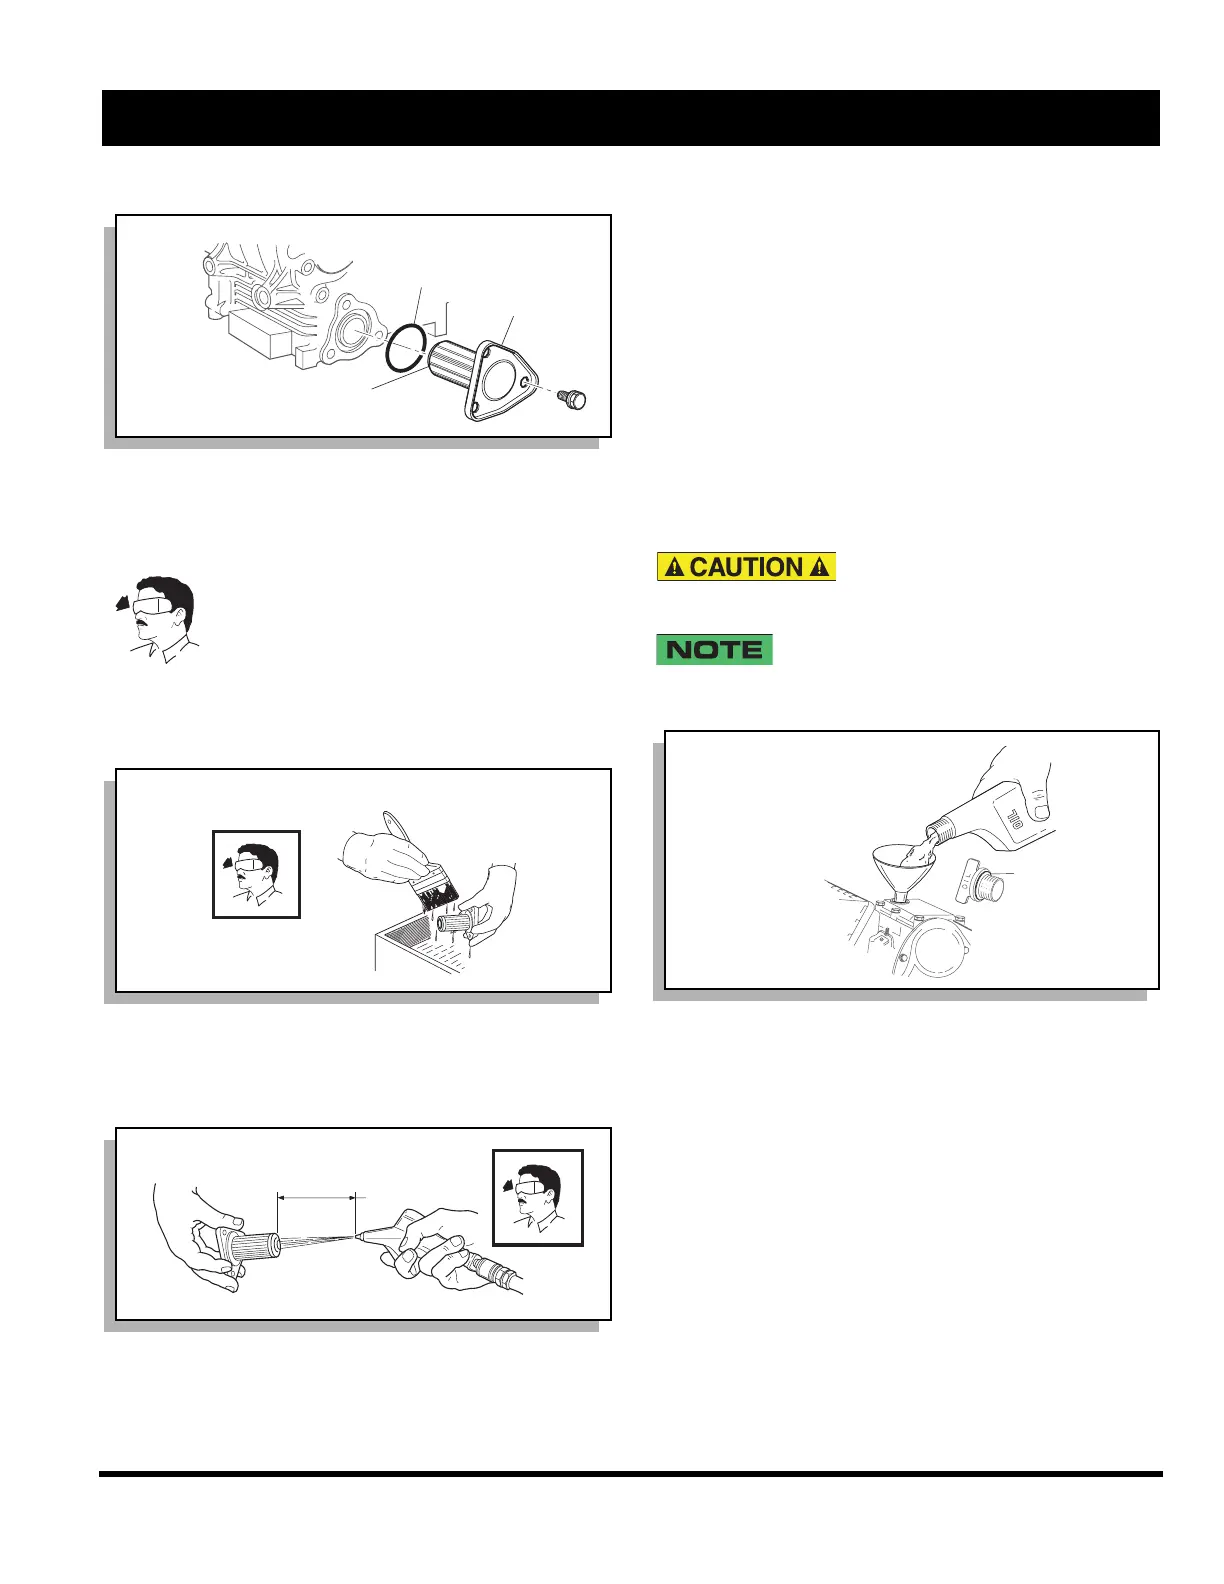
Clean the filter by washing in any shop degreaser and
brushing the metal screen clean with a soft brush (Ref
Fig. 19 on page 15).
Blow out the filter with low pressure air 30 psi (210 kPa)
or less from no closer than 3" (8 cm) and allow to air dry
(Ref Fig. 20 on page 15).
Wipe the area around the filter mount with a clean, lint
free cloth and inspect both filter ‘O’ rings for damage;
replace if necessary. Install the filter into the engine. The
filter engages over a short nipple in the engine. The filter
should slide easily onto the nipple and seat against the
engine using light hand pressure only. Align the holes in
the filter mounting plate with the holes in the engine.
Install and hand tighten the bolts before tightening them
firmly.
Add slightly less than 1 1/2 quarts (1.4 liters) to allow for
possible residual oil left in engine (Ref Fig. 21 on page
15). The oil must be high quality oil that meets or
exceeds API SF, SG, CC standards (Ref Fig. 33 on page
21). Check oil level on dipstick. If necessary, continue to
add oil slowly and allow time for oil to flow down into
engine. Check oil level on dipstick. Do not overfill.
Do not overfill engine. Too much
oil may cause smoking or allow
oil to enter the air filter enclosure.
Both the oil dipstick and fill cap must be in
place before operating the engine. Failure to
install the dipstick and fill cap will result in oil being discharged
into the engine compartment.
Inspect oil fill cap ‘O’ ring and replace if necessary. Install
the oil fill cap. Run the vehicle for one or two minutes and
check the filter for oil leaks.
Check the oil level again with the vehicle on level ground.
Oil should be added to bring the level into the safe oper-
ating range. Do not overfill. The engine can be operated
safely as long as the oil is within the safe operating range
as indicated on the dipstick. Do not operate vehicle if
oil level is below the safe area indicated on the dip-
stick.
STARTER/GENERATOR BELT TENSION
Tool List Qty. Required
Belt tension gauge....................................................... 1
Wrench, 3/4"................................................................ 1
Wrench, 9/16".............................................................. 2
Fig. 18 Remove Oil Filter
Fig. 19 Clean Oil Filter
Fig. 20 Blowing Out Oil Filter
Oil
Filter
Small 'O' Ring Inside
End Of Oil Filter
Large
'O' Ring
ef Rof 1
Ref Cof 1
3" (8 cm)
Minimum
30 psi (210 kPa) Maximum
ef Bof 1
Fig. 21 Add Engine Oil
'O' Ring
Ref Aeo 1