8
■
5551 McFadden Avenue, Huntington Beach, CA 92649 • 800/735-4328
ECO14028 • 14-33-872H • © BSH Home Appliances Corp.1998• Litho U. S. A. 4/01
Thermador reserves the right to change specifications or design without notice. Some models are certified for use in Canada.
Thermador is not responsible for products which are transported from the United States for use in Canada. Check with your local
Canadian distributor or dealer. Thermador, 5551 McFadden Avenue, Huntington Beach, CA 92649.
For the most up to date critical installation dimensions by fax, use your fax handset and call 702/833-3600. Use code #8030.
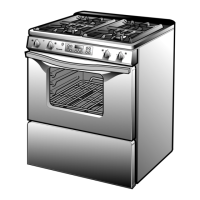
TO INSTALL THE RANGE:
1. Disconnect electrical power and turn off gas supply at
shut-off valve, if applicable.
2. Install anti-tip device as follows:
a) Adjust height of range and level by rotating the
adjustable leg supports, (see Figure 11) using 1/2"
wrench.
b) Attach anti-tip bracket to wall stud 1/4" maximum
above cross brace in back of oven. (See Figs. 12 &
13.) The anti-tip bracket shall allow the range back
brace to slide under the anti-tip bracket. (See Figure
13.)
c) If necessary add spacer between bracket and wall
to insure proper anti-tip bracket engagement.
3. Move range close to the cutout opening and insert cord
set plug into the receptacle or connect flexible conduit
. (All switches must be off.)
4. Secure the flexible gas connector to the shut-off valve.
(See Figure 5, Page 4.)
5. Slide range into position insuring the range back brace
slides under anti-tip bracket. Insure flexible gas
connections are not crimped.
6. Carefully tip range forward to insure that the anti-tip
bracket engages the range back brace and prevents tip-
over. (See Figure 14.)
7. Turn electrical power and gas supply on. Check range
for proper operation described in Care and Use Manual.
RANGE INSTALLATION

 Loading...