Do you have a question about the Thermaltake C240 and is the answer not in the manual?
Installation guide for Intel LGA 775, LGA115x, and LGA1366 CPU sockets.
Installation guide for Intel LGA 2011 and 2011-3 CPU sockets.
Installation guide for AMD CPU sockets.
Flush and rinse radiators and water blocks with distilled water before using.
Attach the fittings to the inlet and outlet of the water block.
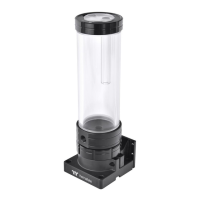
Mount the pump and reservoir, suggesting vertical placement.
Attach the case fans to the radiator.
Connect fan power cables when the liquid cooling system is completely finished.
Step-by-step example of placing the motherboard, radiator, and pump/reservoir.
Connect the motherboard signal bridge cable to fan led cable for different brands.
Connect the ARGB controller to the fans.
Connect the ARGB controller to the SATA connector for power.
Description of light modes, color modes, and light speed settings.
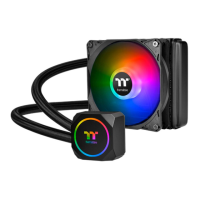
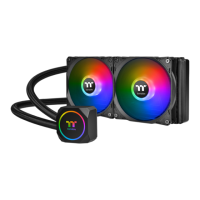
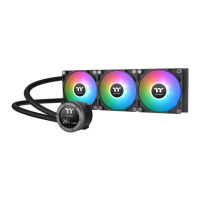
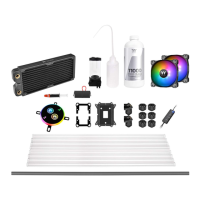
The Thermaltake C240 DDC Soft Tube Liquid Cooling Kit is a comprehensive solution designed to provide efficient cooling for your CPU, enhancing system stability and performance, especially during demanding tasks like gaming or content creation. This kit is built for enthusiasts and users looking to upgrade their system's thermal management with a custom liquid cooling loop.
The primary function of this kit is to dissipate heat generated by the CPU more effectively than traditional air cooling methods. It achieves this by circulating a liquid coolant through a closed loop, absorbing heat from the CPU via a water block, transferring it to a radiator where it's cooled by fans, and then returning the cooled liquid to the CPU. This continuous cycle ensures optimal operating temperatures for your processor. The kit includes all necessary components to build a custom liquid cooling loop, offering flexibility and superior thermal performance.
The Thermaltake C240 DDC Soft Tube Liquid Cooling Kit is designed with user-friendliness in mind, offering detailed instructions for installation and maintenance.
The kit supports a wide range of Intel and AMD sockets, including Intel LGA 775, LGA 115x, LGA 1366, LGA 2011, LGA 2011-3, and AMD platforms. The installation process for the CPU water block is clearly outlined with step-by-step diagrams. For Intel LGA 775, 115x, and 1366, the process involves securing the backplate and mounting the water block with the appropriate screws and springs. Similarly, for Intel LGA 2011/2011-3, the water block is mounted directly to the socket's integrated mounting points. AMD users follow a specific procedure that utilizes the existing AMD retention bracket for secure water block placement. Each step is illustrated to ensure correct alignment and pressure for optimal thermal contact. The kit provides different mounting hardware for various CPU sockets, ensuring broad compatibility.
Before integrating the radiator and water block into the loop, it is crucial to flush and rinse them with distilled water. This step helps remove any manufacturing residues, ensuring a clean loop and preventing potential clogs or contamination. Once clean, fittings are securely screwed into the inlet and outlet ports of both the radiator and the water block. This preparation is vital for preventing leaks and ensuring efficient coolant flow.
The kit includes a pump and reservoir combo, which is a critical component for circulating the coolant and managing air bubbles. Users are advised to choose a proper mounting location within their PC case, with vertical placement often recommended for optimal performance and air bleeding. Fittings are attached to the pump and reservoir, preparing them for connection to the rest of the loop.
The kit includes case fans that are designed to be attached to the radiator. These fans are responsible for drawing air through the radiator fins, facilitating heat dissipation from the coolant. Proper fan orientation is important to ensure effective airflow through the radiator.
Once the liquid cooling system is assembled, the fan power cables need to be connected. The kit provides options for connecting the PWM cable to the motherboard, allowing for fan speed control based on system temperatures. Additionally, fan power cables can be connected to a fan power cable hub if available, simplifying cable management.
Soft tubing is a key feature of this kit, offering flexibility and ease of installation. The process involves cutting the tubing to the required lengths based on the layout of your components. The recommended loop order is Pump Outlet > Water Block > Radiator > Reservoir Inlet. Compression fittings are used to secure the tubing. First, the cap of the compression fitting is placed over the tubing, then the tubing end is pushed over the barb of the fitting, ensuring a tight fit. Finally, the cap is slid over the fitting and rotated clockwise until the tubing is securely sealed. This method ensures a leak-free connection.
Filling the liquid cooling system is a critical step. Before filling, all fittings and unused ports must be completely sealed to prevent leaks. The kit includes a refill bottle to facilitate filling the reservoir with coolant. It is strongly recommended to use a market-proven pre-mix coolant, such as Thermaltake Coolant 1000, which offers corrosion protection for all loop components (copper, brass, nickel, aluminum, and steel). During filling, the PSU should be powered off. Connect the PSU power cord and product cables. Place the PSU outside the case and connect it to the pump's 4-pin Molex connector. Turn on and off the PSU several times to cycle the coolant through the loop, ensuring the pump pushes the coolant effectively. It's crucial not to let the pump run dry; if no liquid enters the pump, power should be turned off immediately. The reservoir should be filled to the top to prevent air from entering the pump. Tilting the system slightly can help bleed air out of the loop. Paper towels should be placed under fittings to check for leaks. The loop should run with the fill port open for about 24 hours to completely bleed air.
The kit features Addressable RGB (ARGB) lighting for aesthetic customization. The ARGB controller connects to the fans and then to the SATA power connector. This controller allows users to switch between various LED modes (Wave, Full light, RGB Spectrum, Off, Flow, Ripple, Pulse, Blink) and adjust colors (Red, Yellow, Green, Teal, Blue, White, Purple, Rainbow). For modes like Full Lighted, Pulse, and Blink, users can choose from 8 LED colors. For Ripple mode, 7 LED colors are available. In RGB Spectrum mode, users can memorize and lock a desired color or allow for 256-color auto-rotation. Light speed can also be adjusted (Slow, Normal, Fast, Extreme).
For users who prefer to synchronize their lighting with their motherboard's software, the kit supports various motherboard ARGB headers, including ASUS Aura Addressable Strip Header(s), MSI JRGB-strip Header(S), ASROCK Addressable RGB LED Header(s), and GIGABYTE AORUS RGB Fusion with Digital LEDs. A Motherboard Signal Bridge Cable connects the fan LED cable to the motherboard header. A crucial caution is provided: always power off the PC and check the positive and negative ends of the connector before connecting to the motherboard, as incorrect connection can damage the LEDs.
The Thermaltake C240 DDC Soft Tube Liquid Cooling Kit emphasizes preventive measures to ensure longevity and optimal performance.
As mentioned, flushing and rinsing the radiator and water blocks with distilled water before initial use is a critical maintenance step. This prevents debris from entering the loop and potentially clogging components or reducing efficiency.
The detailed instructions for securing fittings and ensuring tight tubing connections are fundamental to preventing leaks. The recommendation to place paper towels under fittings during the initial run helps identify any potential leaks early, allowing for immediate corrective action.
The strong recommendation to use a proven pre-mix coolant like Thermaltake Coolant 1000 is a key maintenance feature. Such coolants are formulated to prevent corrosion within the entire cooling system, protecting components made of copper, brass, nickel, aluminum, and steel. Regular monitoring of coolant levels and quality is implied for long-term system health.
The 24-hour run with the fill port open is a crucial step for completely bleeding air out of the loop. This ensures that the pump operates efficiently without air pockets, which can reduce cooling performance and potentially damage the pump.
In the event of a leak, the guide instructs users to immediately turn off the power and clean the leak. If electronic parts are stained with liquid coolant, they must be thoroughly cleaned and dried before resuming operation. This proactive approach helps prevent damage to other system components.
Overall, the Thermaltake C240 DDC Soft Tube Liquid Cooling Kit provides a robust and customizable cooling solution with clear guidance for installation, operation, and maintenance, making it accessible for users to achieve high-performance thermal management for their CPUs.
| Radiator Size | 240mm |
|---|---|
| Fan Size | 120mm |
| Radiator Material | Aluminum |
| Tube Length | 400 mm |
| Tube Material | Rubber |
| Fan Dimensions | 120 x 120 x 25 mm |
| Fan Airflow | 56.45 CFM |
| Fan Connector | 4-Pin PWM |
| Water Block Material | Copper |
| Type | Liquid Cooler |
| Compatibility | AMD AM4/AM3+/AM3/AM2+/AM2/FM2/FM1 |
| Fan Speed | 500 - 1500 RPM |
| Fan Noise Level | 25.8 dBA |
| Pump Rated Voltage | 12V |
| Socket Compatibility | LGA 2066/2011-3/2011/1156/1155/1151/1150/AM4/AM3+/AM3/AM2+/AM2/FM2/FM1 |