13Preventive Maintenance Kit 2270105
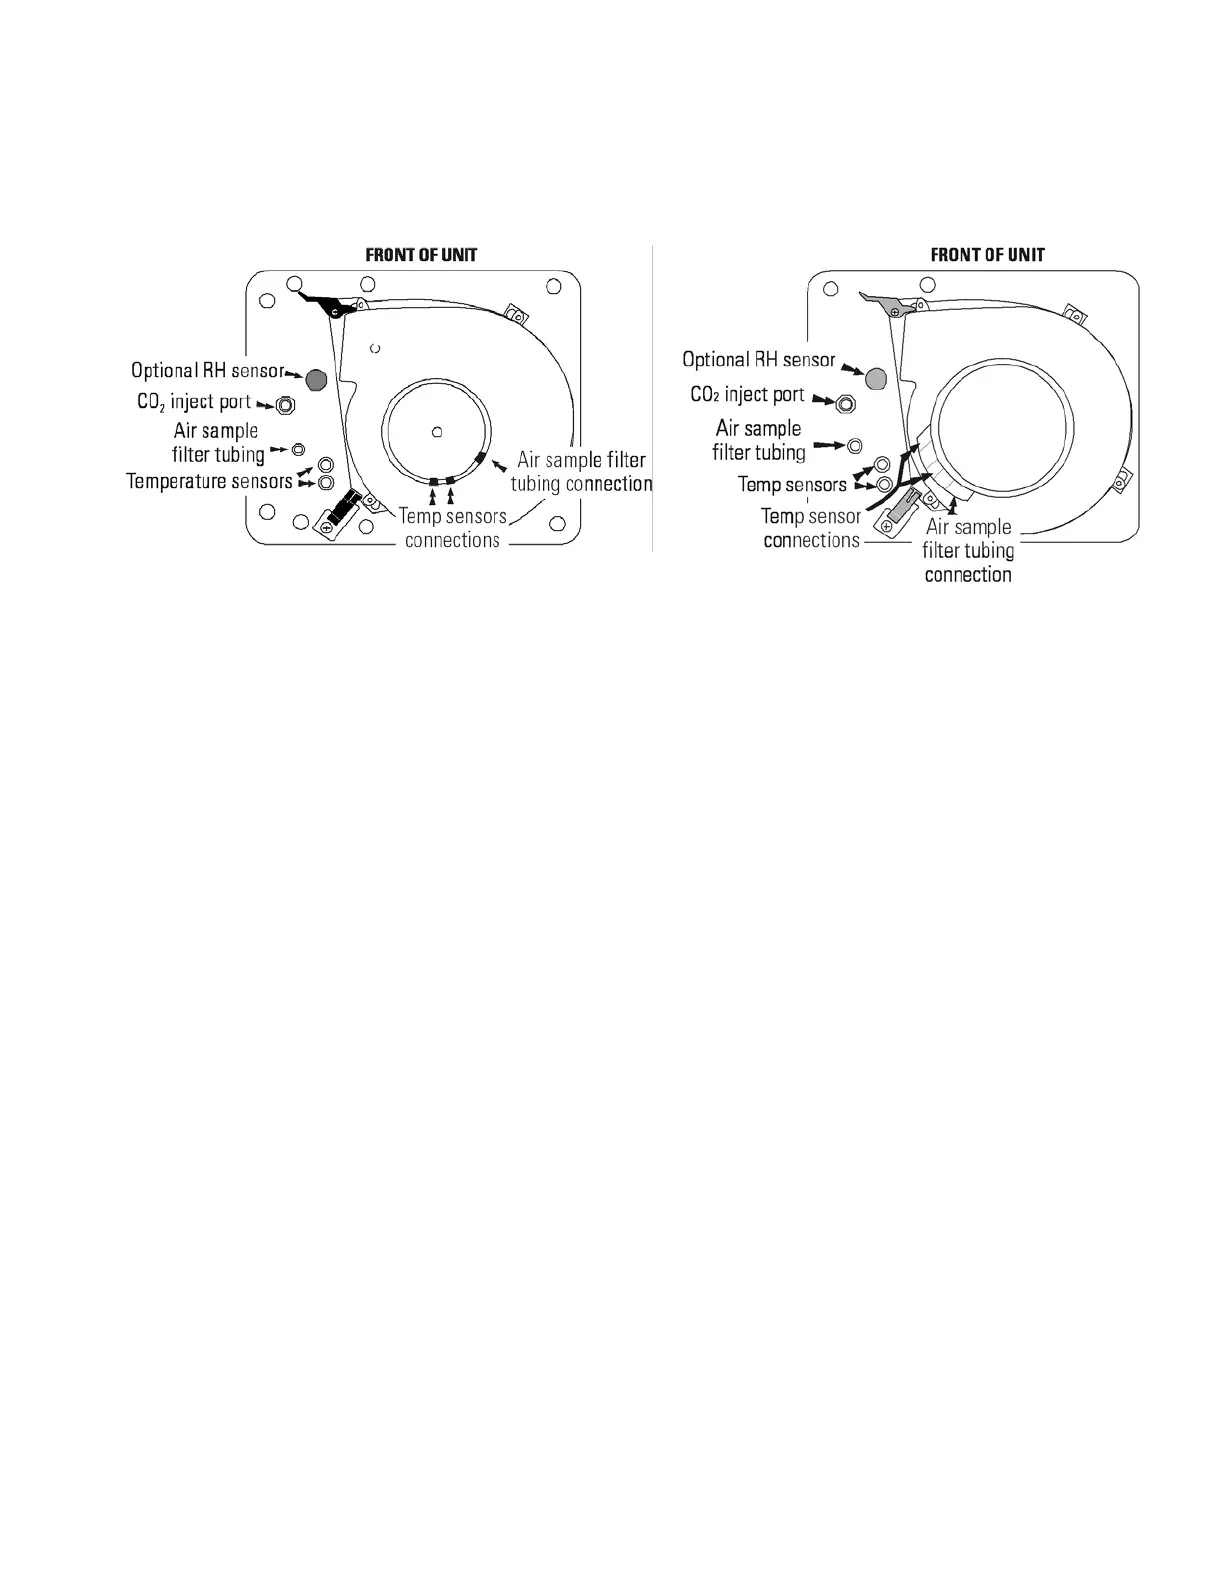
23. Carefully pull the temperature sensors down until they can be inserted
approximately 1 inch into the appropriate holes in the back of the
blower scroll. See Figure 15.
24. Connect the new air sample filter to the tubing that extends through
the top duct. Insert the free end of the tubing approximately 1 inch
into the appropriate hole in the back of the blower scroll. See Figures
10 and 15.
25. If applicable, place the optional RH sensor into the corresponding clip
on the top duct. See Figure 14.
26. Install the new access port filter assembly (Figure 9).
27. Install the shelves and side duct sheets.
28. Install the new HEPA filter.
29. Plug the incubator in and turn the power switch on. Allow the
incubator to run empty for 24 hours and return to service.
To clear the REPLACE HEPA message from the display and reset the
timer after replacing the HEPA filter with a new one, follow the steps
below.
1. Press the Mode key until the Config indicator lights.
2. Press the right arrow until NEW HEPA is displayed in the message
center.
3. Press Enter to restart the timer and clear the REPLACE HEPA alarm.
4. Press the Mode key to return to Run Mode.
Installation - Release 5,
Series II (continued)
Figure 15. Two Scroll Configurations
Clear REPLACE HEPA
Message
 Loading...