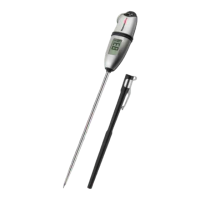
ºF/ºC/
1
2 2
1
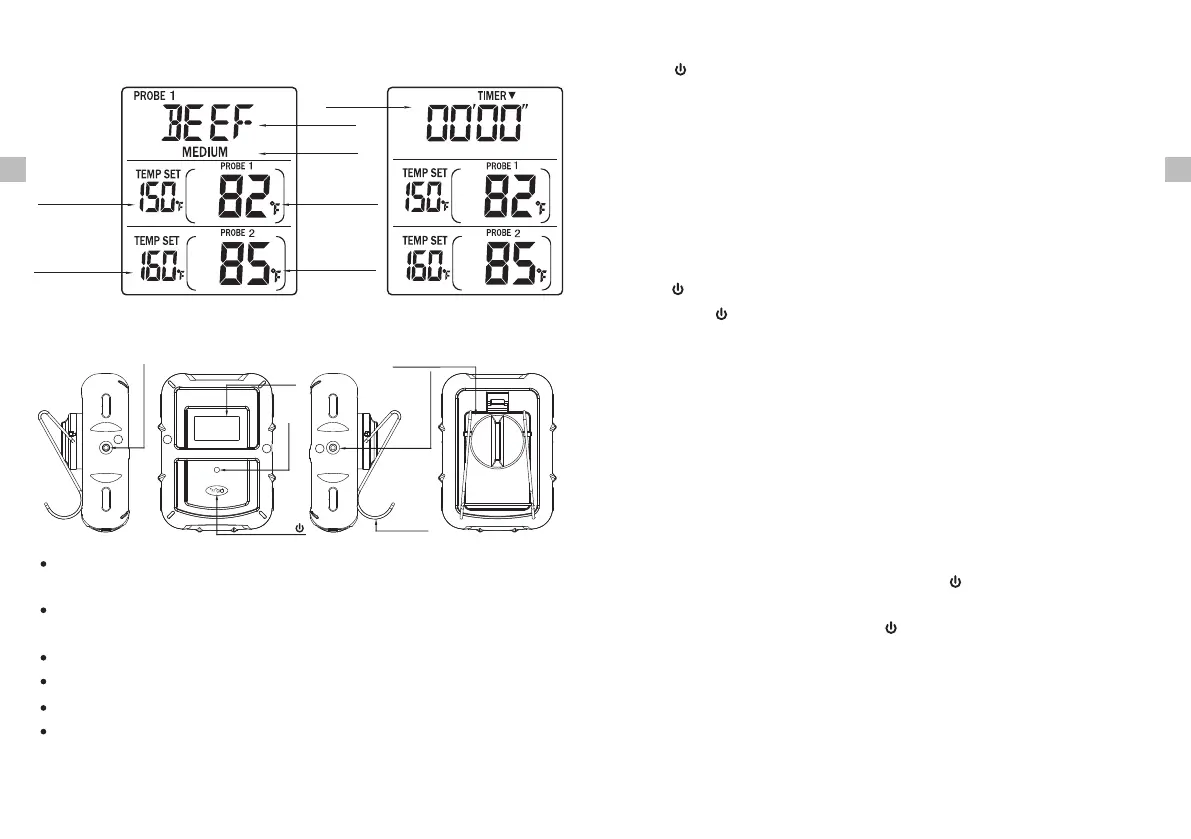
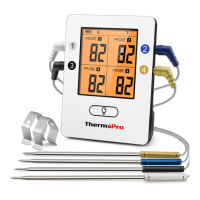
Sensor socket hole
LCD
TX LED
Battery Compartment
Sensor socket
hole
WIRE STAND
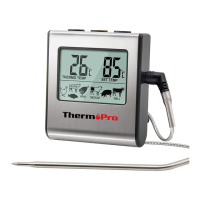
LCD Screen
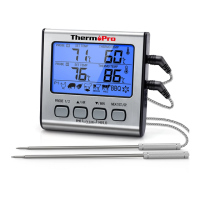
Transmitter Features
LCD (Liquid Crystal Display) – displays temperatures of both probe 1 and
probe 2. It will automatically switch between probe 1 and probe 2 displays.
Wire Stand – Allows you to stand the transmitter on tabletop or it can be
reversed and used as a hanger.
Battery Compartment – holds 2 AAA batteries.
Sensor socket hole – Plug-in for stainless steel probe 1 and probe 2.
ºF/ºC/ – Press once to turn on or off the transmitter. Press and hold for 2
seconds to select the transmitter temperature display in ºC or ºF.
Button
Thermometer mode Timer mode
Probe 1 Temp
Setting
Probe 2 Temp
Setting
Timer
Meat type
Taste level
Probe 1 Temp
Reading
Probe 2 Temp
Reading
Installing batteries
Open the battery compartment of the receiver and insert two “AAA”batteries with
correct polarity. Open the battery compartment of the transmitter and insert two
“AAA” batteries with correct polarity.
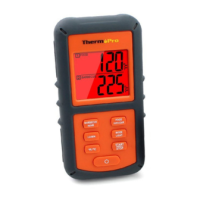
Turn On/Off Unit
Press button on the receiver to turn on/off the receiver;
Press ºF/ºC button on the transmitter to turn on/off the transmitter./
Synchronize/Pair Transmitter and Receiver
The transmitter and receiver were already paired at our manufacturing facility.
Usually you do NOT need to re-synchronize or re-pair the units. You just plug in
the probes, insert batteries, turn on the receiver and the transmitter and wait for
a few seconds, you will see the temperatures shown on both receiver and
transmitter and the units are ready for use.
However, in some unusual cases, the transmitter and receiver are no longer
paired, then you may need to re-synchronize them by following the below steps:
a. Insert the stainless steel probes into the corresponding plugs in the transmitter.
b. Turn on the transmitter by pressing the ºF/ºC button. The transmitter will
show the current temperatures on its LCD display.
/
c. Turn on the receiver by pressing the button.
d. Press and hold Mode button on receiver for 2~3 seconds to enter the
synchronization mode which will last for 60 seconds. The display shows “---”
and it is flashing.
e. Wait for a moment until the temperature reading shows on the receiver display,
it means the synchronization/Pairing is complete. Your professional remote
cooking thermometer is now ready for use.
ENEN
Transmission frequency: 433 Mhz.
Maximum transmit power: 8 mW.
-5--4-