1
Safety Information
Getting Started
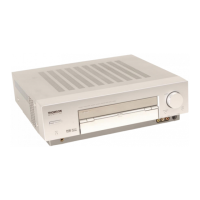
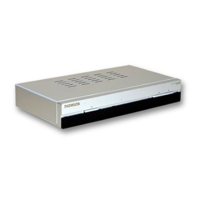
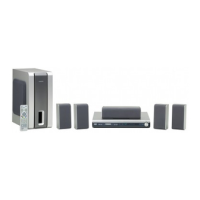
Unpacking the DVD Receiver . . . . . . . . .2
Unpacking the Speakers . . . . . . . . . . . . .2
Inserting Batteries into Remote Control .3
Set Up and Maintenance of the
Receiver . . . . . . . . . . . . . . . . . . . . . . . . . .3
Protect your Components from
Overheating . . . . . . . . . . . . . . . . . . . . . . .3
Disc Information . . . . . . . . . . . . . . . . . . .3
Connecting to Audio-Visual
Components . . . . . . . . . . . . . . . . . . . . . .4
Connecting Antennas . . . . . . . . . . . . . . .5
Connecting the Speakers . . . . . . . . . . . . .6
Positioning your Speaker . . . . . . . . . . . . .7
Front Speaker Placement . . . . . . . . . . . . .7
Advanced Setting . . . . . . . . . . . . . . . . . .7
Preferred Surround Placement . . . . . . . .8
Advanced Setting . . . . . . . . . . . . . . . . . .8
Test Tone / Channel Balance . . . . . . . . . .9
Factory Setting . . . . . . . . . . . . . . . . . . . . .9
Operating your Receiver
Receiver Controls . . . . . . . . . . . . . . . . . .10
Remote Control . . . . . . . . . . . . . . . . . . .11
Display . . . . . . . . . . . . . . . . . . . . . . . . . .12
Switching On/Off . . . . . . . . . . . . . . . . . .13
Selection of Audio Source . . . . . . . . . . .13
Connection of Audio Source . . . . . . . . .14
Advanced Sound Contr
ol
Sound Enhancement Systems . . . . . . . .15
Fine Setting of Components . . . . . . . . .16
Fine Setting of the Speakers . . . . . . . . .17
Speaker icons . . . . . . . . . . . . . . . . . . . . .18
DVD Player
Basic Playback Features . . . . . . . . . . . . .19
Quick Search . . . . . . . . . . . . . . . . . . . . .19
Time Search . . . . . . . . . . . . . . . . . . . . . .19
Freeze Frame and Frame Advance . . . .19
Slow Motion Playback (DVD only) . . . . .20
On-Screen Banner Display . . . . . . . .20-24
Setup Menu . . . . . . . . . . . . . . . . . . . . . .25
CD / mp3 Player
mp3 Recommendations . . . . . . . . . . . . .30
Loading and Playing an Audio CD . . . .30
Quick Scan . . . . . . . . . . . . . . . . . . . . . .31
On-Screen Banner Display for CD
Playback . . . . . . . . . . . . . . . . . . . . . .32-34
On-Screen Display for mp3 playback
. . . . . . . . . . . . . . . . . . . . . . . . . . . . .35-36
JPEG CD
On-Screen Display for JPEG CD . . . . . . .37
DivX
On-Screen Display for DivX . . . . . . . . . .38
To rent (purchase) DivX VOD files . . . . . .39
Radio
Operating the Radio . . . . . . . . . . . . .40-41
Troubleshooting Tips . . . . . . . .42-43
Care and Maintenance . . . . . . . . .44
EN
Table of Content
Safety Information
Thomson Information
CAUTION!
Invisible laser radiation when open. Avoid exposure to
beam. Class 1 laser product. This system must be opened
only by qualified technicians to prevent accidents caused
by the laser beam.
LASER λ = 780 nm, P max = 5 mW
Rating Information: At bottom of the unit
this unit comply with the existing requirements
In accordance with the rating plate of the
unit, this unit complies with current
standards concerning electrical safety and
electromagnetic compatibility.
Please respect the environment Before
throwing any batteries away, consult your
distributor who may be able to take them
back for specific recycling.
Have a Blast- Just Not in Your Eardrums
Make sure you turn down the volume on
the unit before you put on headphones.
Increase the volume to the desired level
only after headphone are in place.
For UK Only
CONNECT THE MAIN LEAD INTO AC MAINS POWER
SOCKET
POWER SUPPLY 230V. It must not be connected to D.C.
mains.
Note; The mains lead of the set is fitted with a molded
plug. If the mains socket are not compatible or if for any
reason the plug is removed please follow the directions
below. The molded plug cannot be rewired and if
removed must be disposed of safely.
DO NOT under any circumstances plug the severed plug
into any mains socket as this could result in electric shock.
Important: If the plug is removed, rewire the new plug
as follow:
The wires in the mains plug are coloured in accordance
to the following code:
BLUE = NEUTRAL/BROWN = LIVE
If the colours of the wires in the mains lead of this
apparatus may not correspond with the coloured
markings identifying the terminals in your plug, proceed
as follows:
BLUE wire to the terminal coded N (Neutral) or coloured
black.
BROWN wire to the terminal coded L (Live) or coloured
red.
DO NOT
make any connection to the
terminal in the plug which is marked by
the letter E or by the earth symbol or
coloured green or green and yellow.
A fused plug must be fitted with a 13A fuse approved by
ASTA or BS1362 and fuse covers must be always be
securely replaced. If you set does not work, the fuse may
be blown.