4
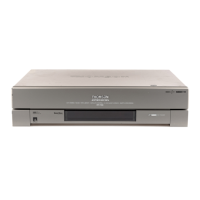
Set-up
1 Switch on the television.
2 Press key VCR (1) on your remote control.
3 Switch on your video recorder, making use either of the remote control key
B (3) or of
the appropriate key (ON) on the video recorder front side.
ð When switching on the video recorder for the first time, a language selection menu
comes up. Should it not appear, press key MENU (15).
4 With key
CC
(13) or
BB
(11) select the language you prefer to display the menus in on
the screen.
5 Validate your choice with the OK (10) key.
ð The
COUNTRY menu comes up.
6 Press key
CC
(13) or
BB
(11) to select the country where you usually live.
7 Validate with the OK (10) key.
J
Your video recorder comes with the NexTView Link feature. This function simplifies the channel
set-up procedure, as the channels already set up on a TV set fitted with the NexTView Link or
similar feature (Easy Link, Smart Link, Megalogic, etc.) can be downloaded to the video
recorder. The channels downloaded this way to the video recorder preserve the same properties
as on your TV set (same number, same name, etc.).
ð If your TV set is fitted with the NextView Link function or similar, the video
recorder automatically initiates channel download once you have selected the
country. You can view channel download on the video recorder display (Pr1, Pr2,
Pr3…). On completion of download, the video recorder switches over to standby.
Channel set-up is achieved.
ð When your television set is not fitted with the NextView Link or any similar feature,
a message tells you that your video recorder is searching and storing the channels
you can receive in your region. Keep patient until a message informs you that your
channels are stored.
8 Press key
BB
(11) to sort your channels.
ð The
ORGANISER menu comes up.
Automatic channel search
J
The automatic channel set-up assigns the numbers to the channels in a predefined order. These
numbers may therefore not match the actual channel numbers. Should this be the case, change
these numbers by carrying out the instructions below. For easy channel identification, we suggest
that you have a TV magazine at hand.
9a If the proposed channel number matches the displayed picture, press
BB
(11) to pass on
to the next channel.
9b If the proposed channel number does not correspond to the picture that you see, select
the Swap with Pr. line with key
WW
(12).
Sorting the channels
When the picture of a channel is of poor quality or encoded, try out the fine tuning feature.
Refer to page 5 (section New or encoded channel, step 9).
L
Initial Set-up
J
If you have not connected the television set to the video recorder with the SCART cable, you must
first make the modulator and then the television settings (refer to page 6) before you start the
automatic channel set-up. The video recorder was not pre-set to receive the channels of your
region. Thus, you'll have to set them up yourself, by carrying out the automatic channel set-up
procedure described below. Your video recorder will automatically perform channel search and
store each of the channels found with its own channel number.
r9_2EN01 25/01/00 10:35 Page 4