Compact Stabilized Light Sources Chapter 4: Operation
Rev F, October 14, 2021 Page 13
4.9. Bulb Module Replacement
Warning
Always power off the unit before opening the housing.
Warning
The bulb surface temperature may reach a few hundred °C during operation.
Always wait at least 10 minutes after turning off the lamp for cool down before
performing a bulb module replacement.
Caution
Wear protective gloves when handling the bulb module. Moisture and grease
from hands left on the bulb may shorten the bulb lifetime.
Warning
The electronics inside a light source are ESD sensitive. When performing a bulb
module replacement, always wear ESD protection to avoid damaging the light
source.
Thorlabs offers pre-aligned bulb replacement modules for SLS201L and SLS202L
light source. The replacement modules are available on www.thorlabs.com under
the SLS251 and SLS252 item numbers, respectively.
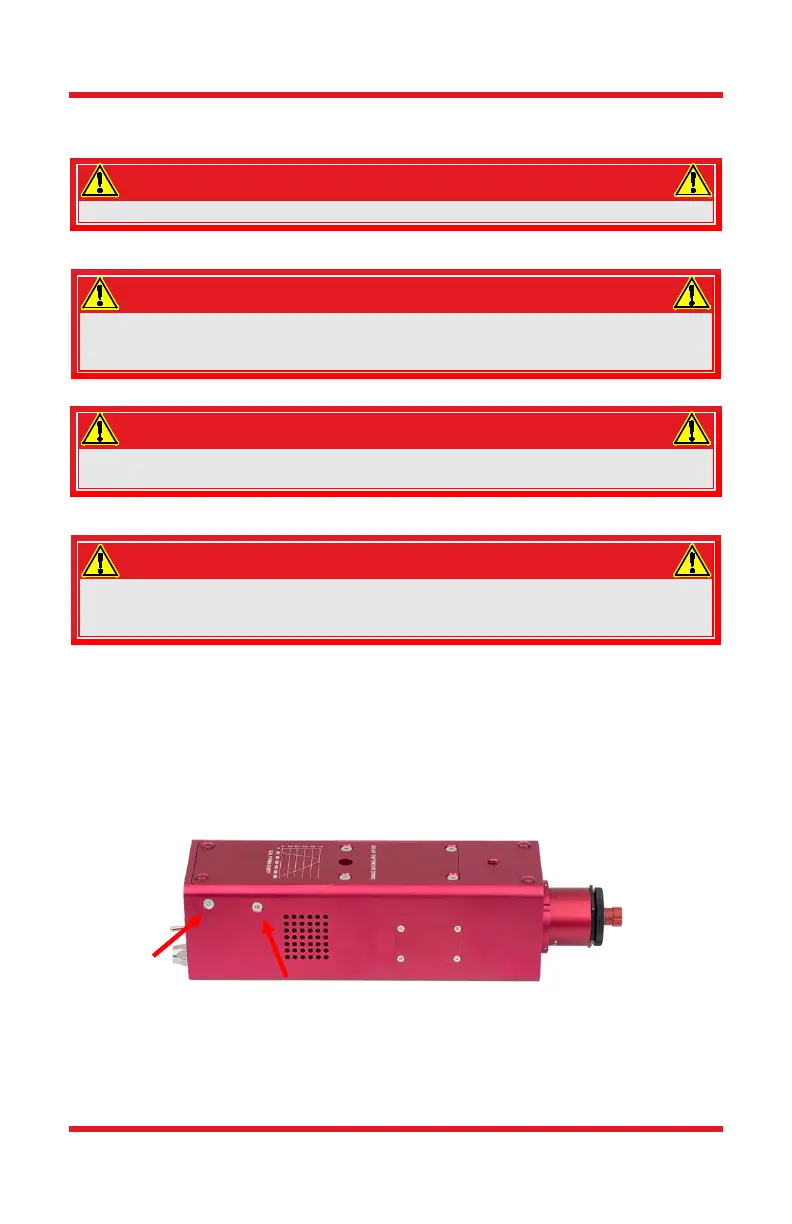
To replace the bulb module, place the light source upside down to reveal the
underside of the unit. Using the included 5/64" (2 mm) hex key, remove the screw
closest to the end of the unit from both the left and right sides. DO NOT remove
the screws closest to the fan ventilation holes.
Figure 14 Remove the two screws at the rear of the light source.
Using the same 2 mm hex key, remove the four screws holding on the cavity cover.
(Both
Sides)