12
This document is the property of THRILL INTERNATIONAL and may not be reproduced without the company’s prior consent.
5. INSTALLATION
NOTE
On rst use, there may be tiny scraps of debris remaining on the product from the packaging
material; the product may also emit an odour. To ensure the machine is clean and ready to use,
rst run the machine on an empty cycle.
The appliance is delivered in sturdy cardboard packaging; gently remove the individual parts
from the box and lay them out on a at surface. Check that the contents are complete and that
all the following items are included:
1) Glassware sanitizing machine
2) Battery charger
3) Power adapter
4) Instruction Manual
5) Statement of Compliance with EU directives.
In the event that one or more parts is missing, please contact the distributor or product
manufacturer.
Thrill International sells 2 types of cylinder made to specications that ensure optimum
operation of its appliances:
1) The 4 kg cylinder for sanitizing and chilling approximately 150 glasses;
2) The 10 kg cylinder for sanitizing and chilling approximately 400 glasses.
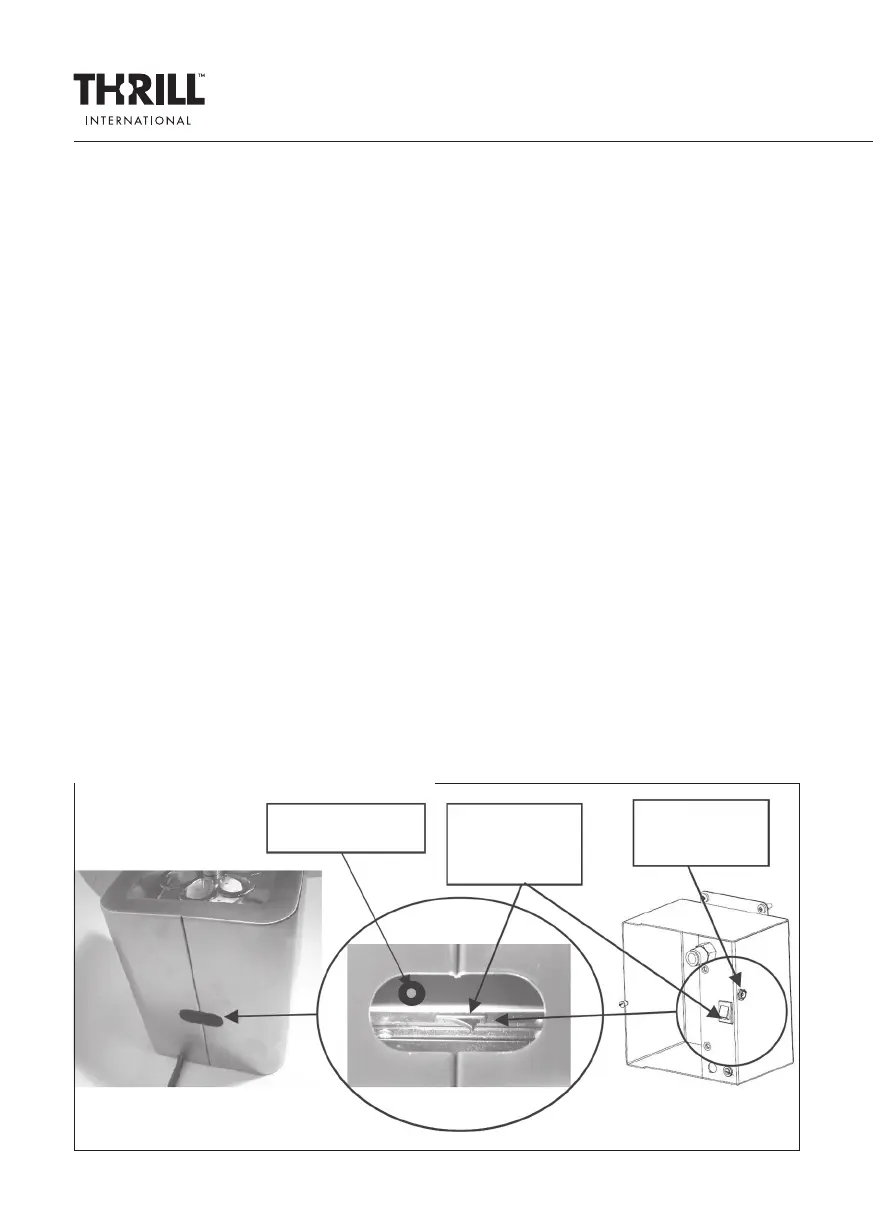
5.1. SET-UP INSTRUCTIONS
Before use, it is necessary to recharge the battery supplied with the appliance. To do this, simply
connect the power cable to the power charger and the low voltage cable to the connection
socket of the sanitizing machine, which is positioned next to the on/o switch, as illustrated in
the diagrams below.
Battery charger
connection
Sanitizing
machine
On/o switch
Battery charger
connection
Recharger connection for Thrill Vortex F1 Pro model