20 ST PLUS ENGLISH
ENGLISH ST PLUS 20
TPM (Option)
Before setting up the TPM (Trusted Platform
Module) functions you must initialize the
security platform.
Activating TPM
1. Restart the computer.
2. Enter the Aptio Setup Utility pressing F2
during the POST.
3. Use the arrow keys to select the Security
menu.
4. Select TPM Configuration and press Enter.
5. Press Enter to access the Security Device
Support menu and select Enable.
6. You will then need to press F4 to save the
changes and restart the computer.
TPM Management in Windows
You can manage your TPM settings from within
Windows:
1. Go to the Control Panel.
2. Click BitLocker Drive Encryption (System
and Security).
3. Click TPM Administration.
4. The TPM Management window allows you to
configure the TPM within Windows. As TPM
is usually administered within large
enterprises and organizations, your system
administrator will need to assist you in
managing the information here.
TPM Actions
1. Click Prepare the TPM and follow the
instructions in the Wizard to prepare
the TPM (this will probably require a restart
of the computer and confirmation of the
setting changes after restart by pressing the
appropriate F key).
2. After the restart the TPM will be prepared and
you can then use the Actions menu to Turn
TPM off, Change Owner Password,
Clear TPM or Reset TPM Lockout.
3. A wizard will help take you through any setup
steps.
3G/4G Module (Option)
(Optional for Models A & B Only)
If you have included an optional 3G/4G module in your purchase option, follow the instructions
below to install the USIM card (which will be provided by your service provider).
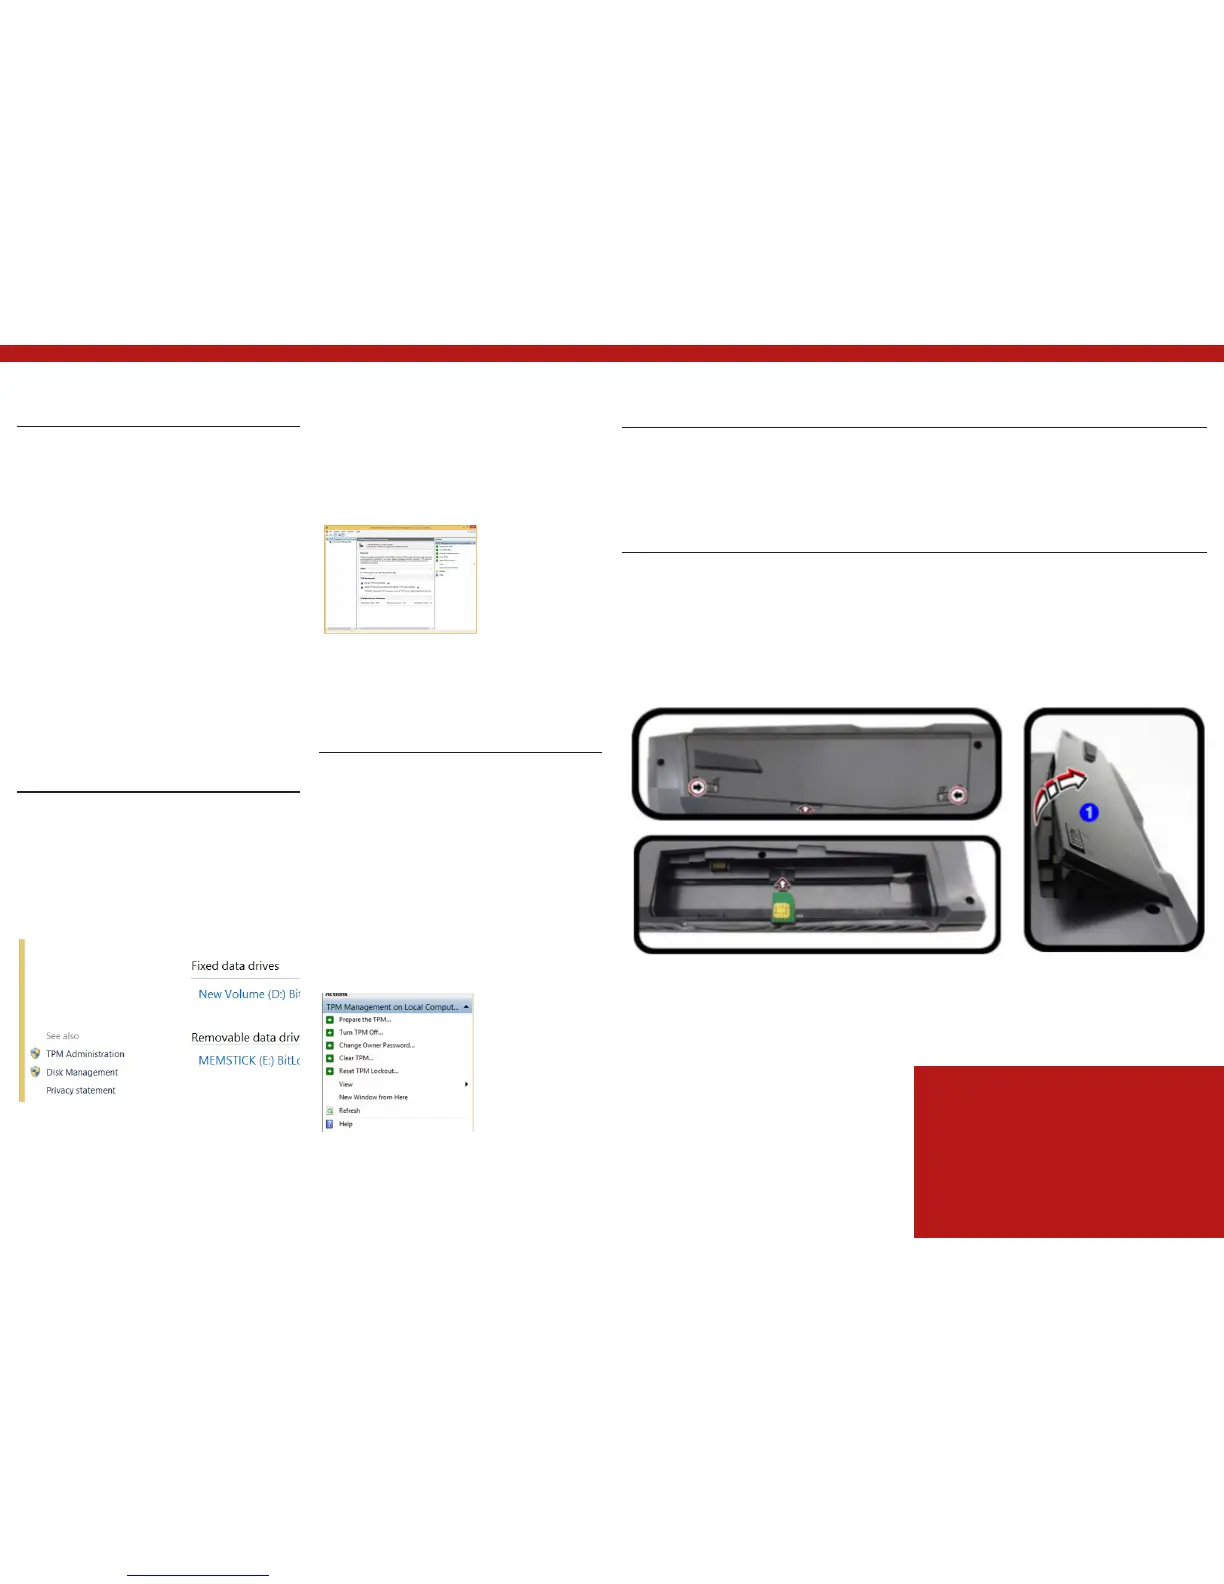
USIM Card Insertion
1. Turn off the computer, and turn it over and remove the battery 1 (slide the latches in the
direction indicated below and slide the battery out).
2. Insert the USIM card as illustrated below until it clicks into position, and replace the battery.
Figure 29 - Trusted Platform Module
(TPM) Manage- ment on Local Computer
Administration
Figure 28 -BitLocker Drive Encryption (TPM
Administration) Administration
Figure 30 - Actions Menu
Figure 31 - Remove the battery and Insert the USIM Card
USIM Card Orientation
Note that the USIM card’s read- able side (with the
gold-colored contacts) should face upwardsas illus-
trated.