11
Determine whether the installation is to be a right
orlefthandinstallation.Theexchainisfactory
conguredforarighthandinstallation.Forlefthand
installationstheexchainmustberemountedon
the mounting bracket.
Measurethefulllengthoftrack.Theexchainmust
be shortened to the same length. Chain links can
be removed by snapping links apart. Reinstall the
end mounting link to chain. When reinstalling the
end mounting link route the wire as shown.
Notethepowerwirecomesthroughttheex-
chain and exits before the last link. The wire is
then on the top of the last link
Chain Mounting Clip
The Chain Mounting Clip
installs here.
Install the chain mounting clip with the two Philips
head screws located at the end of the Flex Chain.
Connect the three wire leads protruding from
the bottom of the chassis’s switch plate to the
corresponding wire leads found at the bracket
mountedendoftheexchain.Eachwireleadhas
a corresponding match paired connector, i.e., it will
onlytwiththecorrectwire.
wires from
exchain
wires from
chassis
face of screws
holding Flex-
Chain to mounting
bracket are
pointing down
towards gear.
These screws hold the mounting
bracket to the chassis.
The chain only bends one way, so make sure that the
loop is heading OUT of the end that will be heading
DOWN.
Determine which end of the chassis will be the "downhill"
end.Whenfolded,thefoldedloopoftheex-chainmust
be toward the "downhill" end of the chassis. Remounting
theex-chaintotheoppositeendofthebracketmay
be required
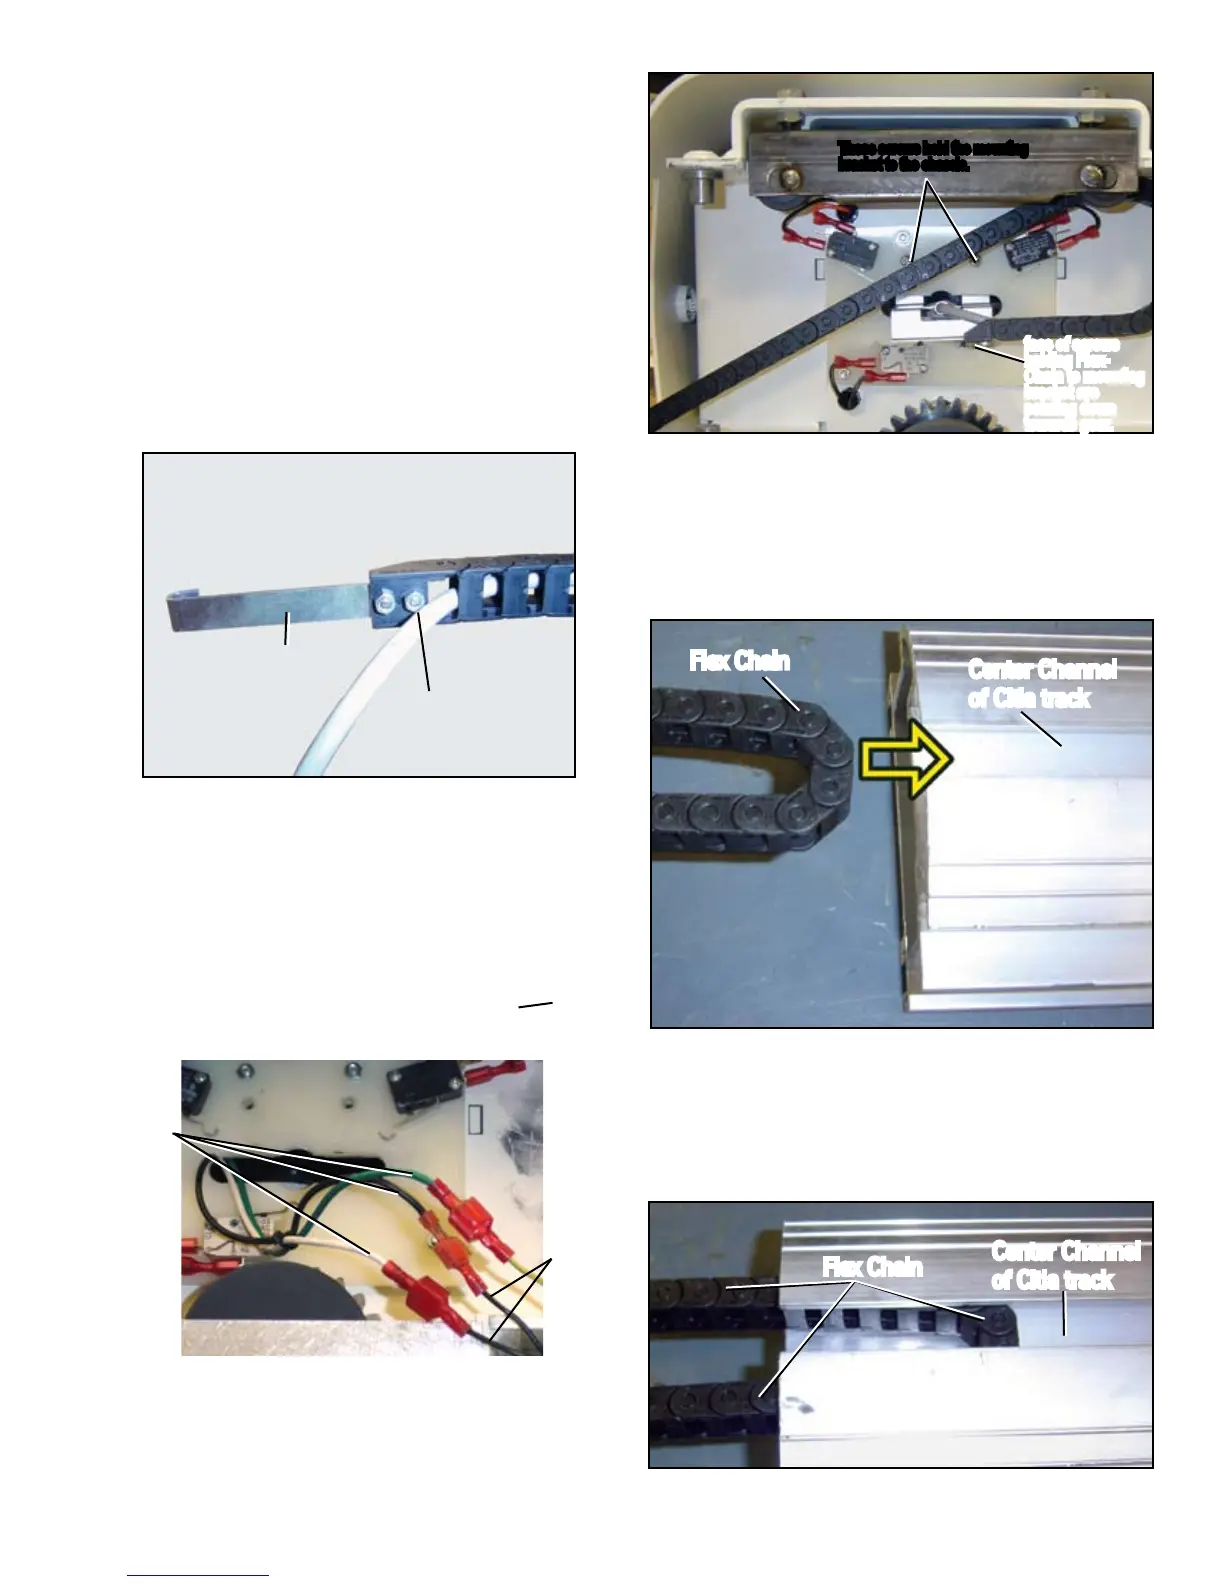
Center Channel
of Citia track
Flex Chain
TheChainwilltlikethis:
Flex Chain
Center Channel
of Citia track
I. INSTALL FLEX CHAIN