5
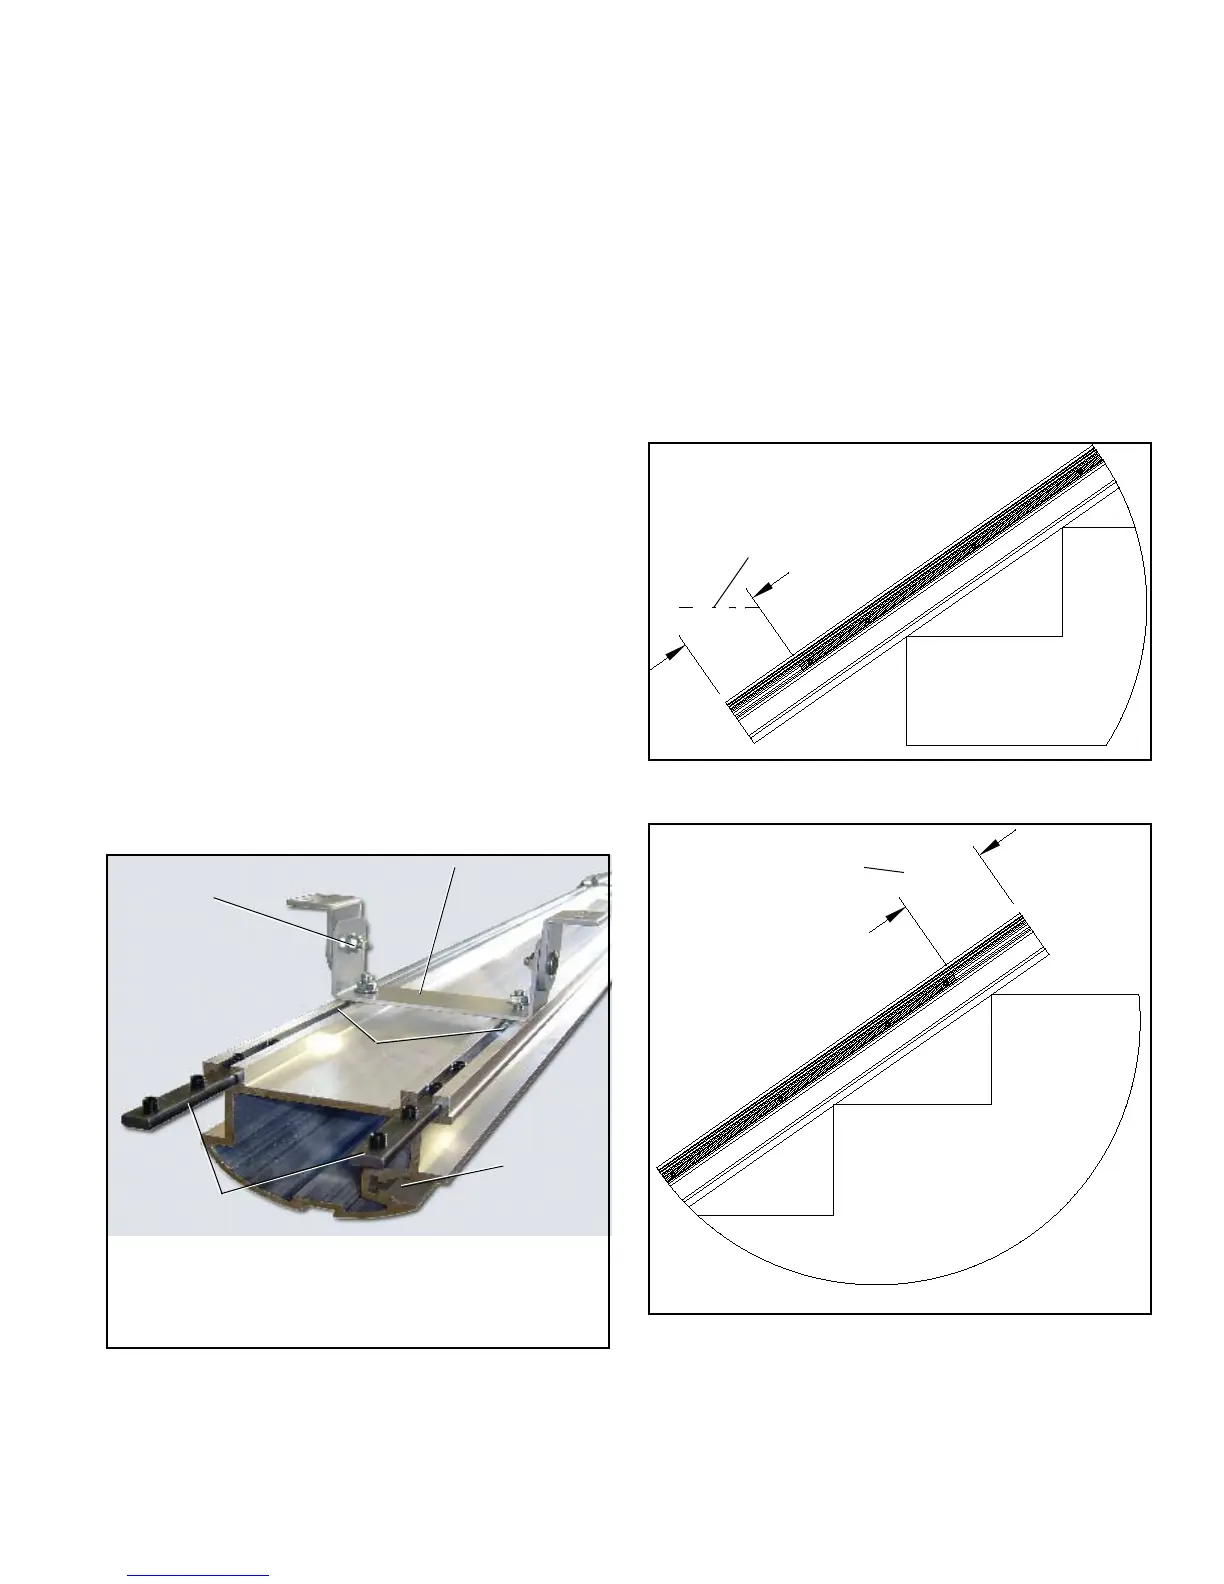
B. INSTALL MOUNTING HARDWARE
Lay out the sections of track on the staircase, with
the back side facing up.
Insert the appropriate number of T-bolts into the
slots on the bottom of the track.
Note: There will be three (3) brackets per each 8’ sec-
tion. This must be done before the splice bars
can be inserted.
Assemble the mounting brackets on the T-bolts as
shown.
Slide the (2) pieces of track together and secure
the splice bars with the set screws. Ensure that a
tight, hairline joint is formed all the way around the
track joint.
Note: Snug the bolts, but do not tighten at this time
as the brackets will need to be adjusted.
Splice bars slide
into track slots
Mounting bracket
T-bolts
Gear Rack fits in
this channel
E. INSTALL SPLICE BARS
5
/
16
-18 x ¾"
cage bolts
C. TIME THE GEAR RACK
Loosen the set screws in the top sections of gear rack
and slide them up until the gear rack in the upper track
sectionis6⅛”fromthetop.
Note:Thereareatotalofvesectionsofgearrackthat
need be slid up. This may cause the gear rack to not
beushwiththeendofthetrack.Thisisacceptable,
thereisatoleranceanywherefromushtowithin
5⅝"frombottomoftrack.Anydistancebetweenthere
isne.Ifyouhavegearrackextendingbeyondthe
track, please cut it off.
5.625"
There is a tolerance of up to
5⅝”betweenthegearrack
and the end of the track.
Anywhere between here is
ne.
The gear rack MUST be
6⅛"fromthetopofthetrack.
Make sure this measurement
is accurate.
6⅛"