Page 12
Installing Impression Rail
™
Express
Open Mid-Rail Stair Panels
Dia. #4
Dia. #3
2
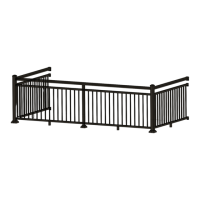
Install Stair Clips On Posts
• After stair panel has been cut to proper size
and angle, place the panel on the 2x4″ (or
hold 11/2″ above stair nosing) board, between
the 3″ posts. Use a #2 sharp pencil to draw a
line across the top of the lower H-channel in
two places (Dia. 3).
• Remove panel and bottom post. Attach stair
panel attach clips at marked location as per
(Dia. 4) and fasten with #8x3/4″ self-drilling
screws.
• NOTE: Rail clip jigs are not used for stair
panel installation.
Temporary
2” x 4” spacer board
With #2 pencil place
mark on post at top of
lower stair extrusion
RAIL CLIP
PENCIL
MARK LINE
CLIP
TOP EDGE
INSTALL
2X #8 X
3/4" SELF-
DRILLING
SCREWS
OUTSIDE
INSTALL
2X #8 X
3/4" SELF-
DRILLING
SCREWS
Dia. #5
Dia. #6
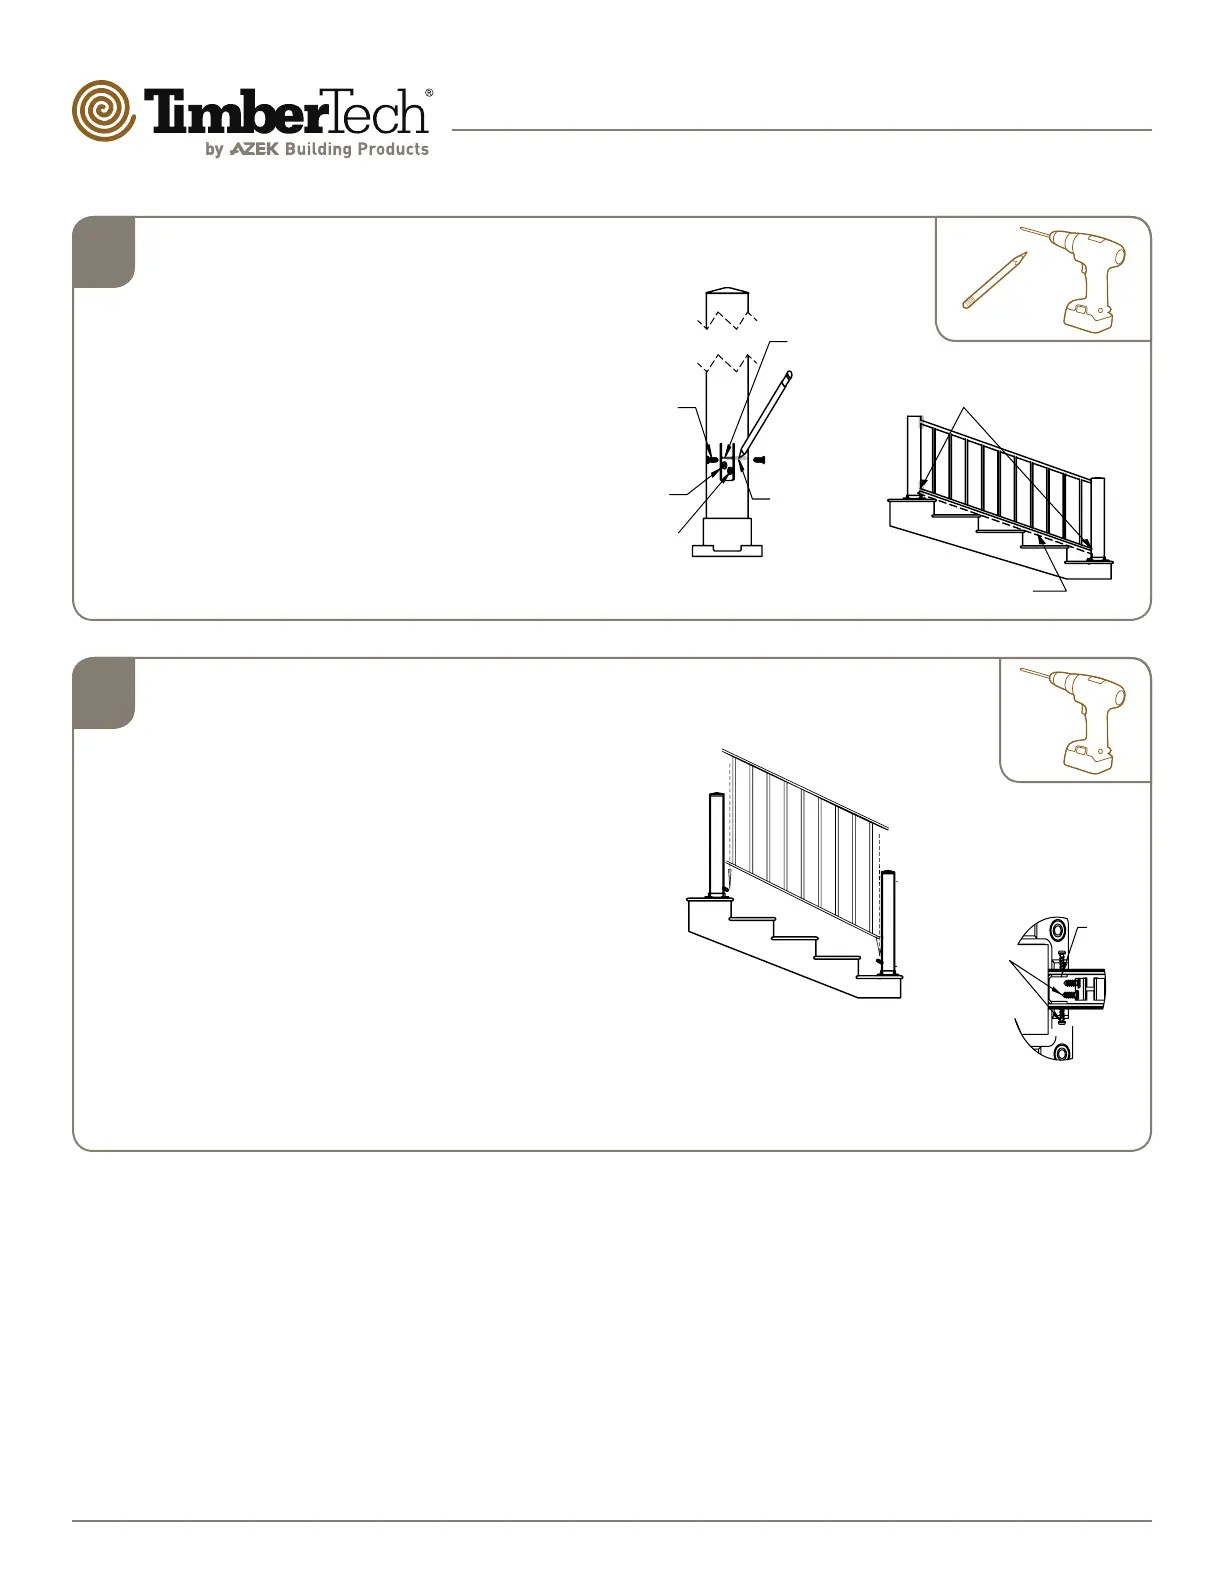
3
Secure Stair Panel To 3” Posts
• Once the stair panel attach clips have been installed,
re-attach the lower 3″ post to the bottom step or
landing. Place the stair panel onto the lower stair panel
attach clips (Dia. 5).
• When lower extrusion is fully seated on lower clips,
insert stair panel attach clips into upper extrusion.
Secure attach clips to post with 2-#8x3/4″ self-drilling
screws, then secure upper extrusion to stair panel
attach clip with 2-#8x3/4″ self-drilling screws. Repeat
this same procedure for bottom post, upper extrusion
(Dia. 6).
• When upper extrusion is secured to attach clips, return
to lower extrusion and secure lower extrusion to lower
stair clips with 2-#8x3/4″ self-drilling Screws at upper
post and 2-#8x3/4″ Self-Drilling Screws at lower post.
Rail clip
4x #8 x 3/4"
Self-Drilling
Screws –
two inside and
two outside