Page 7
Installing Impression Rail
™
Express
Aluminum Posts
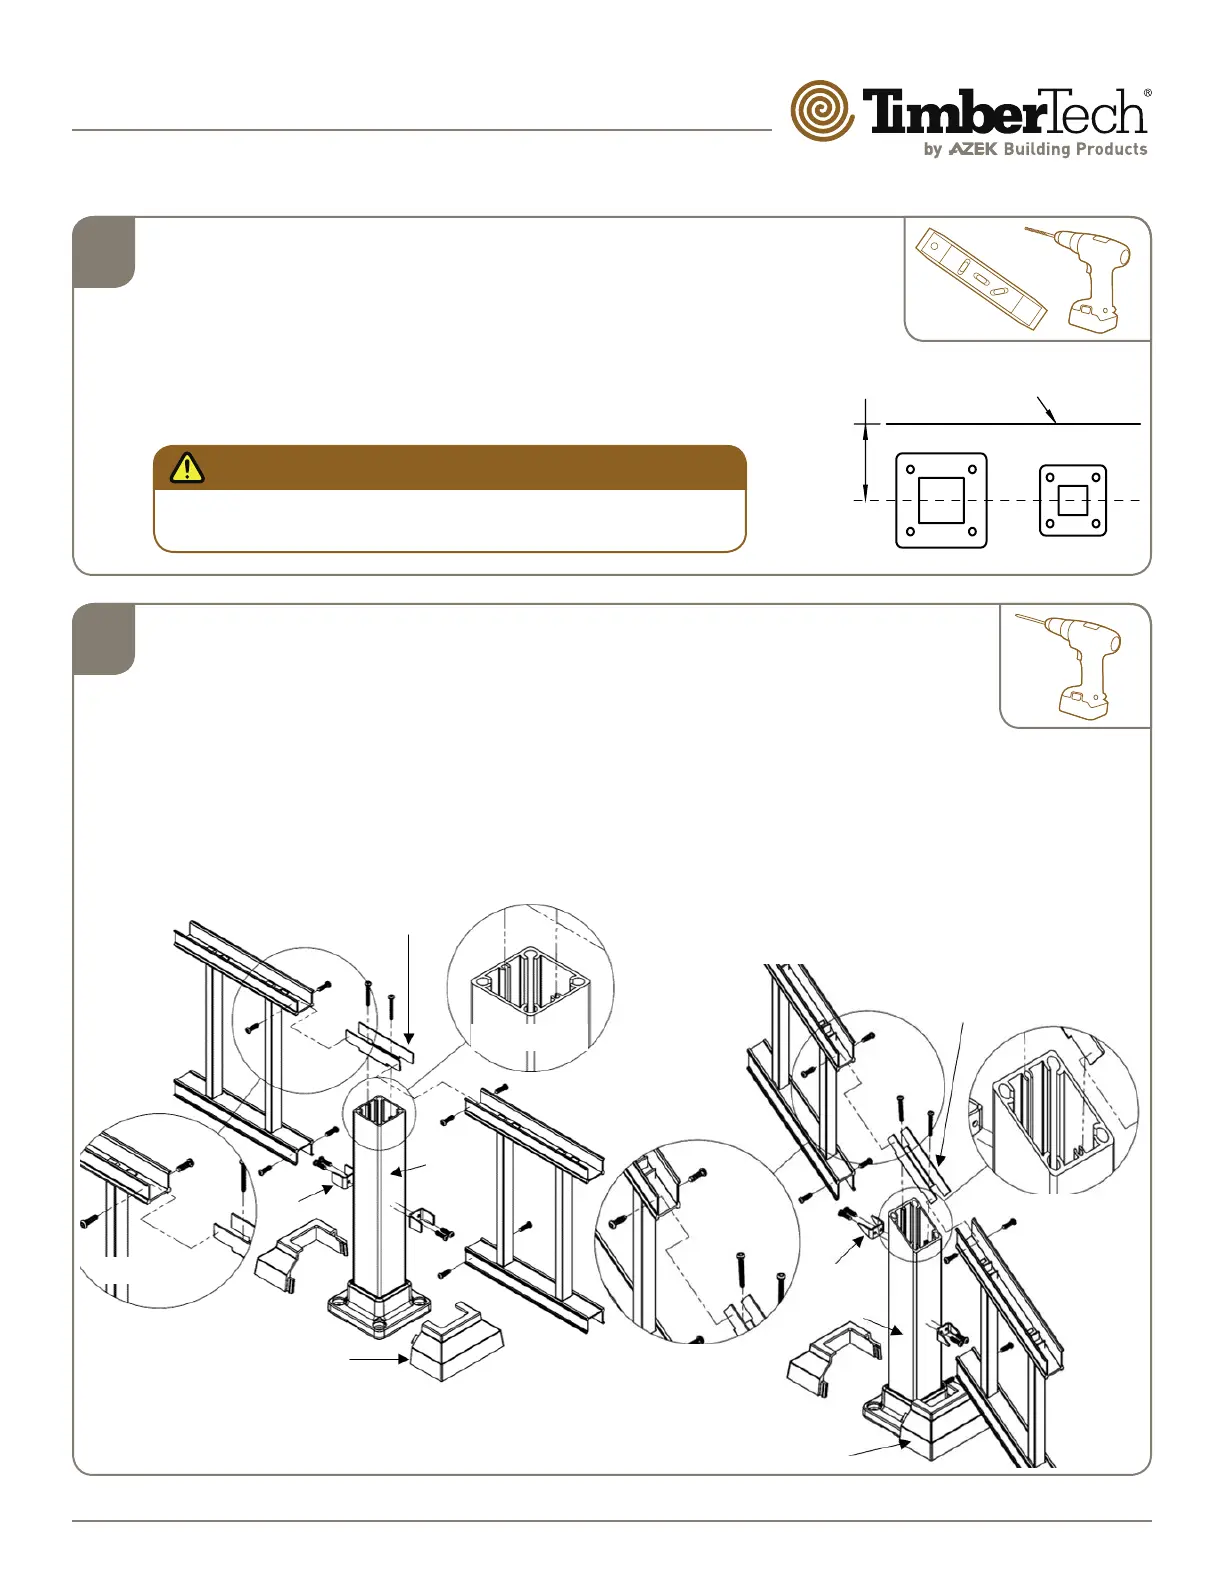
STAIR CROSSOVER
BRACKET
POST BASE PLATE
VINYL COVER
POST
EXTRUSION
CLIP
Dia. #12B
Dia. #12D
Install Crossover Brackets on 2" Posts
• With 6" #2 square drive bit, fasten straight crossover bracket (included) into post with
(2) - #8x1.5" Self-Drilling Screws. (Dia. #12A & #12B)
NOTE: Self-Drilling Screws must be installed in screw chases in-line with panels.
• With 6" #2 square drive bit, fasten H-channel to straight and stair crossover brackets
with (4) - #8x3/4" Self-Drilling Screws. (Dia. #12C & #12D) Repeat for lower clips.
• Install base plate vinyl cover only after railing assembly is completed. (Dia. #4)
8
9
Dia. #11
3" CENTERLINE TYPICAL DECK EDGE
Secure 2" Posts to Deck (center only)
• For continuous top rail systems, install 2" posts centered between
3" end and corner posts.
NOTE: 2" Posts must be installed with center screw chases
in-line with panel (Dia. #11).
• Follow instructions in step 2 (Dia. #3A to Dia. #4).
Important Note:
3" posts are required at all transitions. 2" posts may not be used
to start/end a run or to form a corner.
STRAIGHT CROSSOVER
BRACKET
POST BASE PLATE VINYL COVER
*DO NOT INSTALL UNTIL RAILING
ASSEMBLY IS COMPLETED.
POST
EXTRUSION
CLIP
Dia. #12A
Dia. #12C
LEVEL PANELS
STAIR PANELS