Page 8
Installing Impression Rail
™
Express
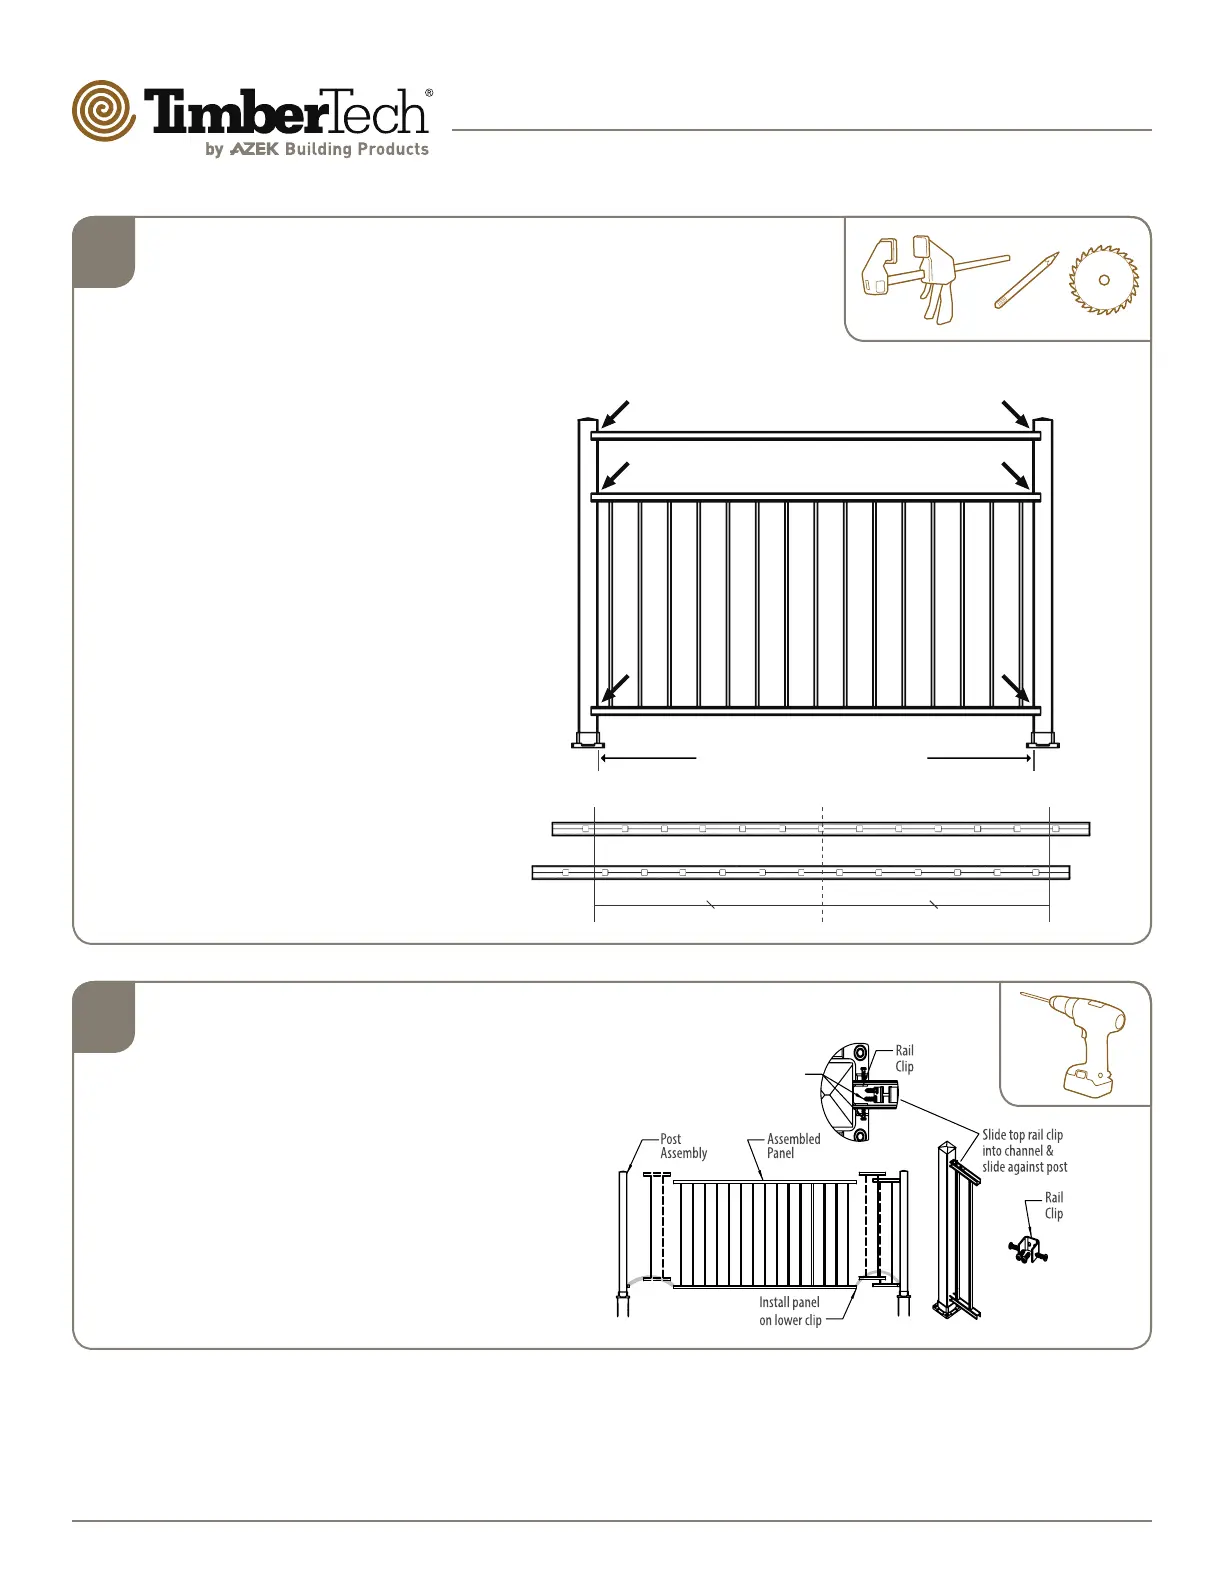
Open Mid-Rail Level Panels
Dia. #1
Dia. #2
Secure Level Panels to Posts
Slide bottom H-channel of pre-cut panel on to
lower clip. (Dia. #2)
• Insert clips into top H-channel of panel on
each end.
• Using (4) - #8x3/4″ self-drilling screws, attach
the upper 2-clips to the post.
• Using (8) - #8x3/4″ self-drilling screws,
secure the upper and lower clips to the panel.
• Tip: Use a 6" drill bit for easier installation of
top attachment clip to post.
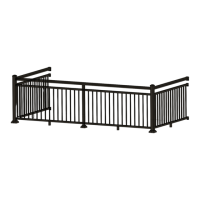
Cut Level Panels and
H-channels
Clamp or hold panel against post,
adjust for equal end spacing. (Dia. #1)
• Determine the desired center of
the rail; either a baluster hole or
between two baluster holes. (Dia.
#2)
• Measuring from the determined
center, cut both ends of the rails.
• Mark the top and bottom rails and
H-channel.
• Cut panel and H-channel 1/16″ less
than opening size.
• Clean cut areas and apply touch-up
paint on exposed ends. Touch-up
paint sold separately.
2
1
Cut rail panel and unpunched H-channel
1/16" less than opening size
Temporarily clamp panel and unpunched
H-channel against posts and mark for cutting.
Dia. #2
Centerline
Even number of balusters
Install Self-Drilling Screws,
2x #8 x 3/4" Outside,
2x #8 x 3/4" Inside